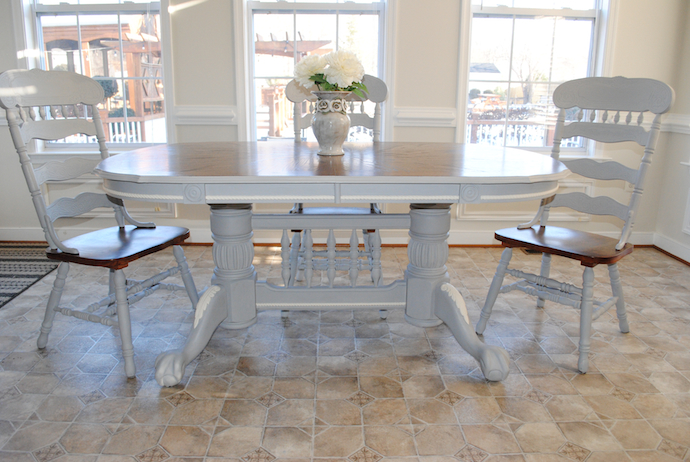

-
Sanding table top and chair seats
-
Staining table top and chair seats
-
Matte Poly table top and chair seats (2 coats)
-
Chalk Paint (Annie Solan Paris Grey) table and chairs (2 coats)
-
Chalk Paint (Annie Solan Old White) table accents (2 coats)
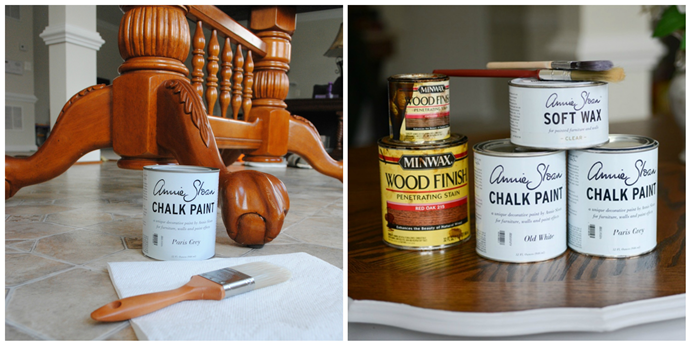
What I used:
- Orbit Sander
- For orbirtal sander I started with 120-Grit
Sandpaper then did a overpass with 220 Grit
Sandpaper
- Sanding Sponge 120-Grit, Fine
for around the chair spindles
- Annie Sloan Chalk Paint in Paris Grey and Old White
- Annie Sloan Wax
- Regular Paint Brushes for paint
- Trim Brush
and Art Brushes
for the detail
- Painters Tape
- MiniWax Stain (I mixed Expresso
and Red Oak
)
- Staining Rags
- Satin Polyurethane
- Foam Brush for Poly
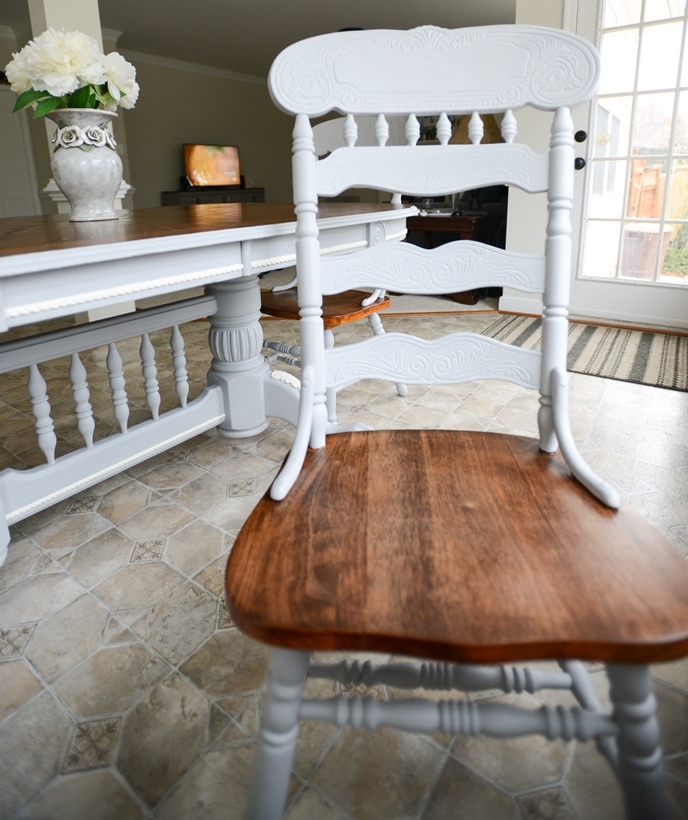
The details are just fabulous! For adding the white detail paint I used small art brushes, tape, and a trim brush. I tried covering all the areas I wanted white even if it meant going into the grey a little because the final step was to use an angled trim brush and carfully follow the lines with the grey paint to cover and white overflow on the detail sections.
 I am in LOVE with the end results and the stained top pattern is STUNNING!
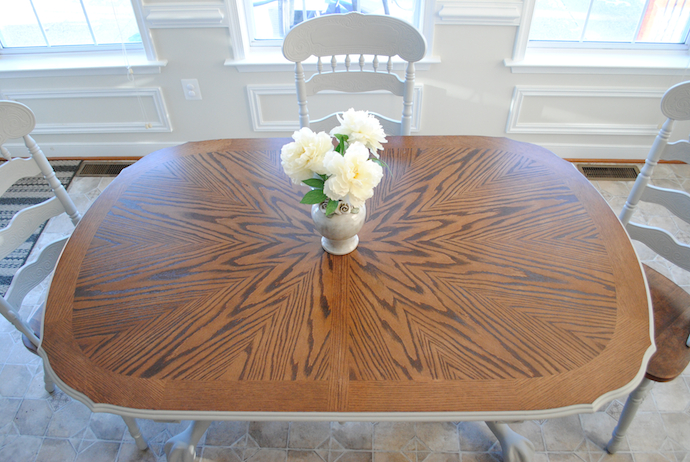
Before and After:
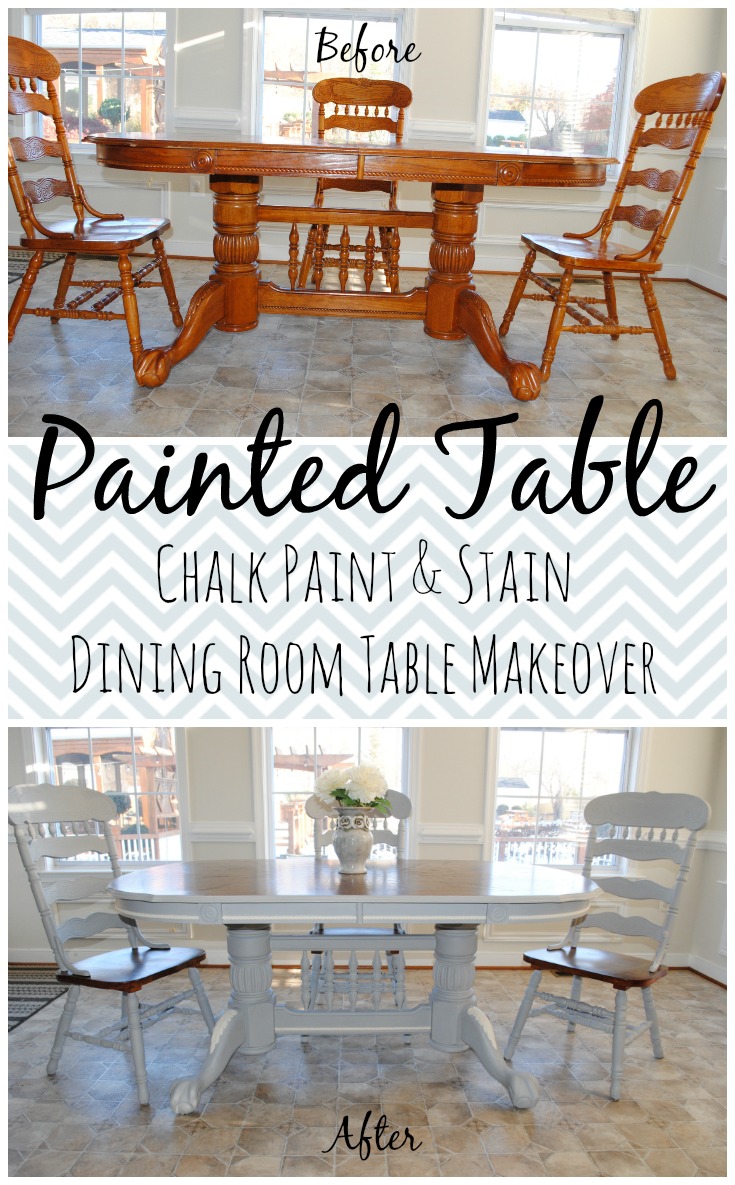


Yay it looks so Awesome!! Now you have a table like mine! 🙂 Love all the detail.
Thank you so much!
What was the tabletop like? I have a table I would love to redo and it has the laminate top surface (I’m guessing that’s what it’s called), and I’m wondering if it’s even worth the redo? I heard they are tough to work with and then the finish doesn’t always stay.
Hi Robin! I’ve worked with a laminate top table too and if you sand down you can get to a pourous surface that will take stain. Let me know how it goes!
Do you need to sand the top right down to the wood or can you lightly sand and apply the stain?
Hi Suzanne- in order for the stain to work on the top you have to remove all existing finish, so you must get down to the wood.
Wonderful post thank you for sharing.
Hi there! Did you sand the base of the table and legs of chairs? Or just prime them?
Hi Patty- Since I used chalk paint, I didn’t sand anything 🙂
Did you dismantle anything to paint? Also, how many coats of the chalk paint? Thanks.
No, I did not dismantle and about 2 coats (3 in spots) of chalk paint.
Hello, I just bought this very set with six chairs and fir a steal price of $30! I want to make this the best looking set but i am so worried about picking the wrong color! I actually do not want the brown top on the table or chairs but what if it doesn’t look as amazing as yours? I cannot decide and worst of all I also have a beautiful china cabinet to go with it that i would like to match but not clone the colors on the same areas. For example white on the main surfaces and a little of another color for accents…. Am I making any sense? LOL I love your step by step instructions so i’m not worried about the process.
That’s awesome! I’m sure any color will turn out perfect 🙂 Good luck!