Monday, March 30, 2020

DIY Kid’s Fairy Garden

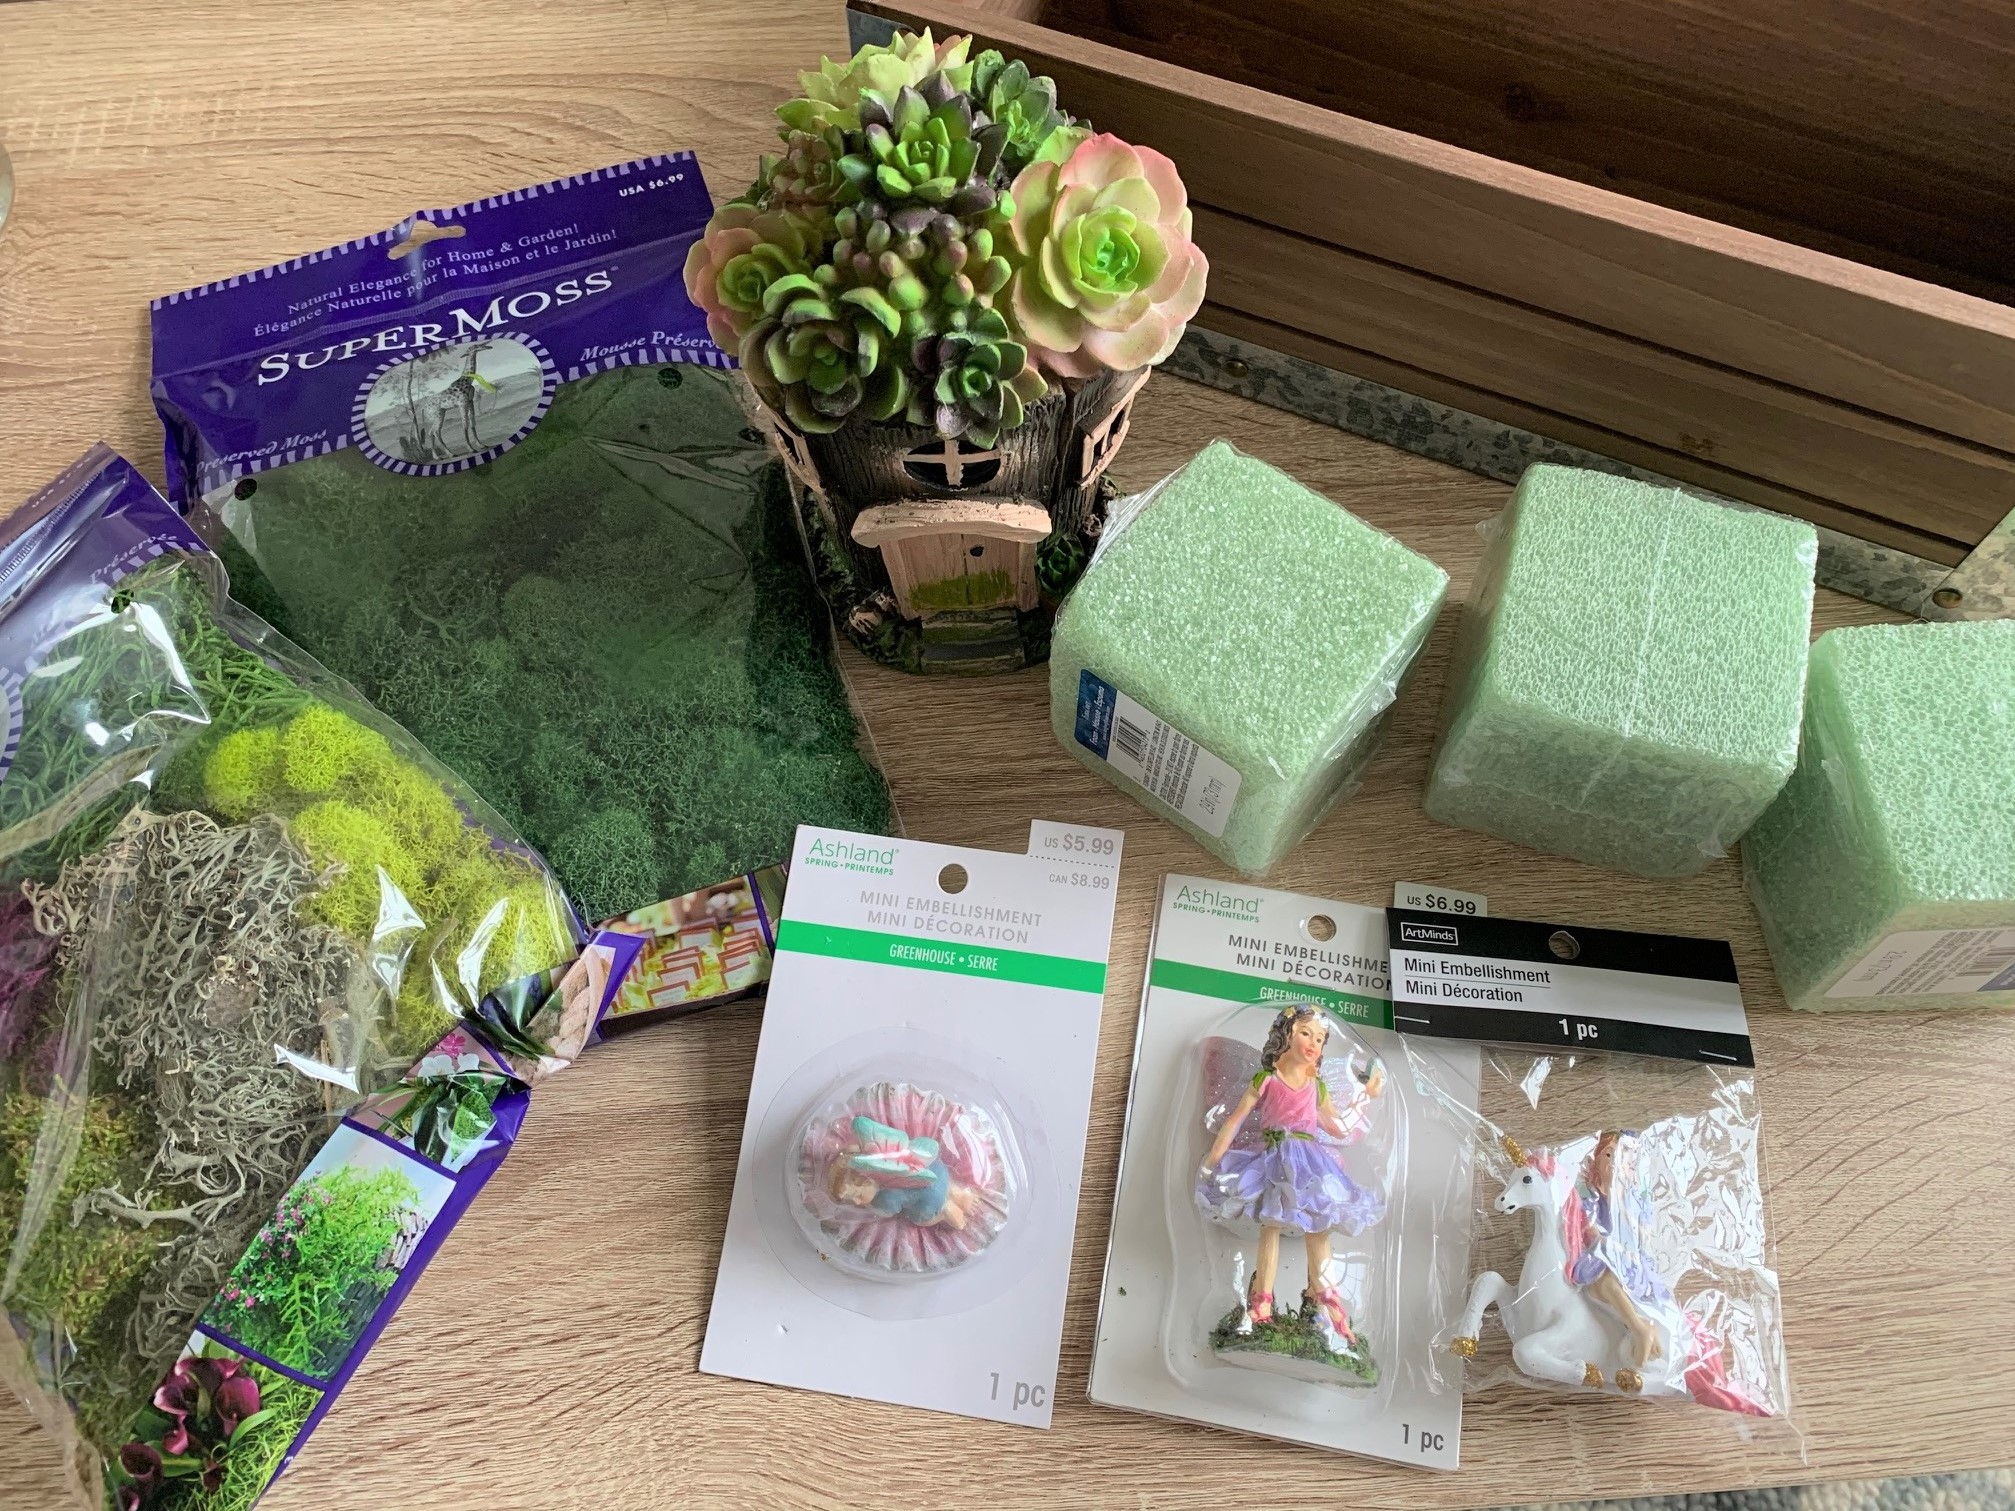
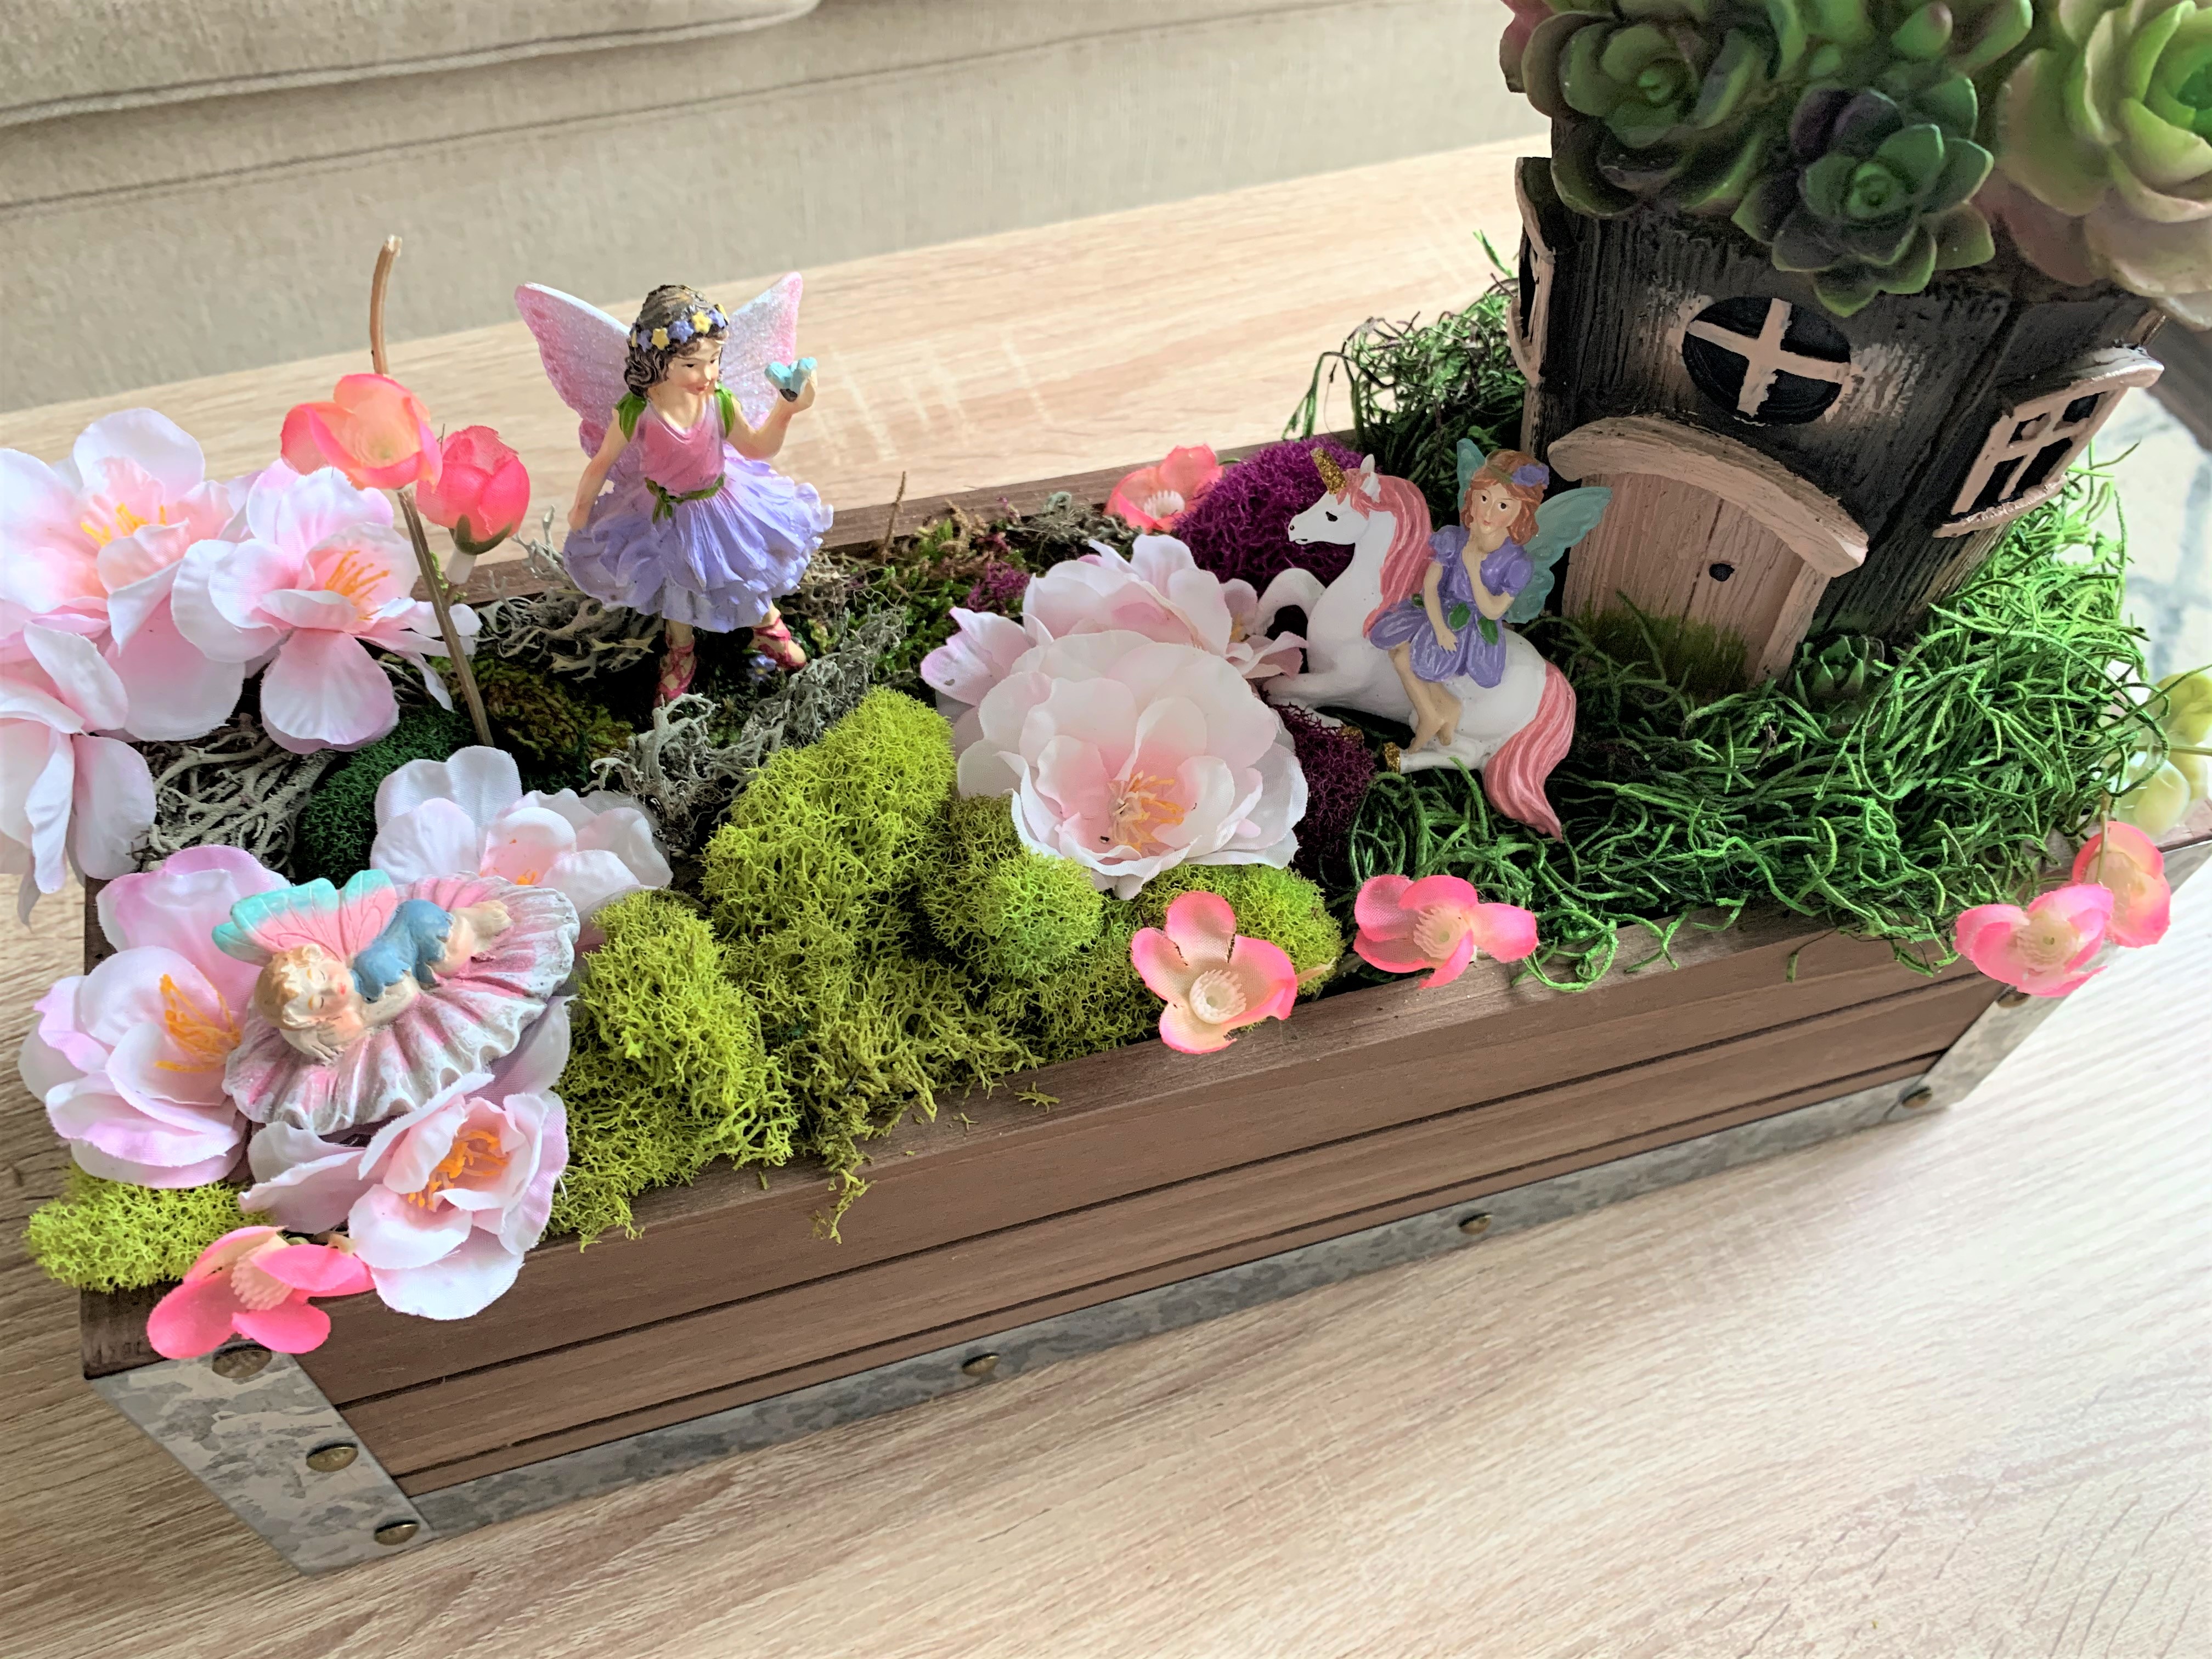
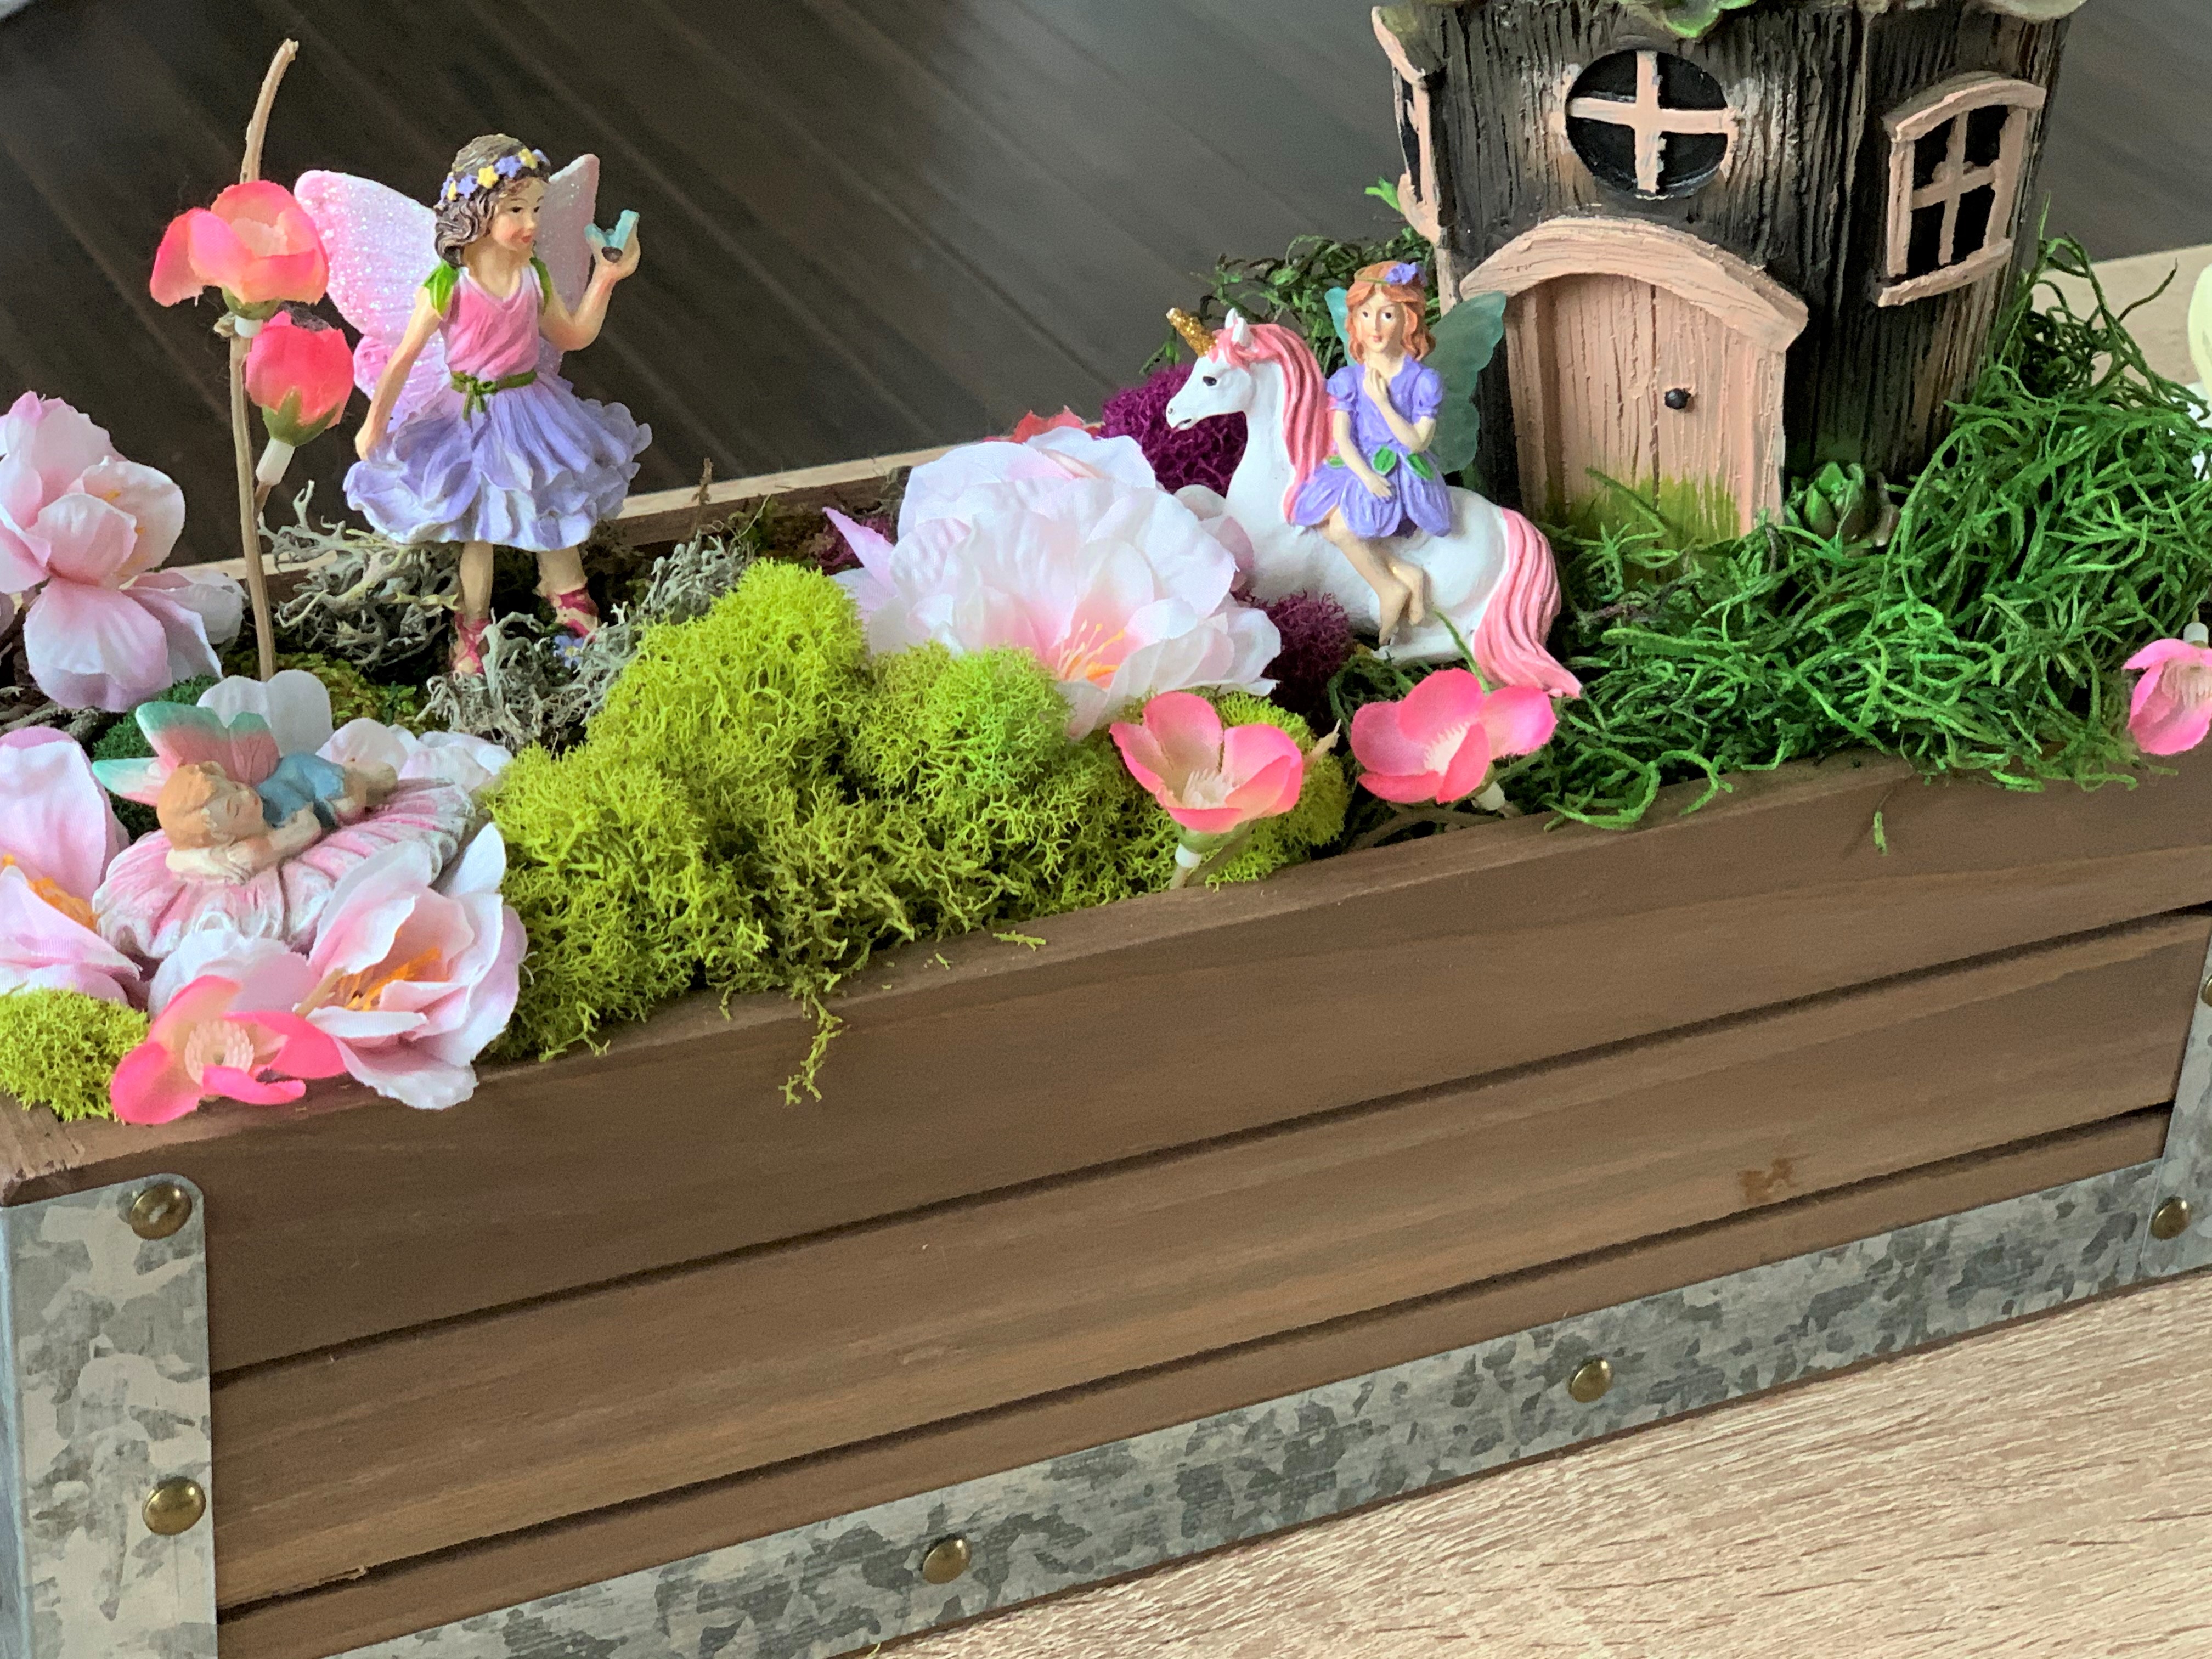
So with the chaos of our world right now some simple happy crafts that make you smile are just what we need. This centerpiece type fairy garden is the perfect quick project to do with your little one. Hartley and I shopped Michaels online store together and she got to pick the type of fairies she wanted. There are so many options that your little one can choose and add all sorts of animals, colored moss, house, rocks, etc. And Michaels curb-side pickup was super simple and followed the social distancing rule with Lysol wipe and spray off before they were brought into the house.

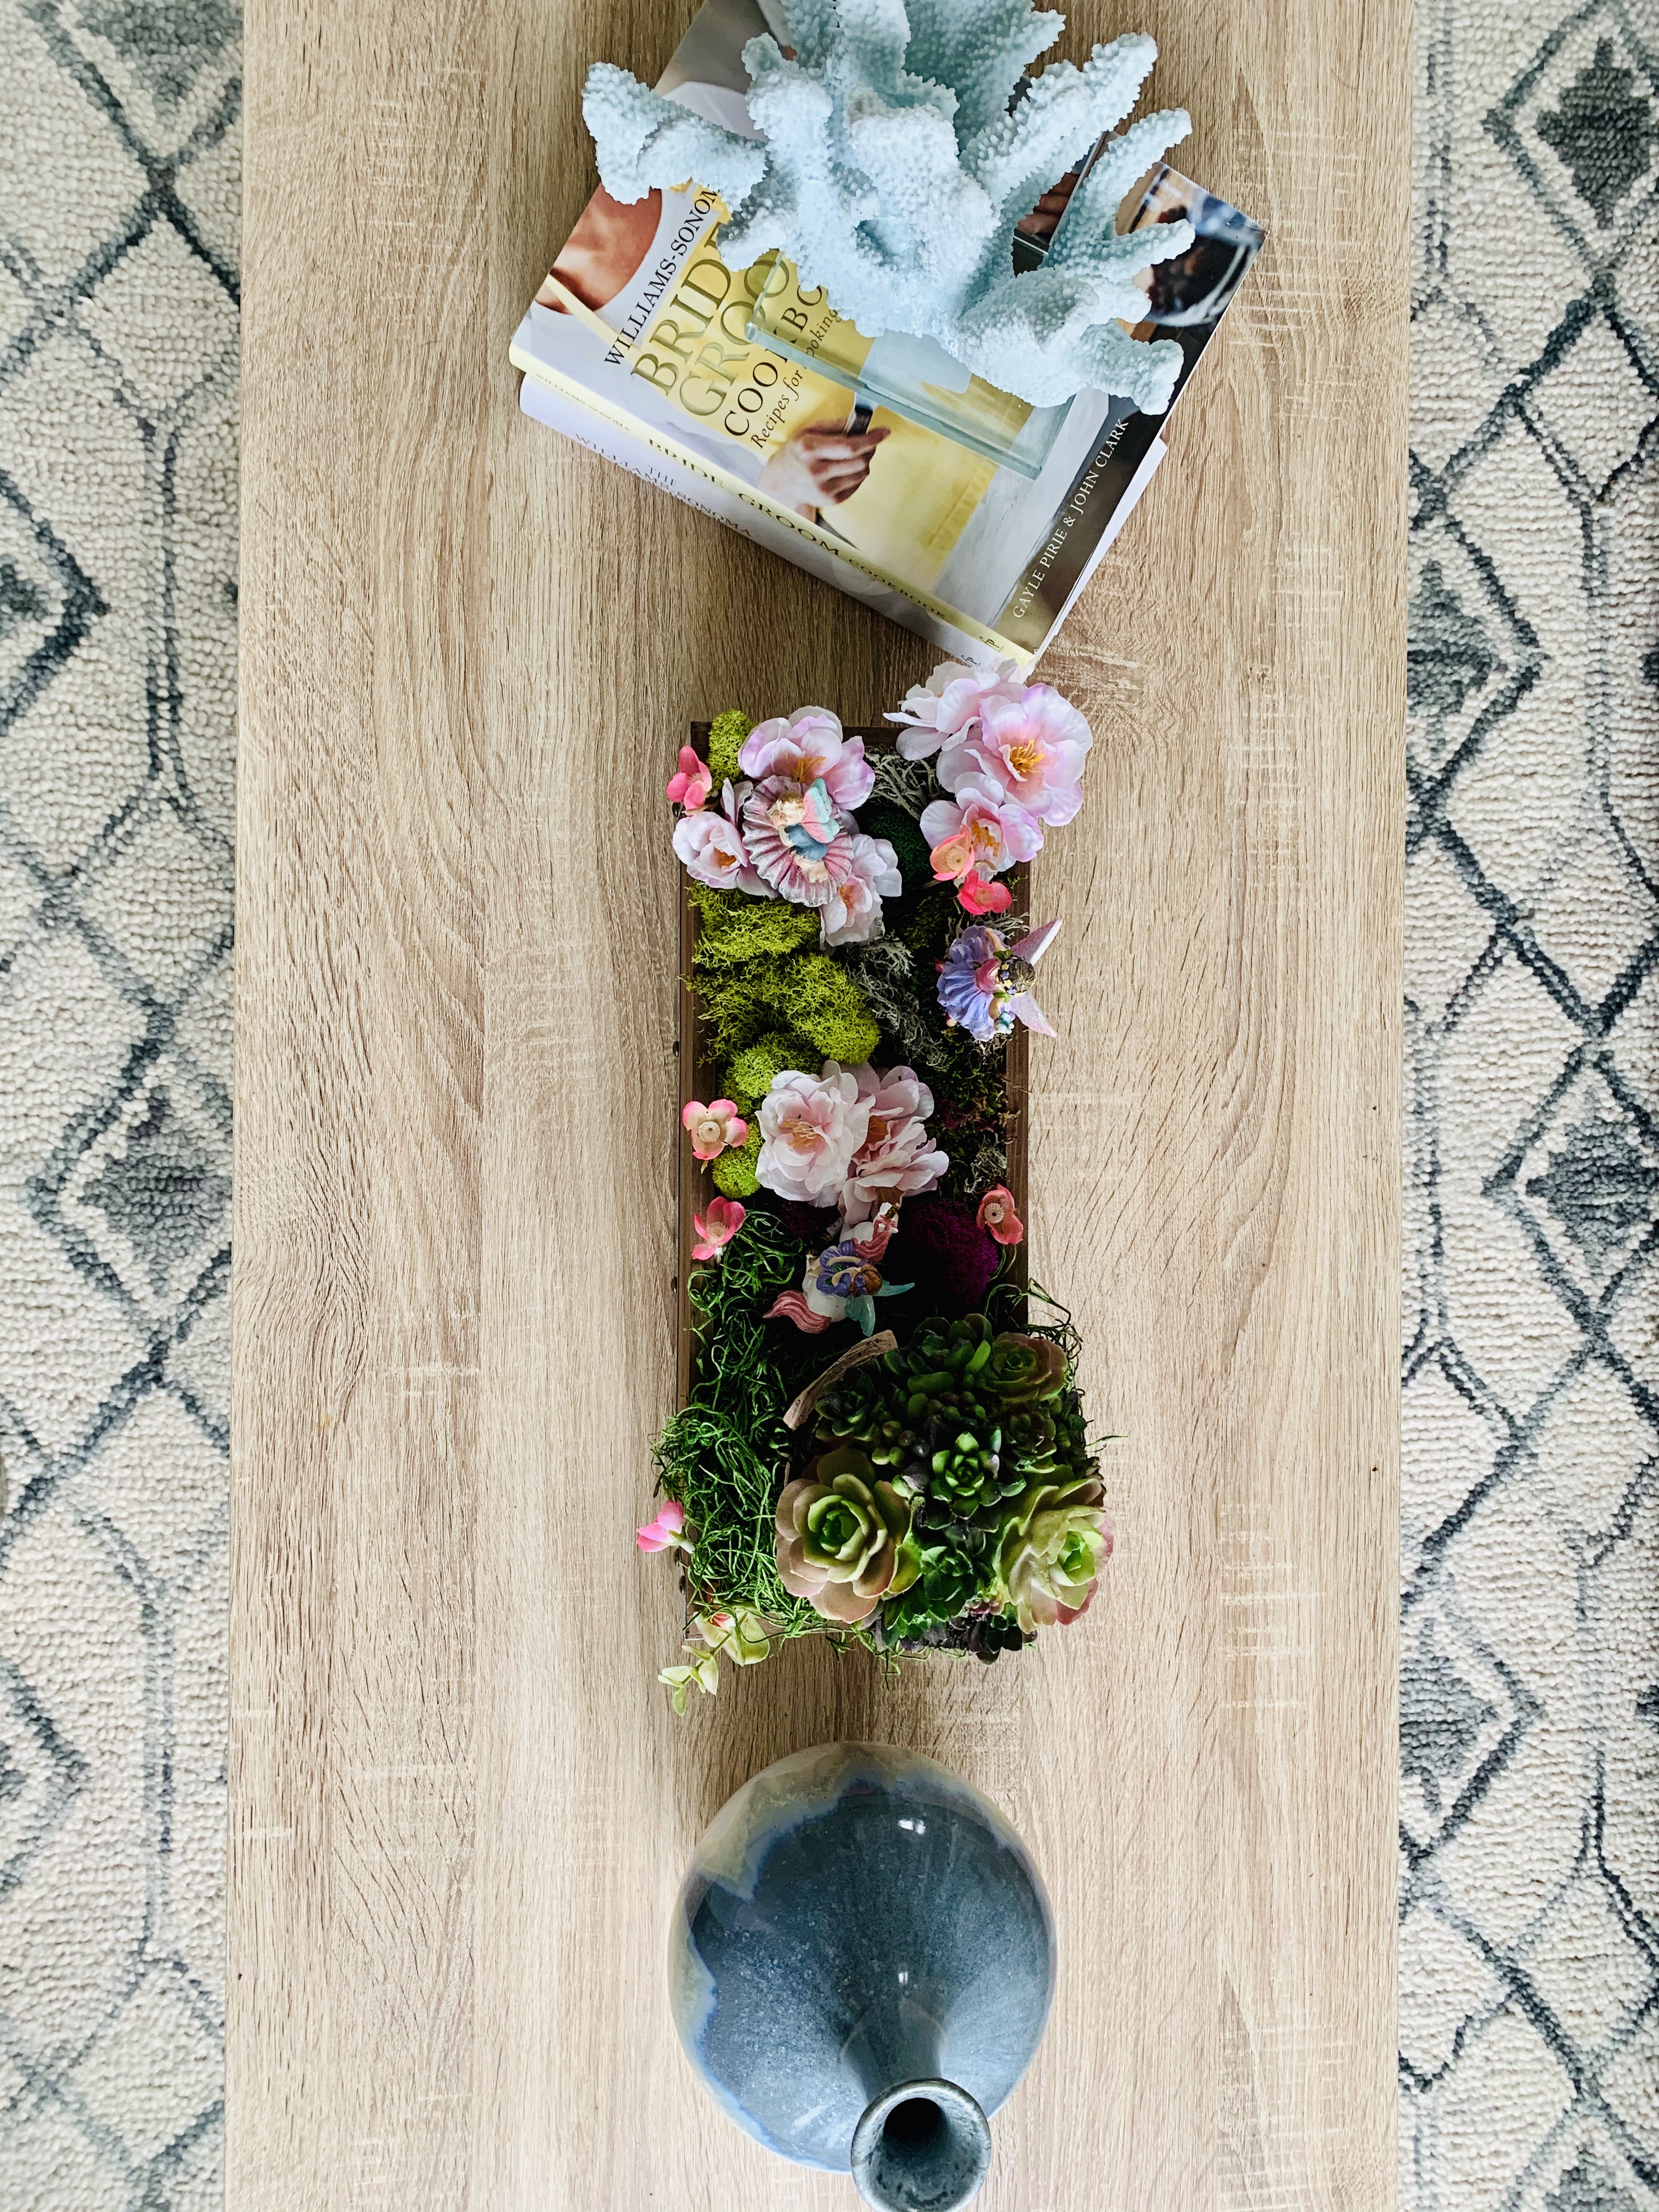
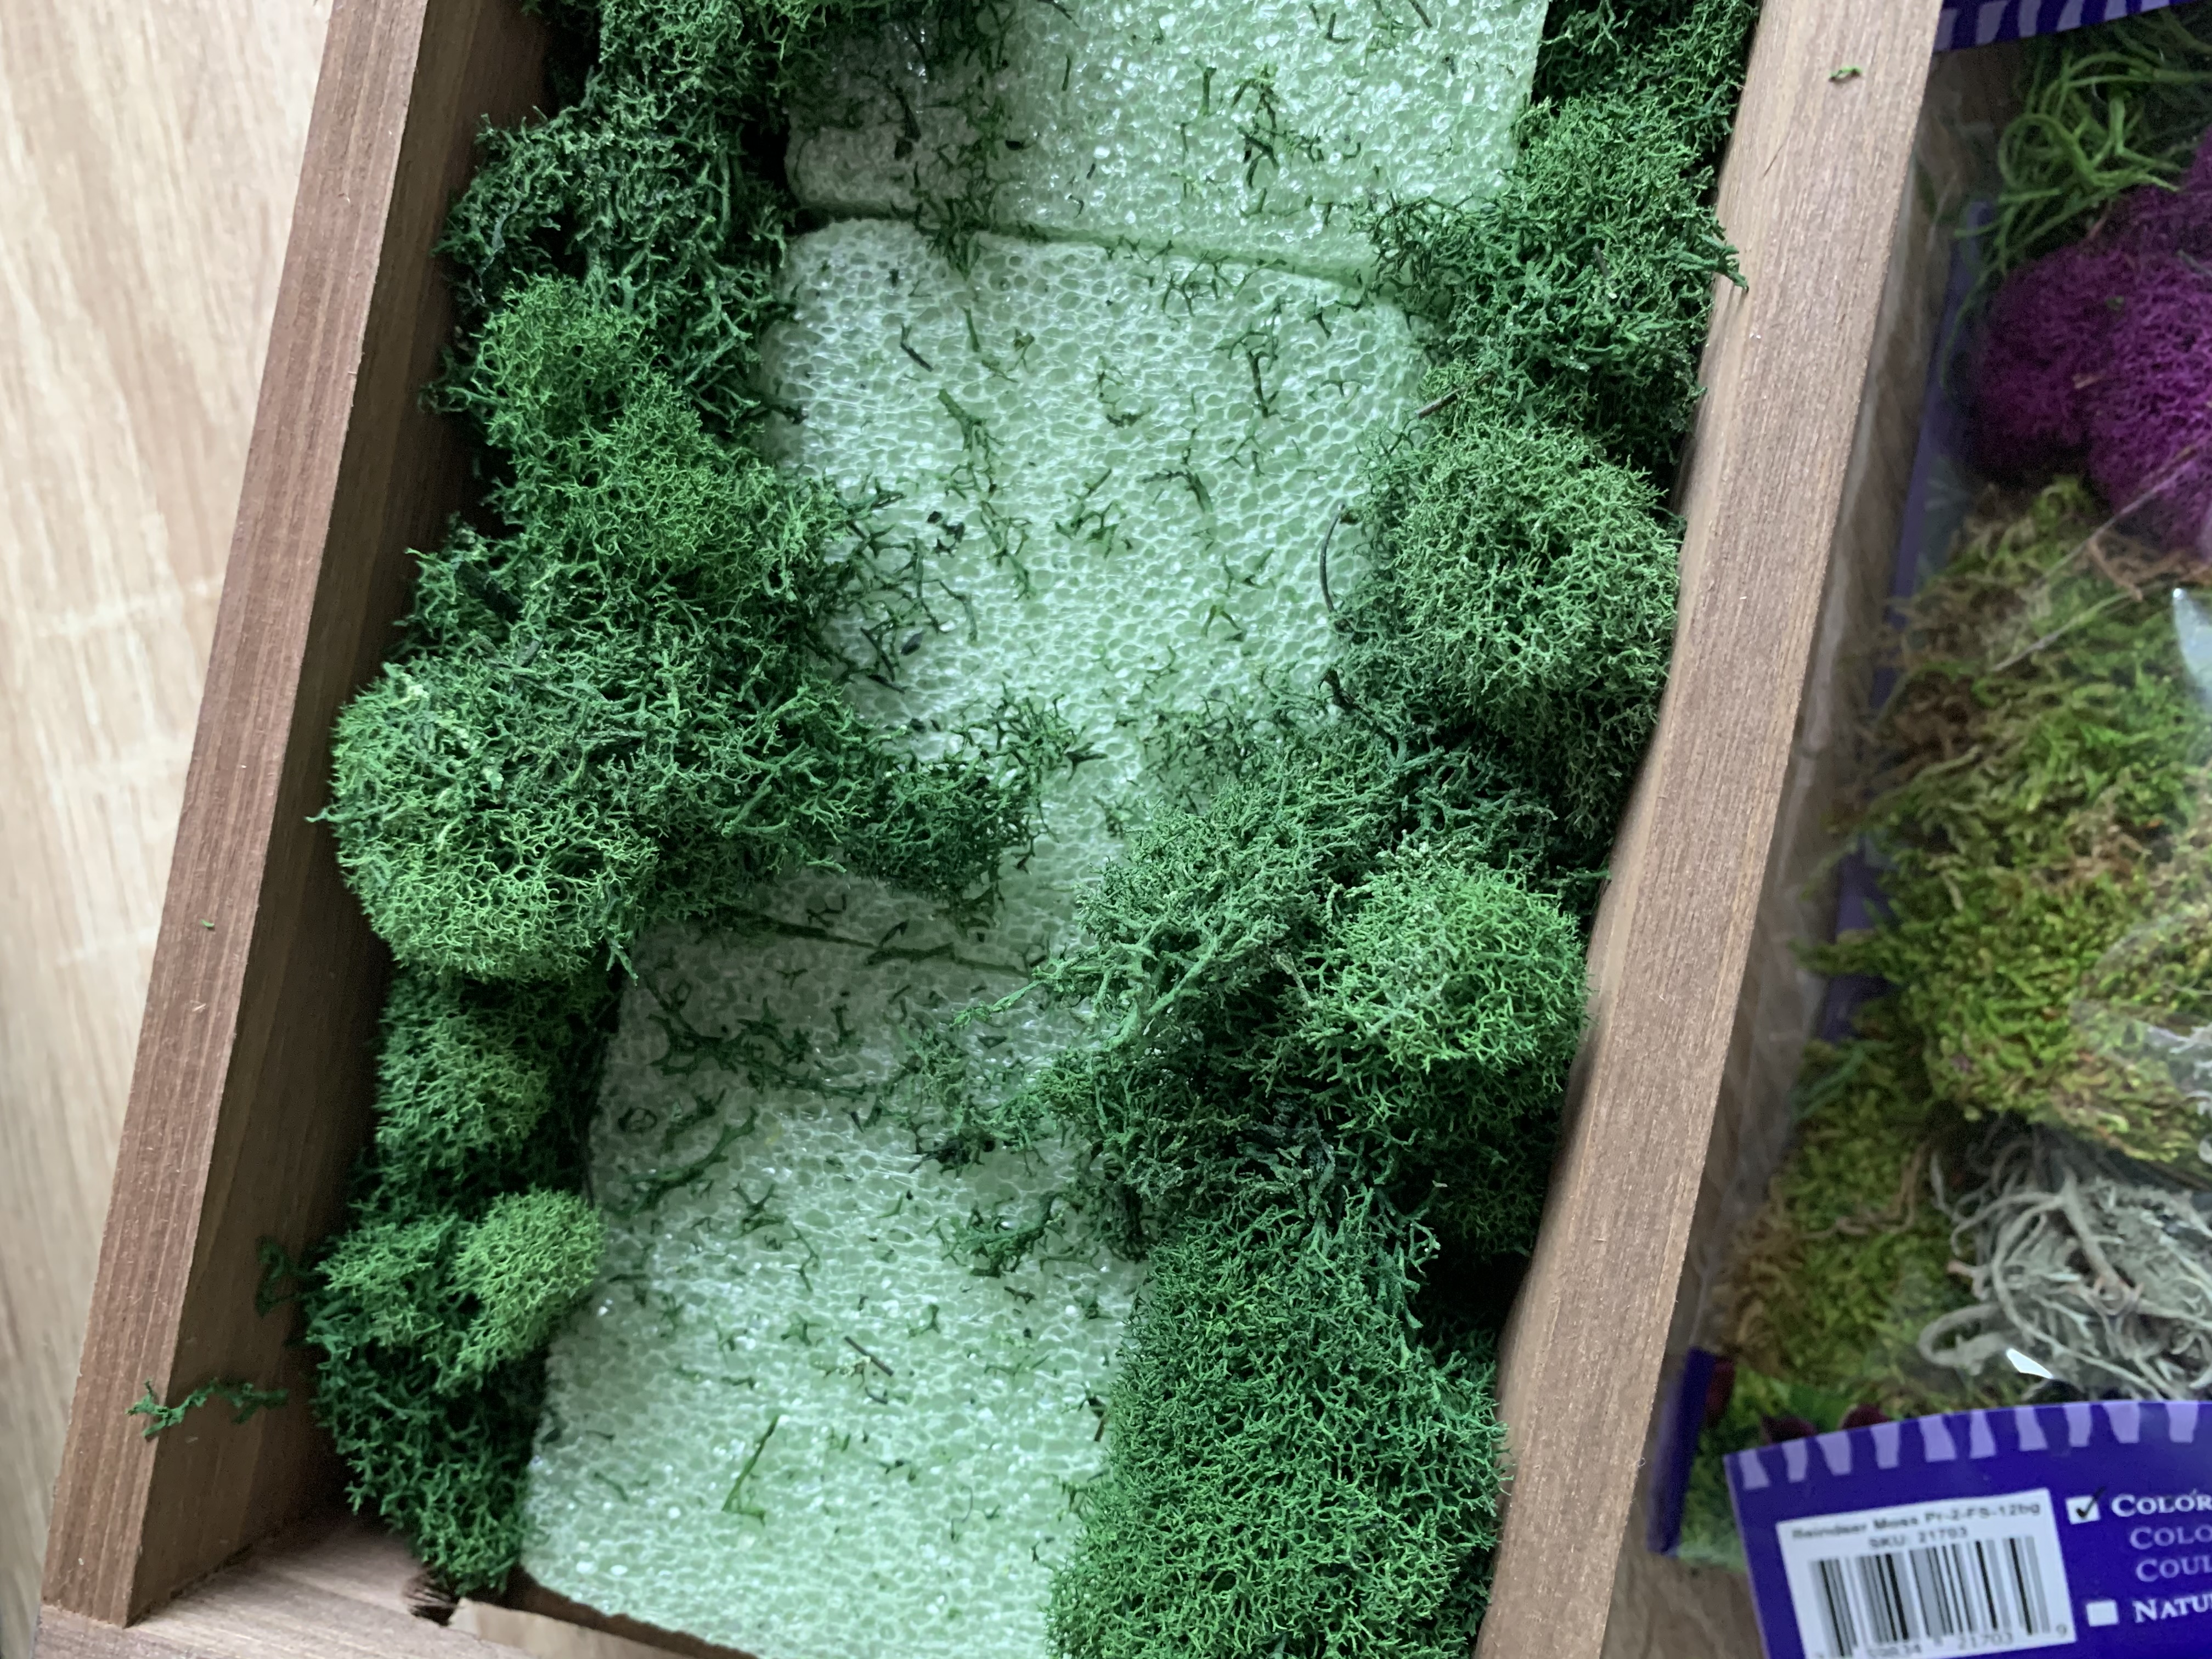
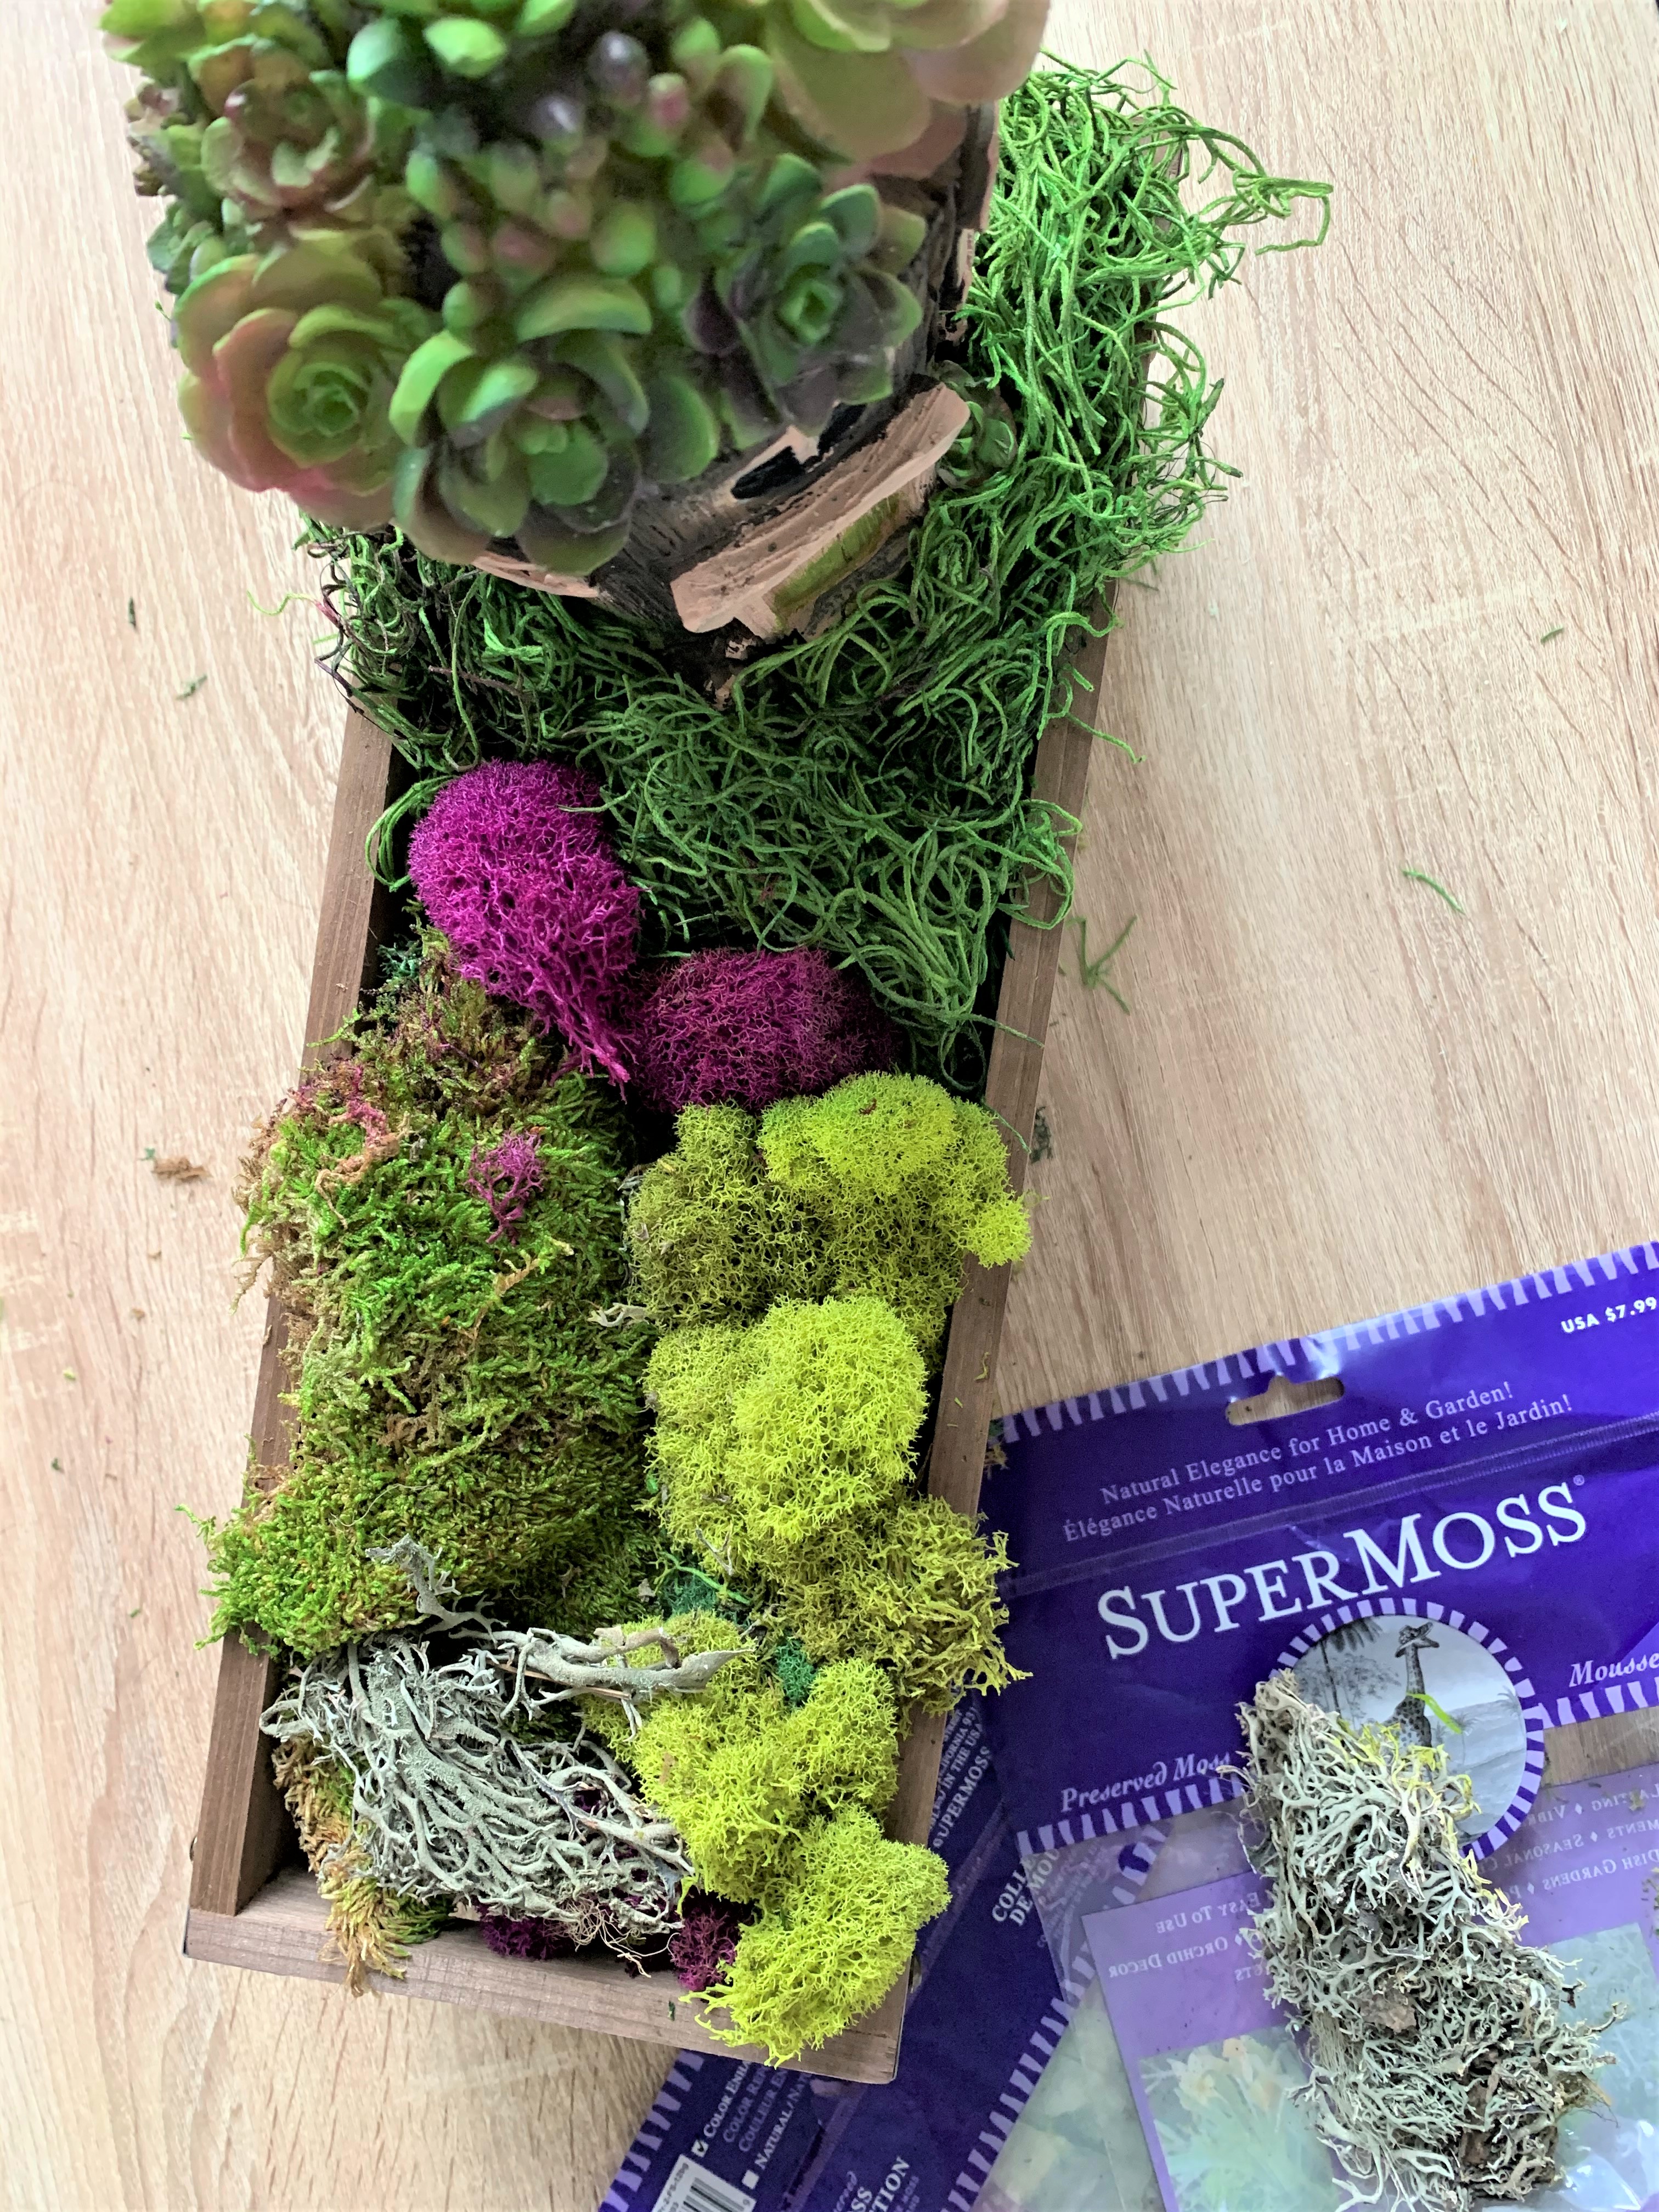
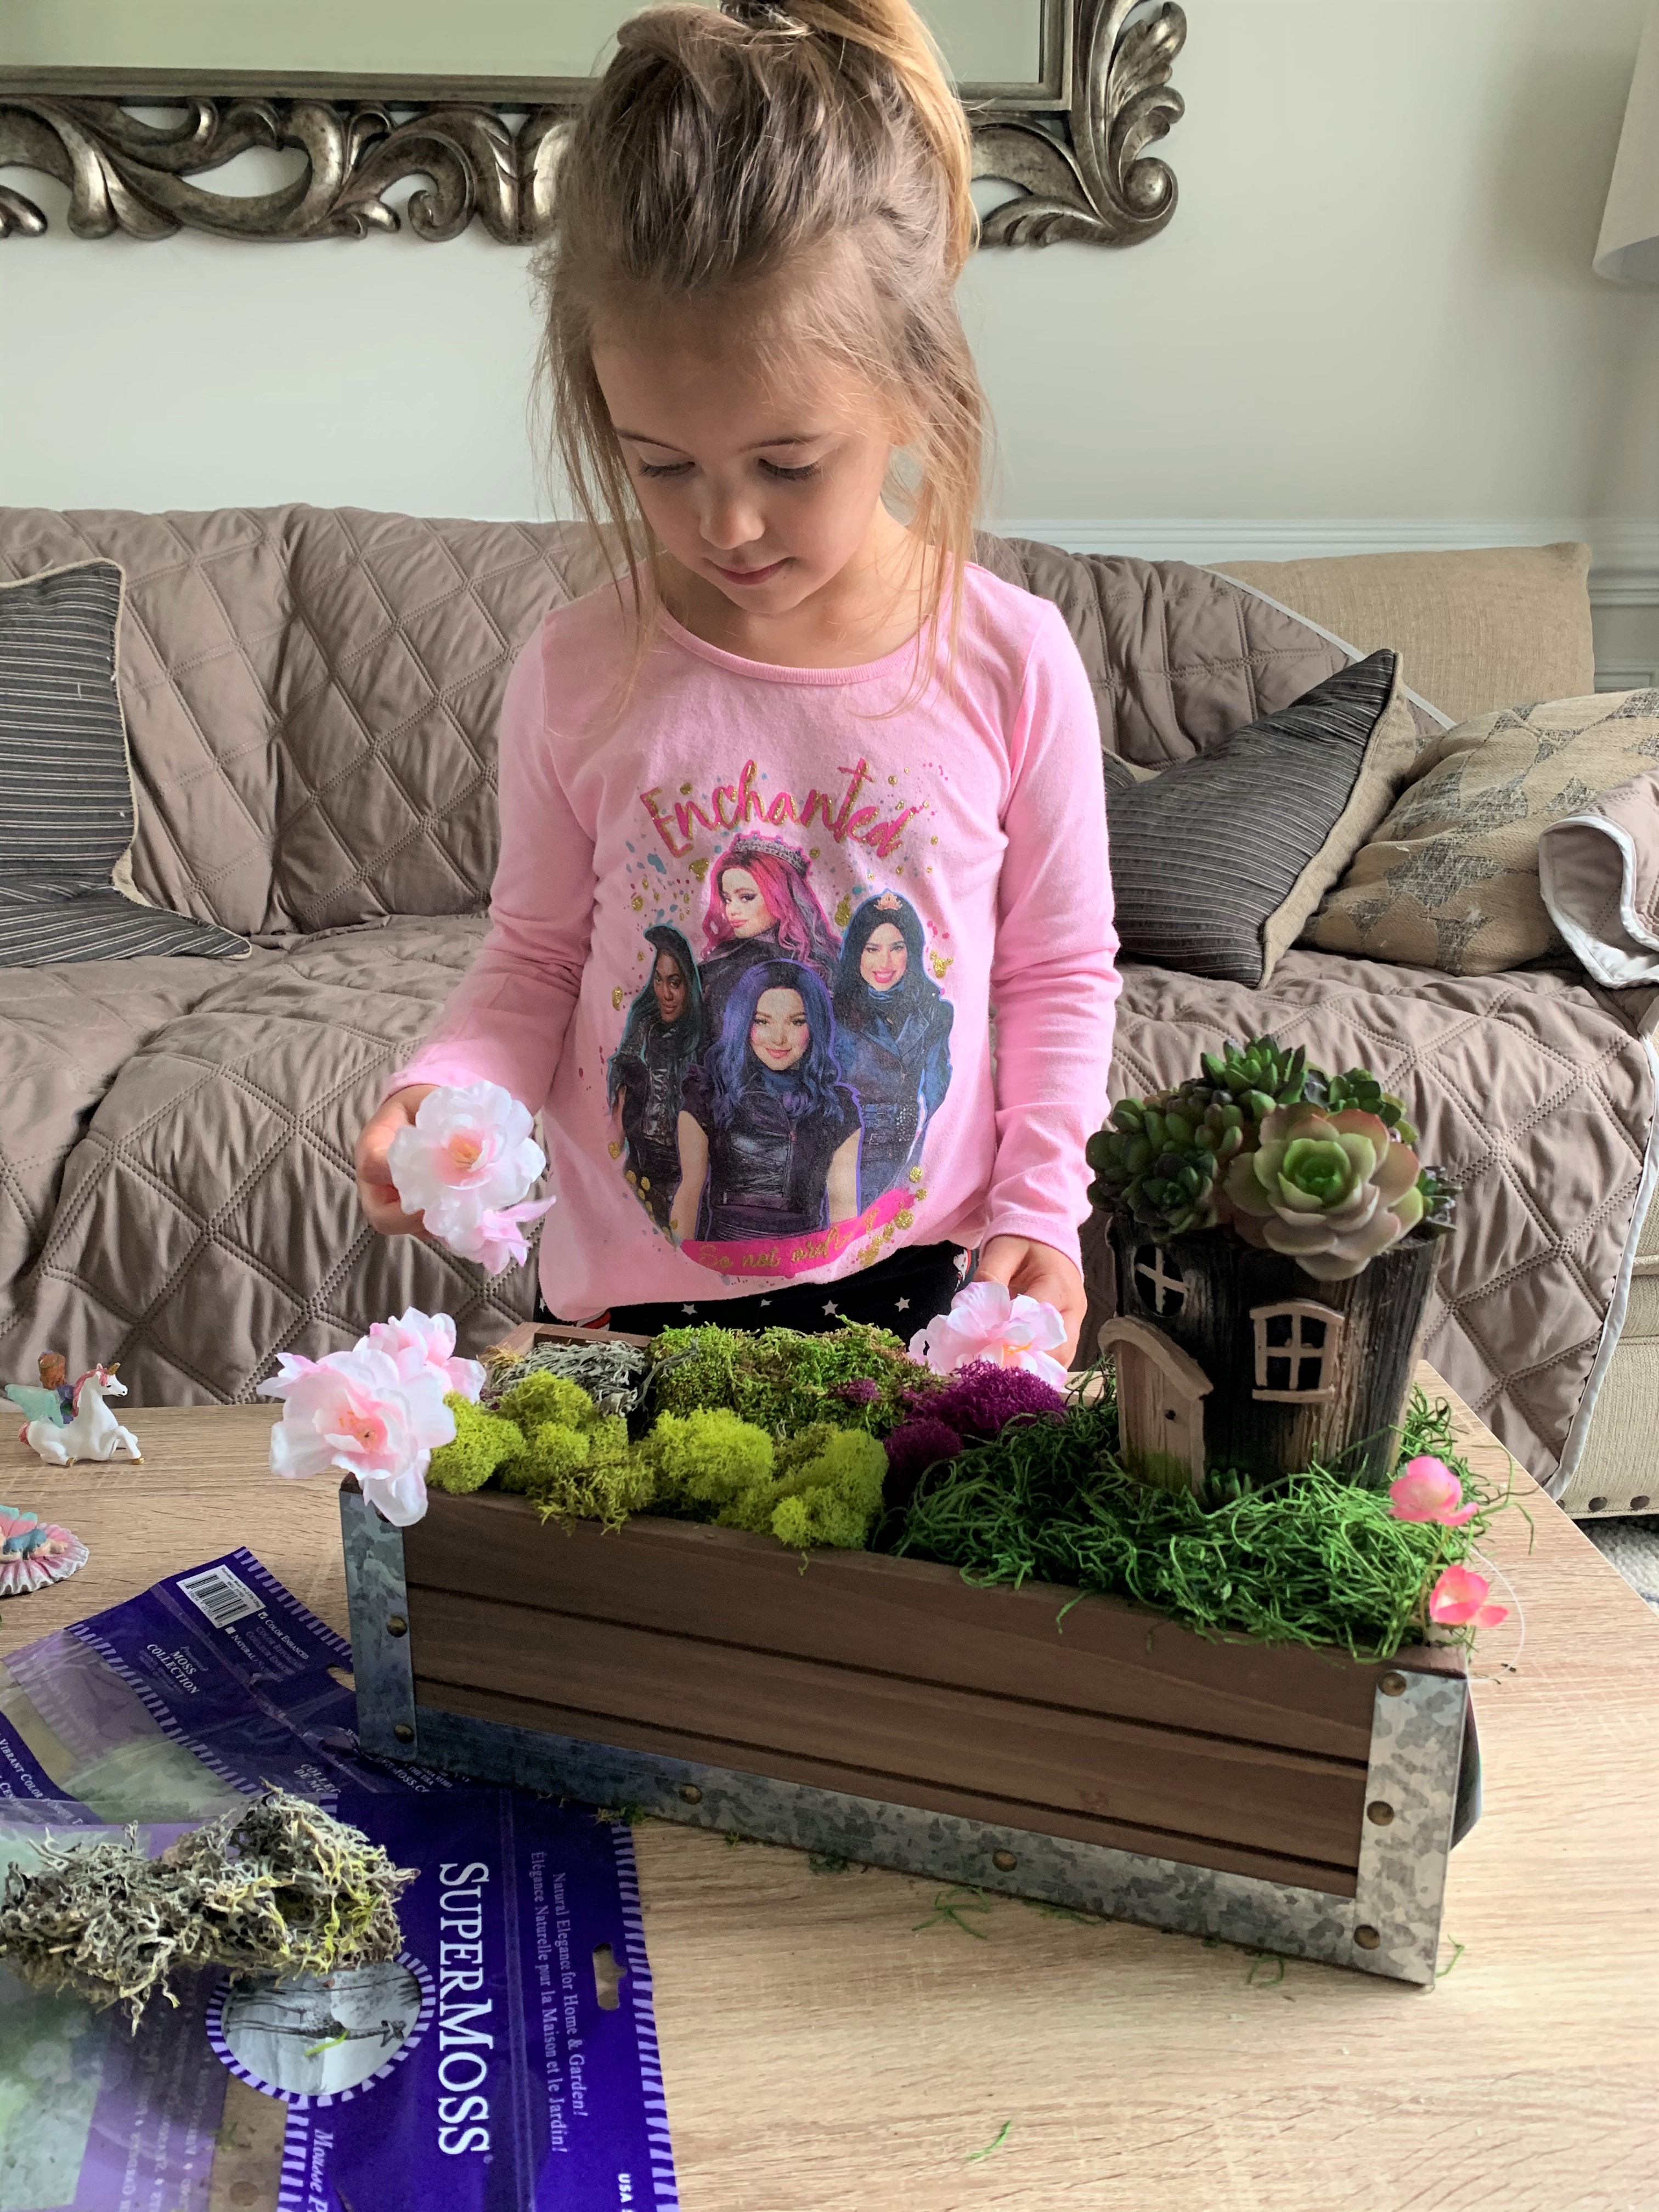
You can pick whatever container you would like, a few floral foams, moss, flowers, small fairies, and any other additions you would like to make your fairy garden super special to you. I hope this brings some inspiration, imagination, enchantment, and magic into your home during these uncertain times. Stay positive and making memories at home.


Tuesday, December 24, 2019

Master Bathroom Makeover : Valspar Chalky Finish Painted Vanity

There are two important tips I learned when remodeling my bathroom…I’ve always underestimated the power of a paint roller and a trick to keeping paint supplies usable for the entire project. The first tip and I’m not really sure how I after all my projects with chalk/mineral paint I’ve never used a roller. EVER! Not even on my massive entertainment center. Completed all by a tiny little paint brush. Soooo, needless to say I’m now a huge supporter of using a paint roller when you can and a bathroom vanity is the perfect place to do it. Second tip is placing your painting material in the refrigerator so they stay “wet”. Why has no one ever told me this? After every coat I covered my pan and roller with a plastic grocery bag and sealed my brush in a ziplock, stuck in fridge, and these babies were like I never stopped between coats even after 24 hours! This was a game changer and so much less waste.

Our bathroom has been a long awaited project and I love the little changes we did for a BIG impact. Total cost of the project was right under $1,600. BIG shout out to my hubby for doing all the electrical and plumbing. Saves so much money with household labor. I wanted a deep rich sexy color for the walls. It’s Valspar paint in the color Seine. Mirrors are from Kirklands and such a great deal on sale, together they were $81. Faucets and light fixtures from Wayfair and both in matte black finish. Door knobs are matte black from Lowes. The granite color is Brown Fantasy from Erin’s Marble and Granite. Originally I was trying to get away without painting the cabinets, but when the granite was installed, it needed a pop of brightness against the dark wall color I did. Luckily I had paint in the garage already (yay free) so I went for it…

Lightly sanded, cleaned with heavy duty cleaner like Liquid TSP Cleaner, tape , and removed doors to paint separately from frame. The drawers I left on and taped the back. This allowed me to paint both front and back of the drawers at the same time. Pick your paint (I used Valspar chalky finish paint in ¾ kids gloves leftover from entertainment center and ¼ a gray color I found on clearance for $5). I only used a paint brush to apply to edges and places that I could not reach and everything else was applied with the small roller. I did two coats on the back (inside) and three coats of front (outside) of the vanity waiting at least 8 hours between coats (which is why the refrigerator tip came in handy). After 24 hours of the last coat application, I had to finish with the sealing wax applied via wax sponge and roller. This is the WORST part for me. I don’t know why I dislike it so much. I like the Valspar product but after 4 vanities now, I’m still liking the ease and durability of the Fusion Mineral Paint. I never posted it but I used for my girls bathroom and because it’s all in one it’s quick and I don’t notice as much chipping.

Merry Christmas to me! This is all I really wanted and we finished it right before the holidays. Hope you all have the best holiday season and see ya in 2020!!!

Monday, January 14, 2019

DIY Shiplap Fireplace Makeover

First project of 2019! This was my Mother’s Day gift that I finally got to cash in on with the cold weather not really giving us much else to do but housework. It was a weekend project that makes a HUGE impact.

Cost = $85

Supplies:

  1. Shiplap Boards (5 – Shiplap 5.375-in x 12-ft)
  2. Side Boards (1 – 5.5-in x 8-ft Painted MDF Square Moulding)
  3. Miter Saw
  4. Table Saw
  5. Air compressor, nail gun, nails,
  6. Measuring tape
  7. Level
  8. Chauk
  9. Painter’s Putty
  10. White Paint

Willie started with the outside to boards to frame the fireplace. Then cut the shiplap boards to size to fit perfectly within the frame he made. Once all boards were secured with nails, he finished with silicone around the edges and putty to even out the nail holes. I then painted the wood with two coats of satin white.

I am so happy with this project. It’s one of those changes in your home that you are like, wow it looks like it always belonged.

All the mantle accessories (minus horse head and shorter eucalyptus) I found at Hobby Lobby. What do you all think?

Thursday, November 29, 2018

DIY Card Holder from Thrift Frame

It’s almost December! Thanksgiving is over and everyone can finally acceptably decorate for Christmas. Christmas is my absolute favorite. It is a time of family traditions, childhood memories, family, friends, sharing, kindness, and love. One of the most precious things I receive during the holidays are cards. There is something so special about getting a letter in the mail and opening it up to see familiar faces with glowing smiles and growing families. The exciting news of marriages, babies, and new homes is always a welcomed bonus in these notes of holiday best.

My mother always pulled out the tape and attached them to her kitchen cabinets, so as a child I always would say to myself “Oh hi, [family/friend name]” and it I always felt closer to them somehow just with that simple reminder that they are always there. But since our kitchen remodel…Willie would kill me if stuck cards to our freshly painted cabinets…so I needed a new option to hang the incoming holiday cards. I thought where is the best place to show off the cards? Bingo…the fireplace mantle. And once the tree is up it will be a fabulous gathering spot for our Christmas morning. And this one will be super special as it will be Finley’s first Christmas.

So as always I set out on a mission looking for a large frame that I could either affix wire or ribbon to in order to hang the cards. After a couple of failed attempts at my normal go-to spots, I finally found a large enough frame. The picture was $25 from my favorite thrift store. It was slightly painful to undo this custom framing job (as I’m sure someone spent a fortune to do), but once I got it home I removed the paper backing and the multiple layers of matting to reveal a beautiful larger frame canvas. Originally I was going to leave the frame the original metal color but after some thinking I thought it would match better with all the shabby chic white in my living room if I painted. So with some leftover Fusion Mineral Paint (color –Champlain) from My Coffee Table Makeover, I did a super distressed paint job. Once it dry I did a fast light sanding to reveal some more of the metallic color underneath.

I highly debated about using a pretty ribbon as the method to hang the cards, but ultimately decided on using leftover chicken wire from my vegetable garden rehab. Mainly, well…duh, it was free. But also the ability to hang the cards in multiple ways. The ribbon would have been restrictive in the numerous card sizes/orientations we receive.

I absolutely love the ways this turned out! I cannot wait for all my holiday cards to start pouring in so I enjoy looking at all the special people in my life daily. Come on Christmas! Happy Thrift Thursday!