
There are two important tips I learned when remodeling my bathroom…I’ve always underestimated the power of a paint roller and a trick to keeping paint supplies usable for the entire project. The first tip and I’m not really sure how I after all my projects with chalk/mineral paint I’ve never used a roller. EVER! Not even on my massive entertainment center. Completed all by a tiny little paint brush. Soooo, needless to say I’m now a huge supporter of using a paint roller when you can and a bathroom vanity is the perfect place to do it. Second tip is placing your painting material in the refrigerator so they stay “wet”. Why has no one ever told me this? After every coat I covered my pan and roller with a plastic grocery bag and sealed my brush in a ziplock, stuck in fridge, and these babies were like I never stopped between coats even after 24 hours! This was a game changer and so much less waste.
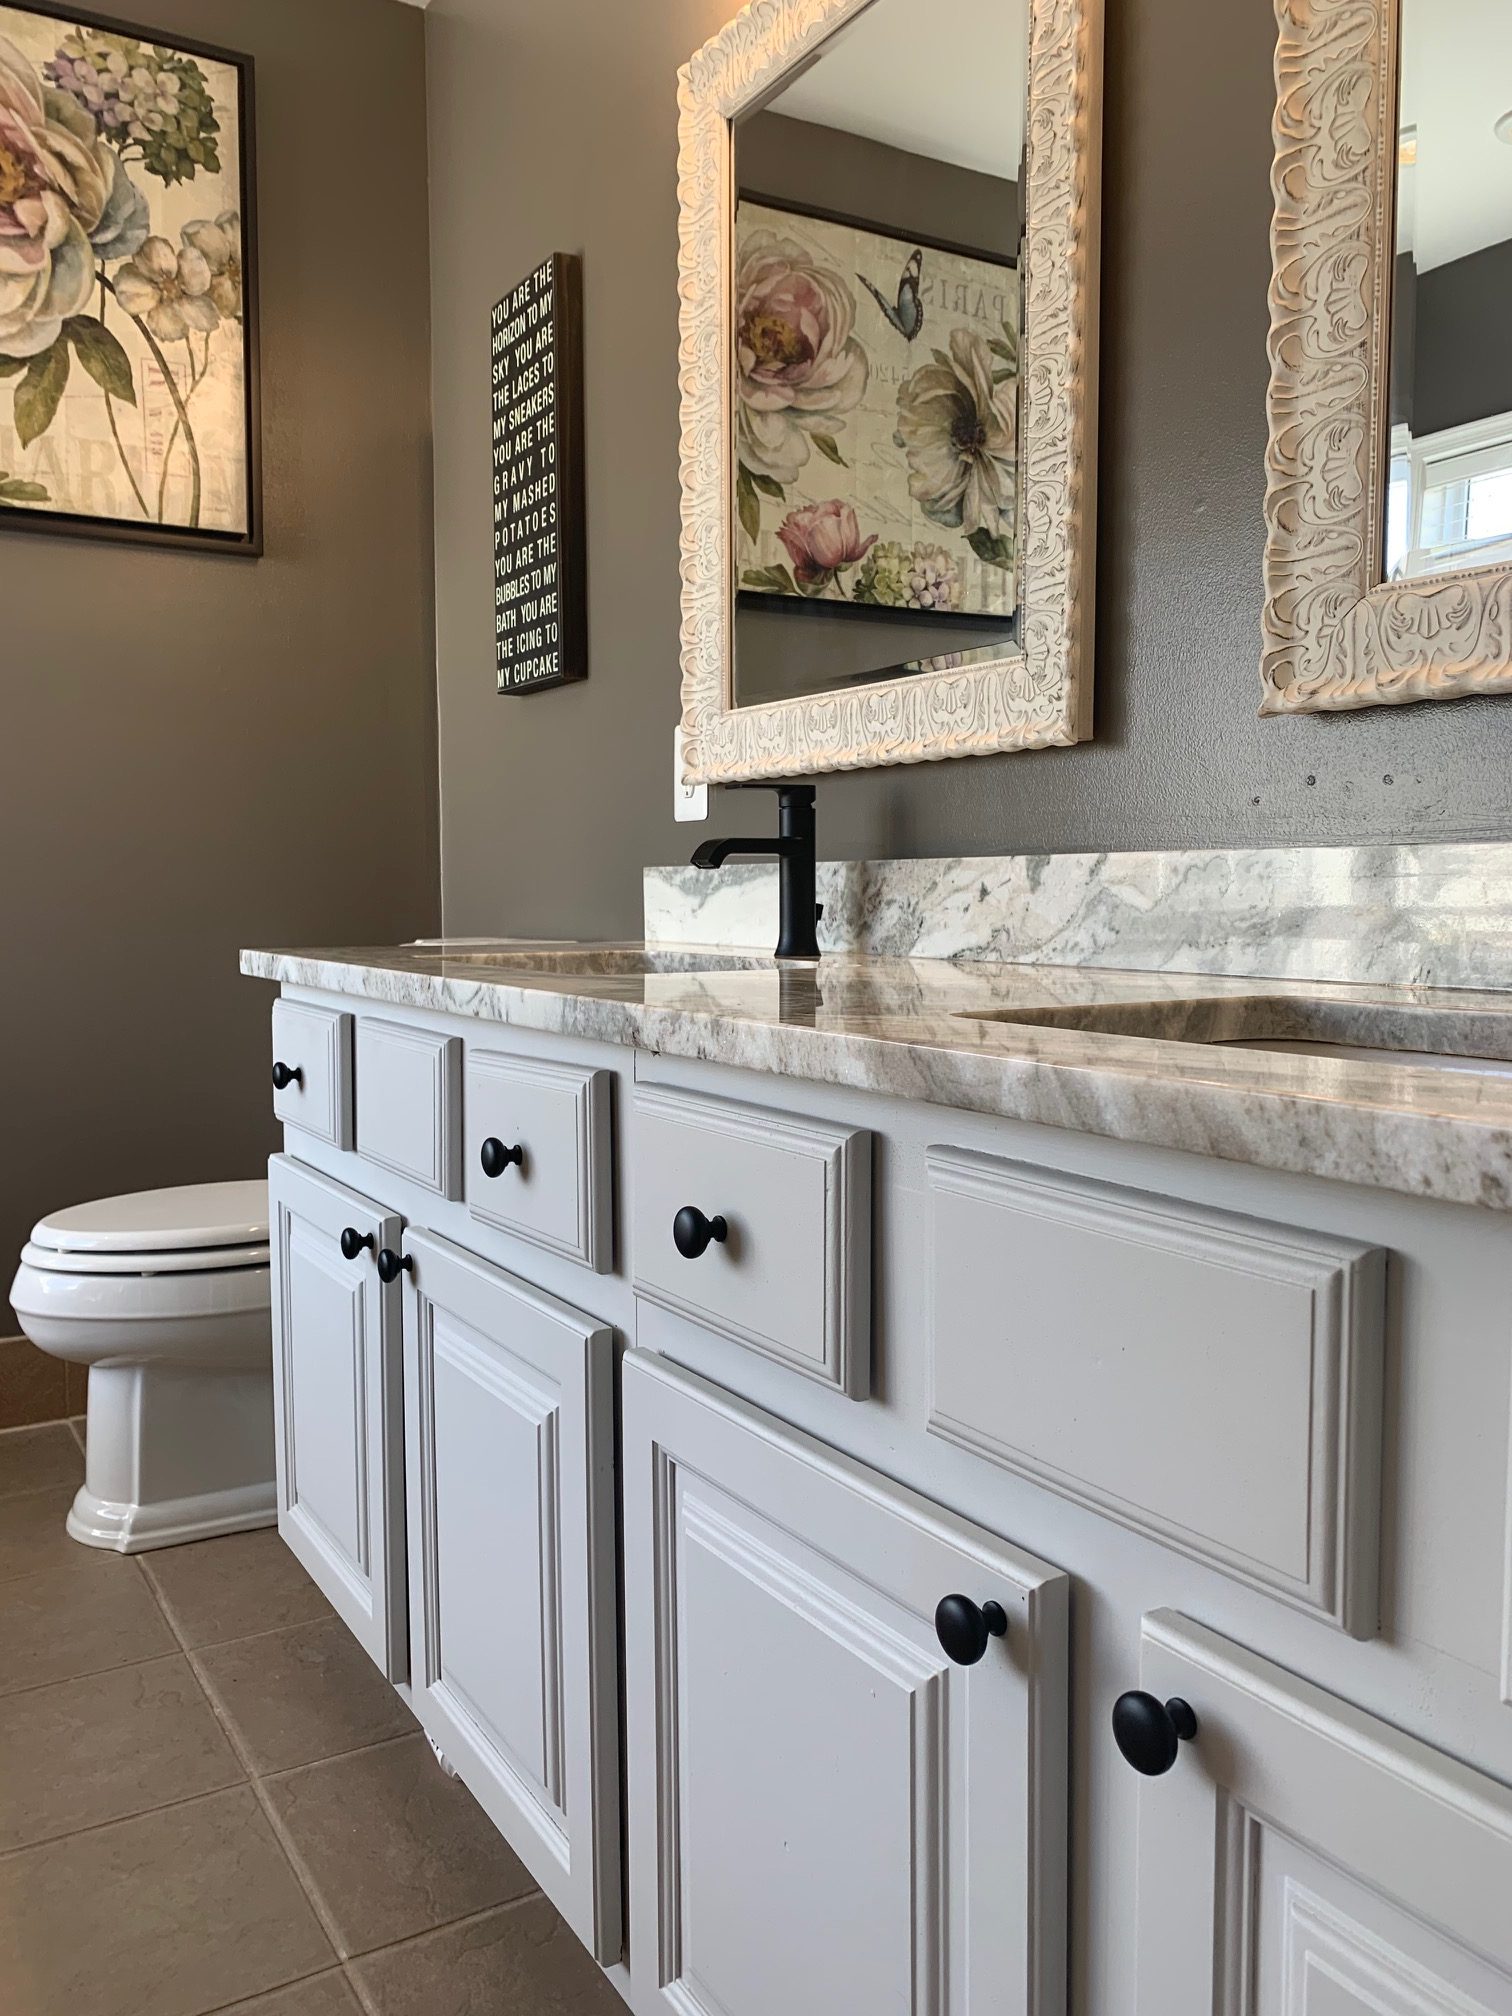

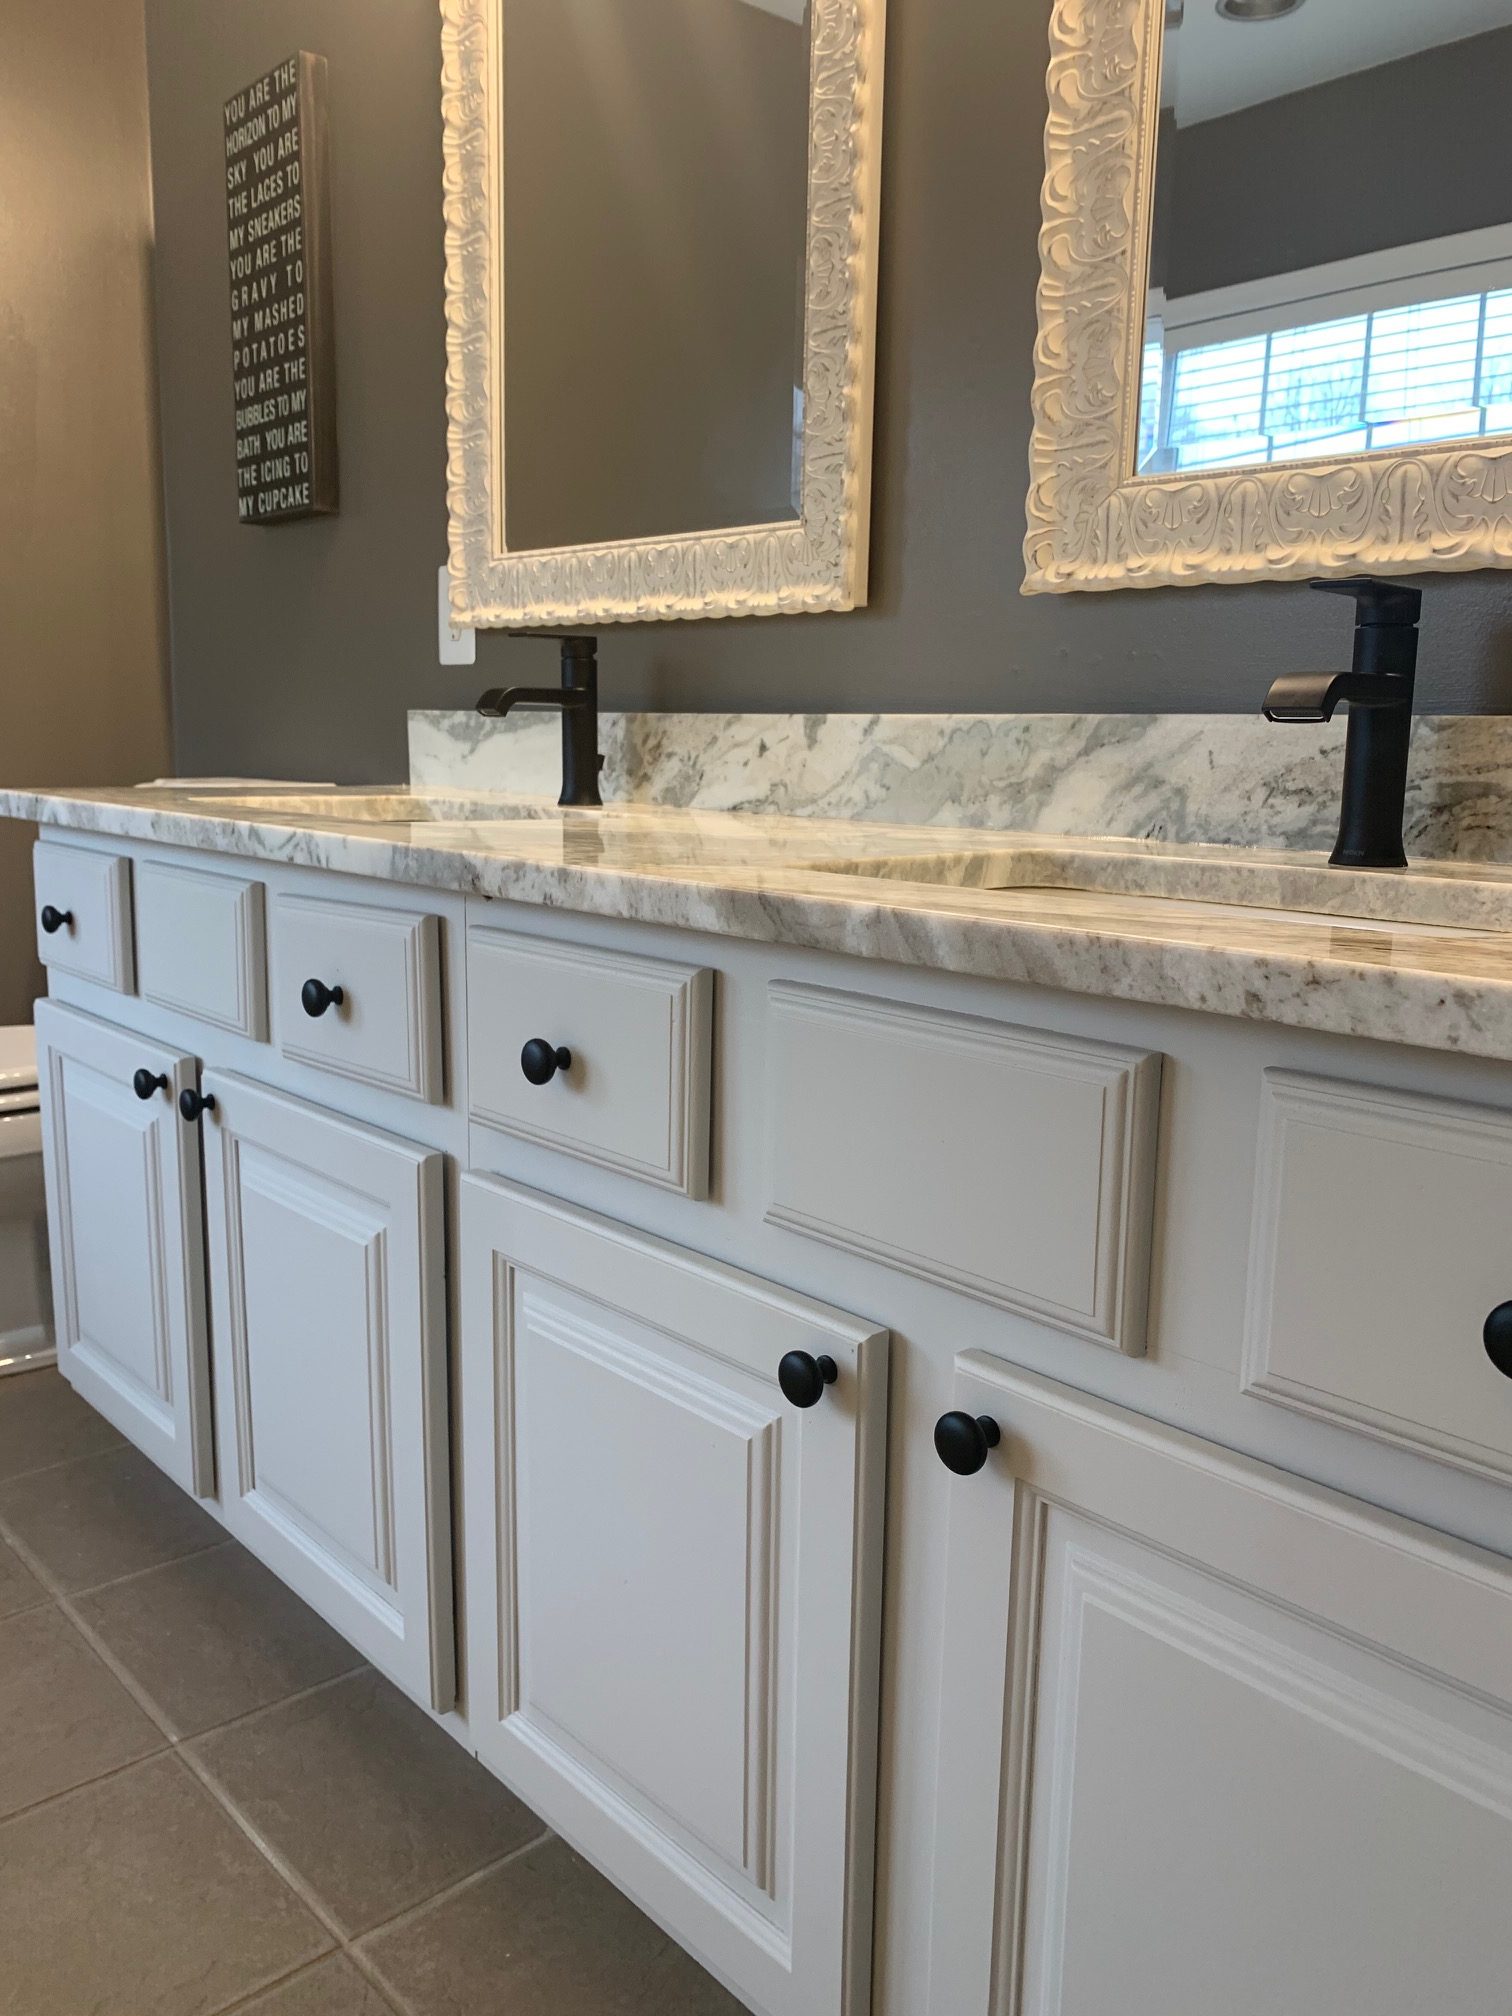
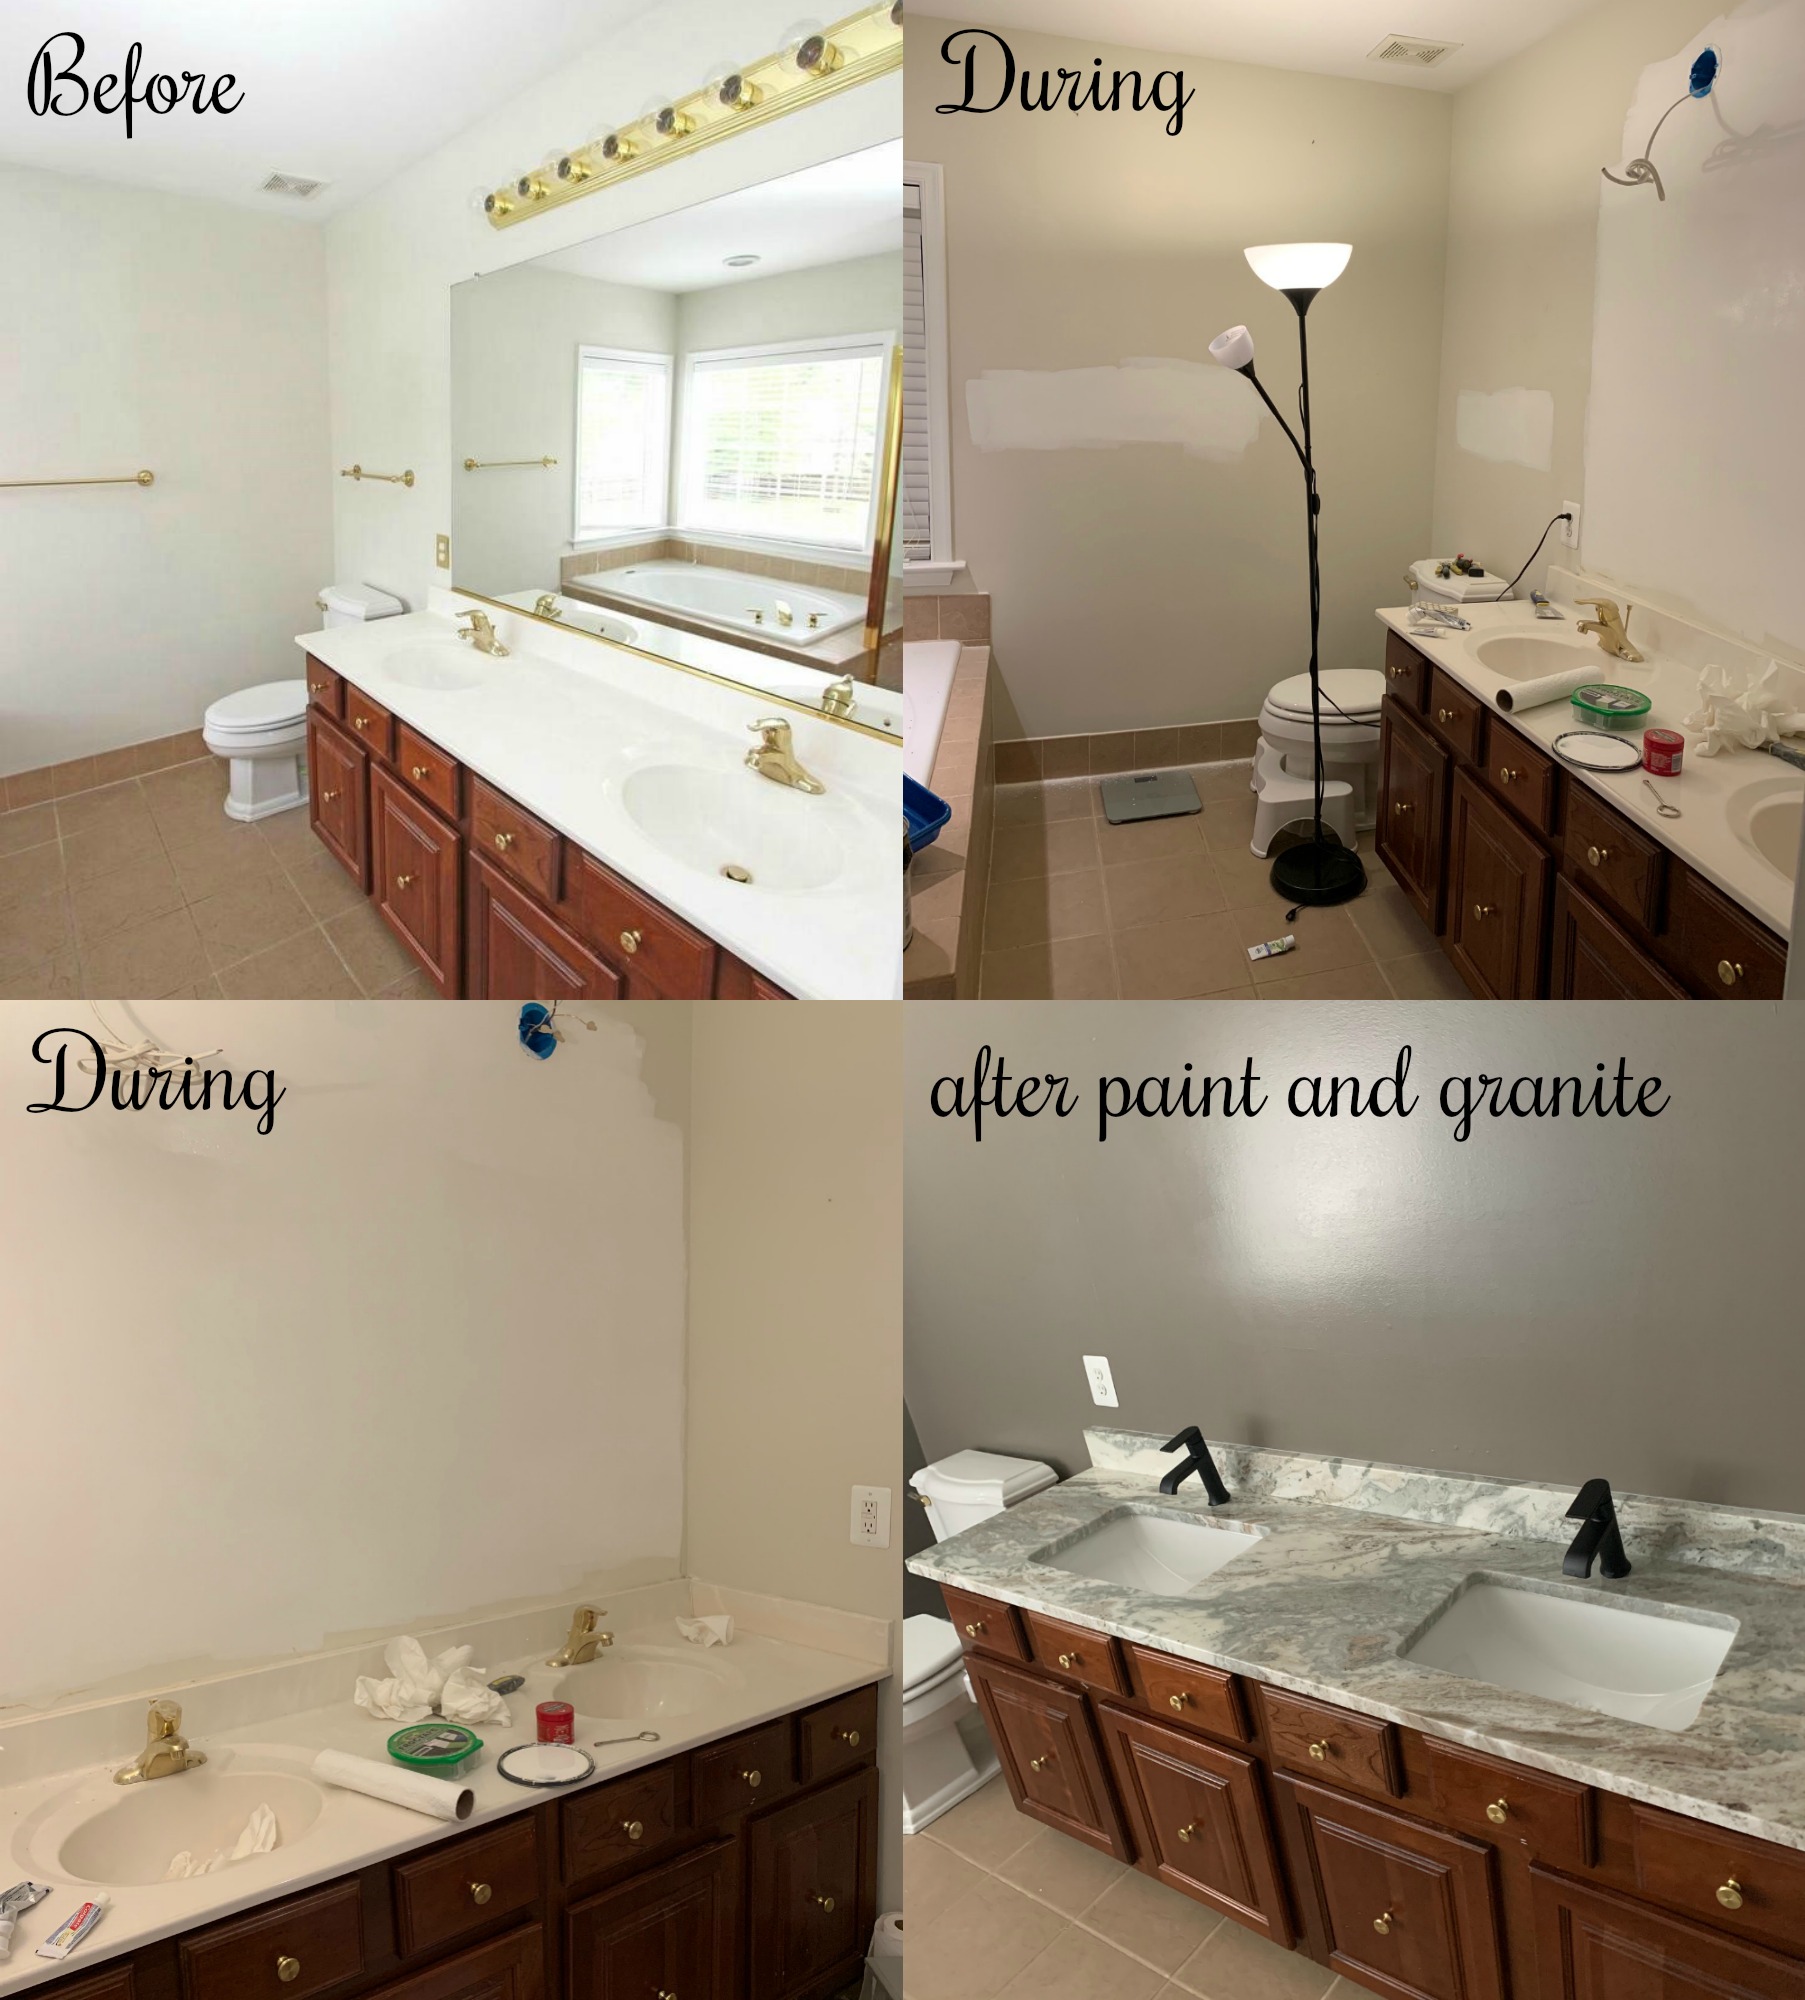
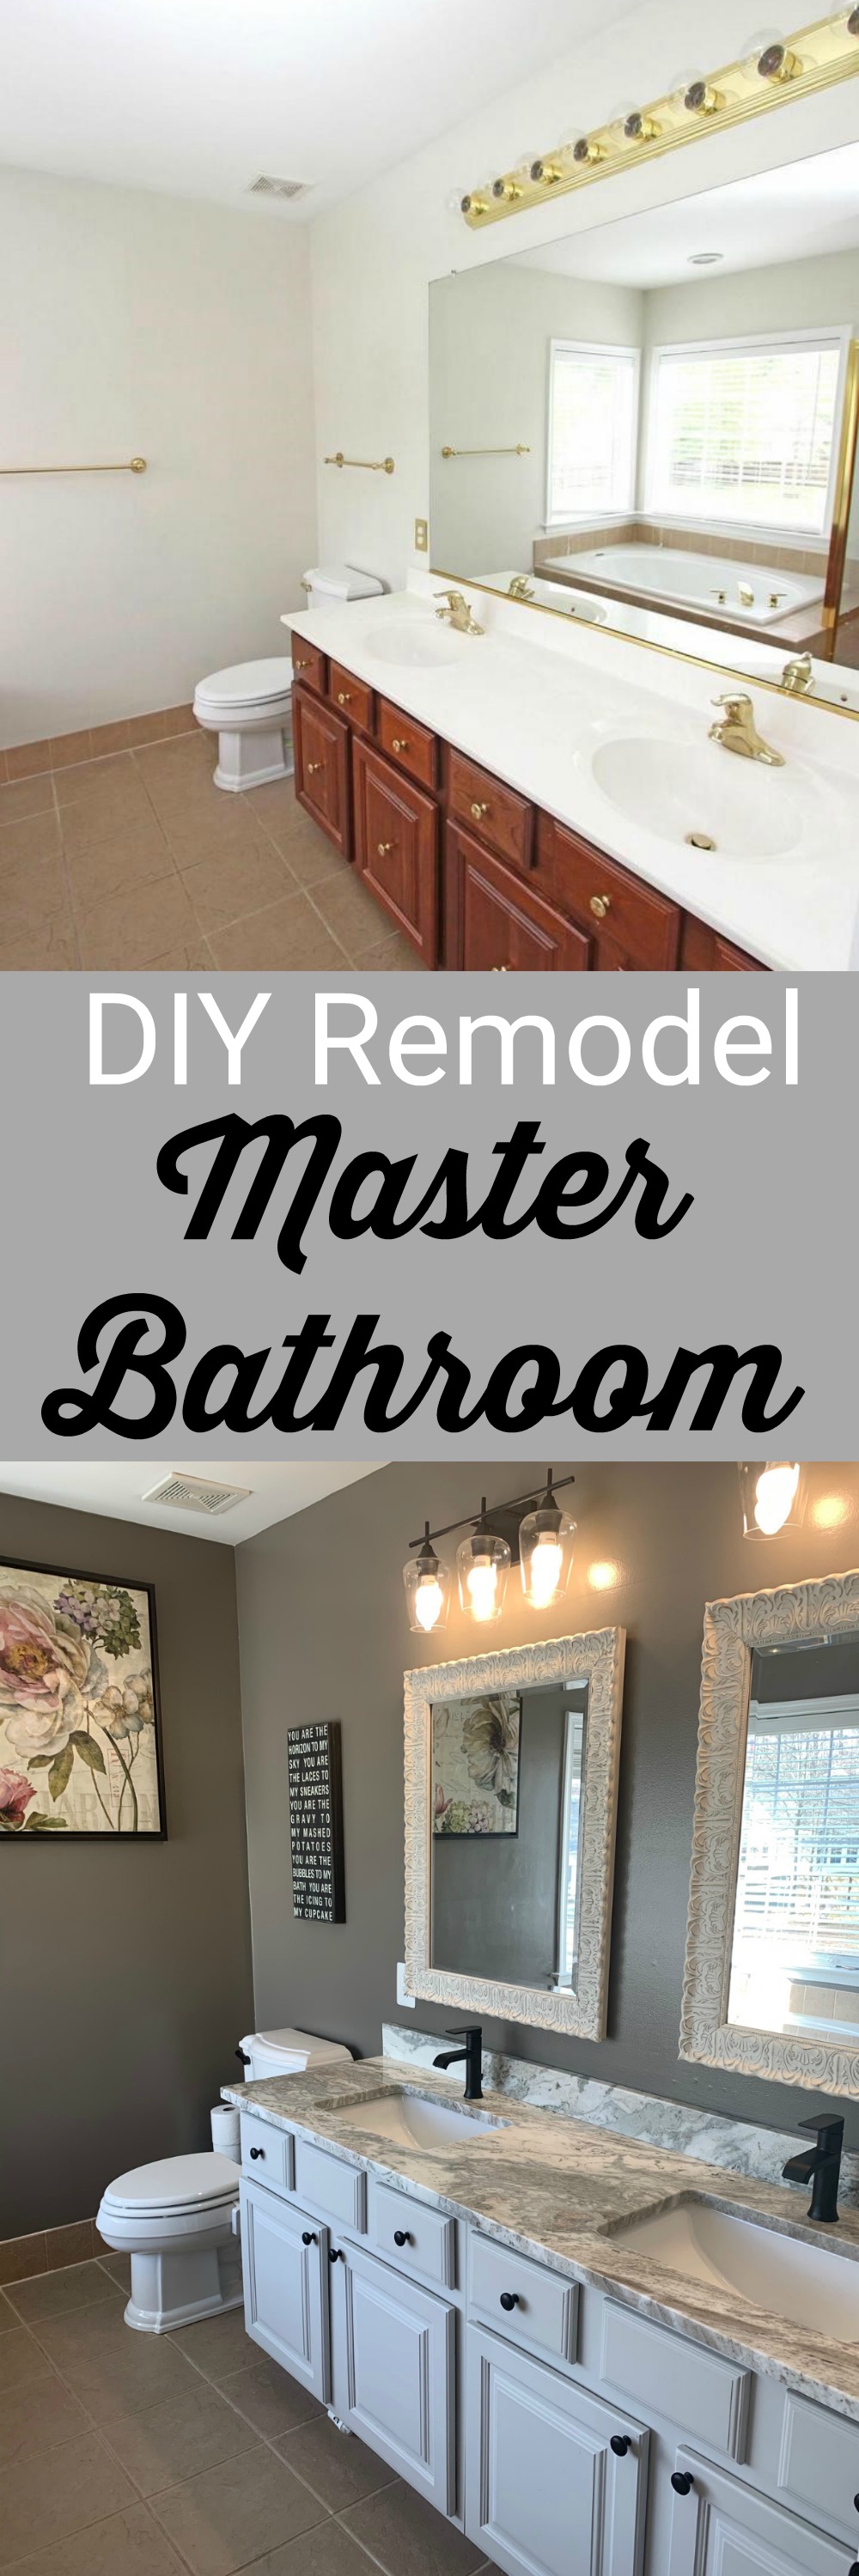
Our bathroom has been a long awaited project and I love the little changes we did for a BIG impact. Total cost of the project was right under $1,600. BIG shout out to my hubby for doing all the electrical and plumbing. Saves so much money with household labor. I wanted a deep rich sexy color for the walls. It’s Valspar paint in the color Seine. Mirrors are from Kirklands and such a great deal on sale, together they were $81. Faucets and light fixtures from Wayfair and both in matte black finish. Door knobs are matte black from Lowes. The granite color is Brown Fantasy from Erin’s Marble and Granite. Originally I was trying to get away without painting the cabinets, but when the granite was installed, it needed a pop of brightness against the dark wall color I did. Luckily I had paint in the garage already (yay free) so I went for it…
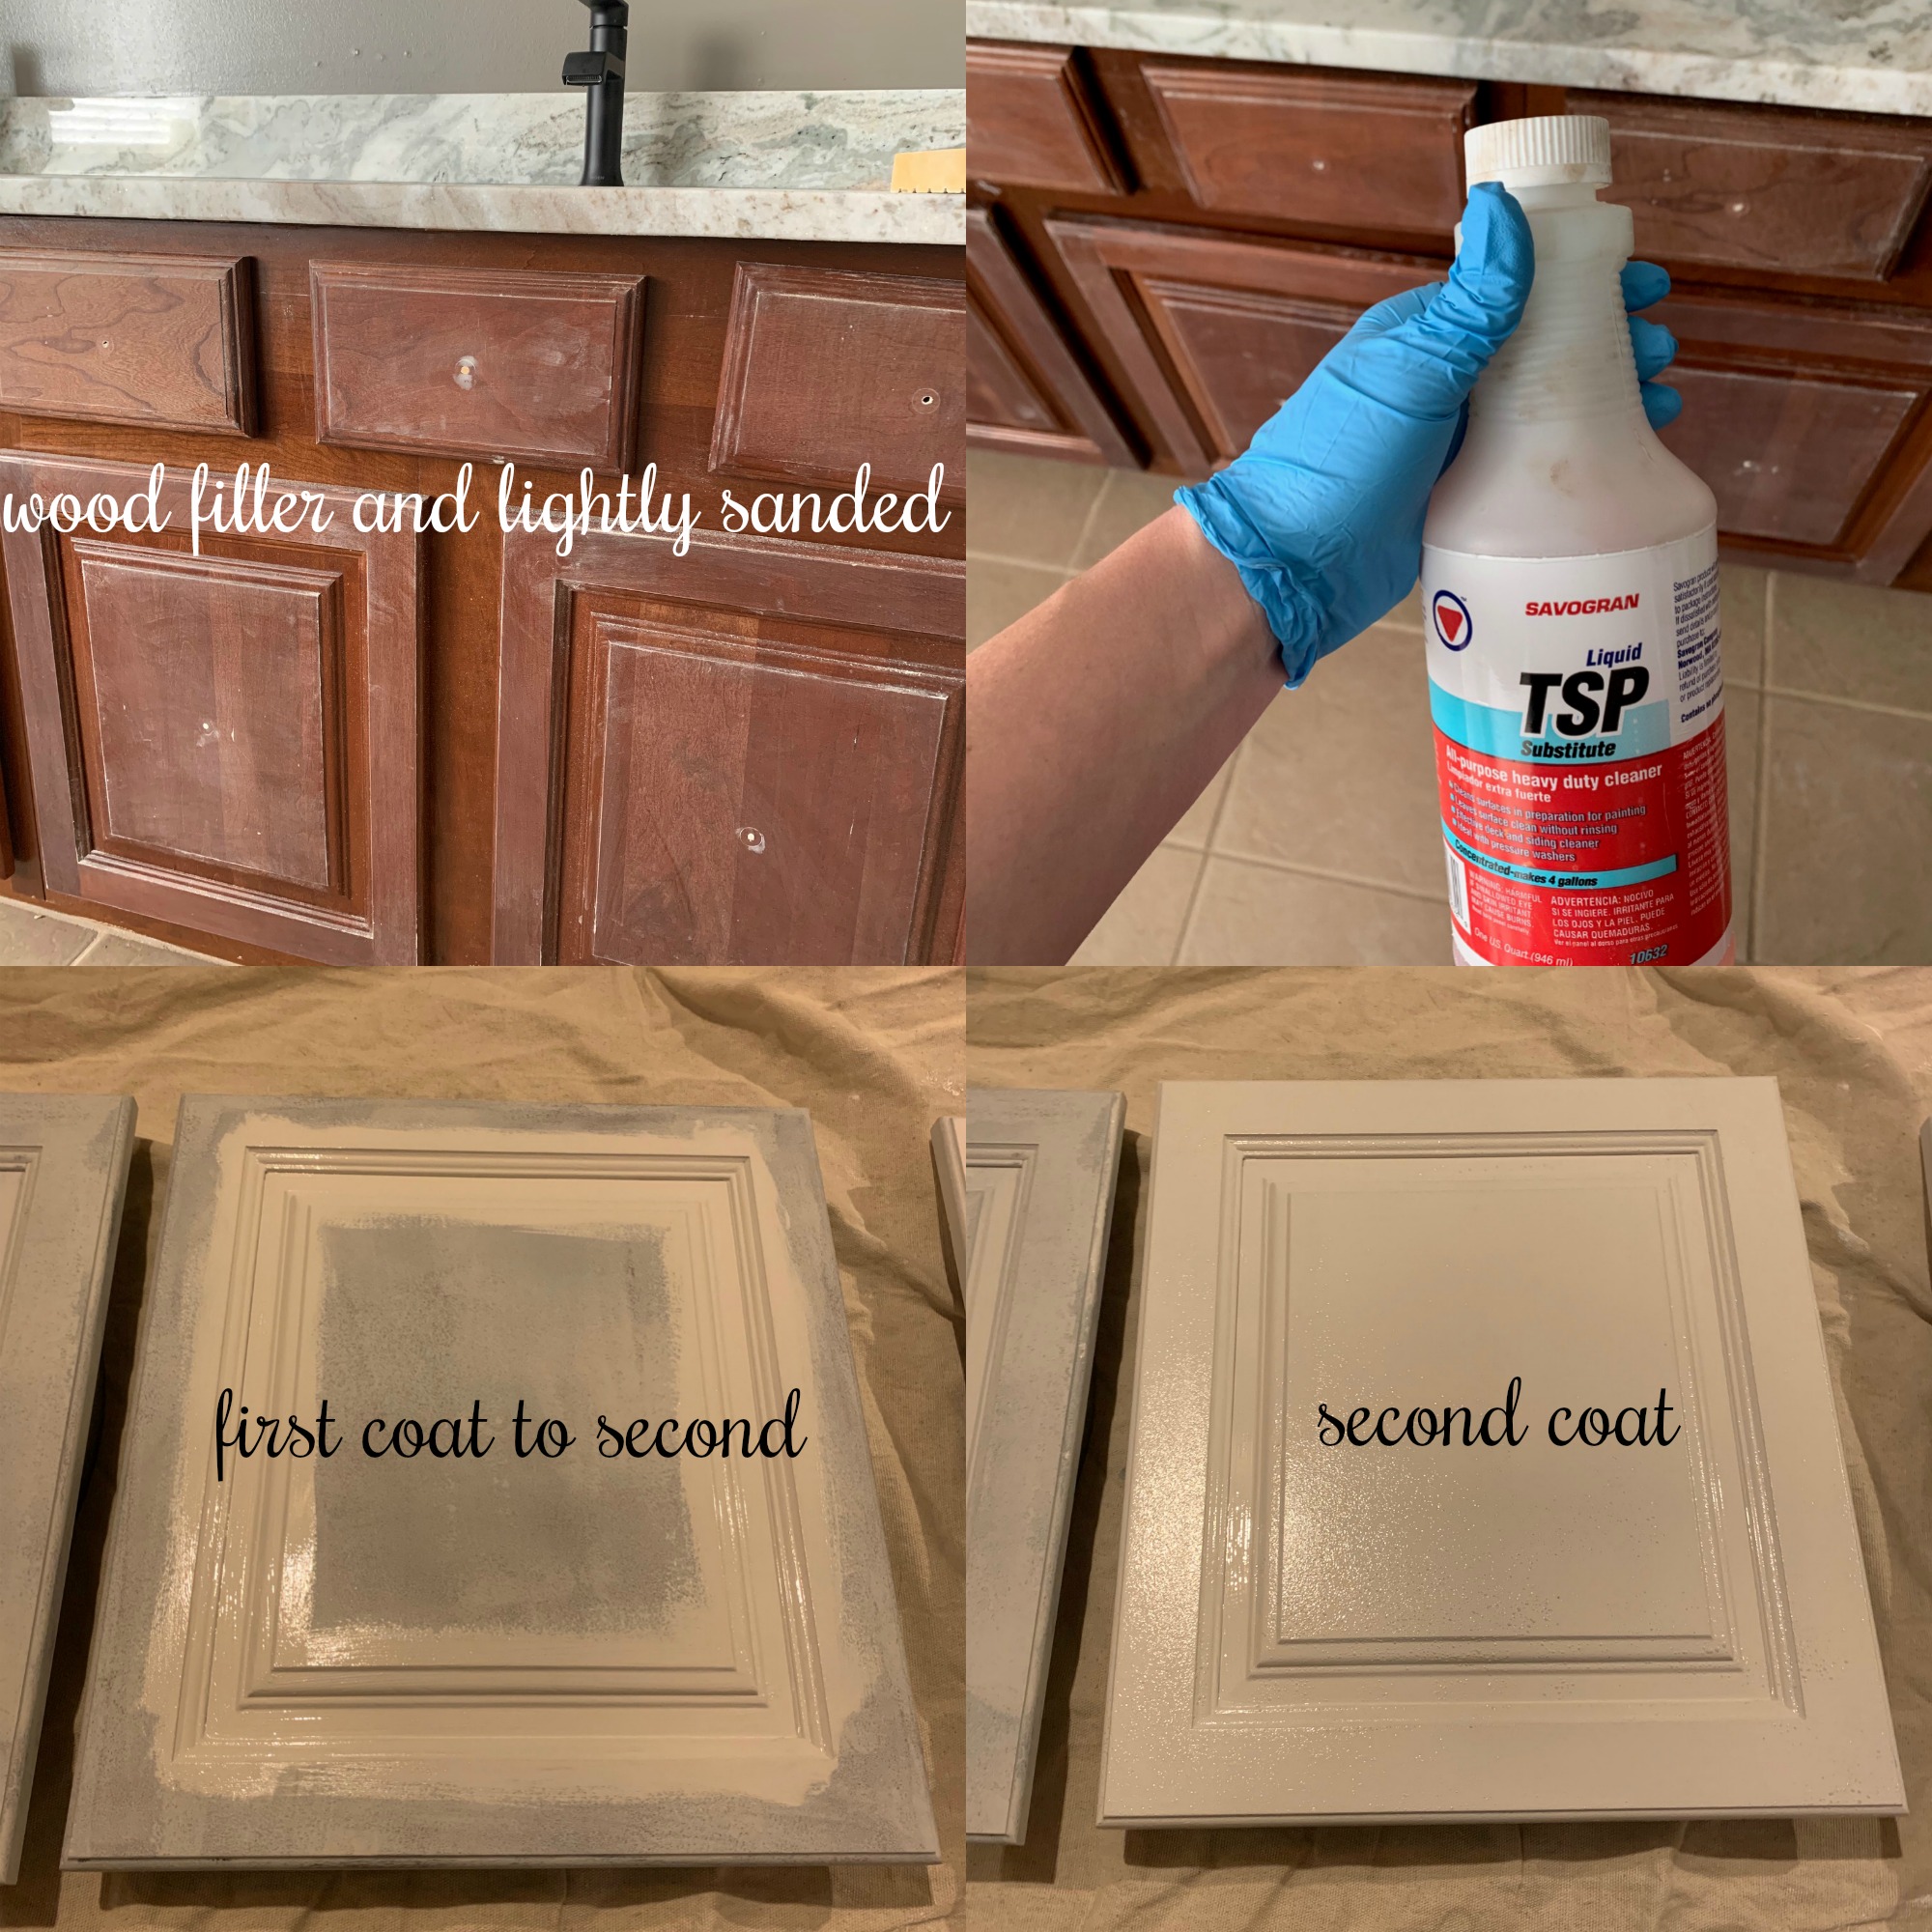
Lightly sanded, cleaned with heavy duty cleaner like Liquid TSP Cleaner, tape
, and removed doors to paint separately from frame. The drawers I left on and taped the back. This allowed me to paint both front and back of the drawers at the same time. Pick your paint (I used Valspar chalky finish paint
in ¾ kids gloves leftover from entertainment center and ¼ a gray color I found on clearance for $5). I only used a paint brush to apply to edges and places that I could not reach and everything else was applied with the small roller
. I did two coats on the back (inside) and three coats of front (outside) of the vanity waiting at least 8 hours between coats (which is why the refrigerator tip came in handy). After 24 hours of the last coat application, I had to finish with the sealing wax
applied via wax sponge and roller. This is the WORST part for me. I don’t know why I dislike it so much. I like the Valspar product but after 4 vanities now, I’m still liking the ease and durability of the Fusion Mineral Paint
. I never posted it but I used for my girls bathroom and because it’s all in one it’s quick and I don’t notice as much chipping.
Merry Christmas to me! This is all I really wanted and we finished it right before the holidays. Hope you all have the best holiday season and see ya in 2020!!!

Speak Your Mind