dresser turned out!!
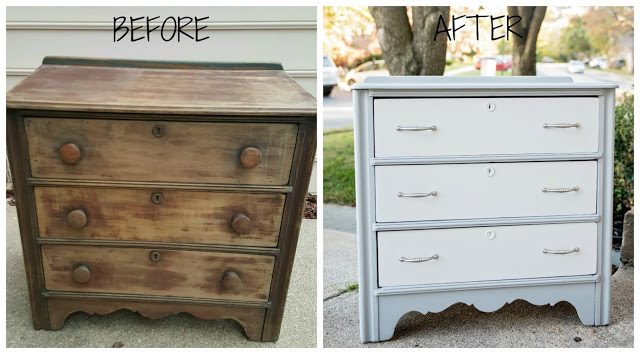
This beautiful family hand-me-down was in desperate need of
a makeover. My bestie, Kimberly, is totally glam, chic and perfect. So when she
asked me how to restore her grandparent’s dresser, I was totally up for the
challenge! She is now a true believer that old things can be just as good as
new 🙂 She
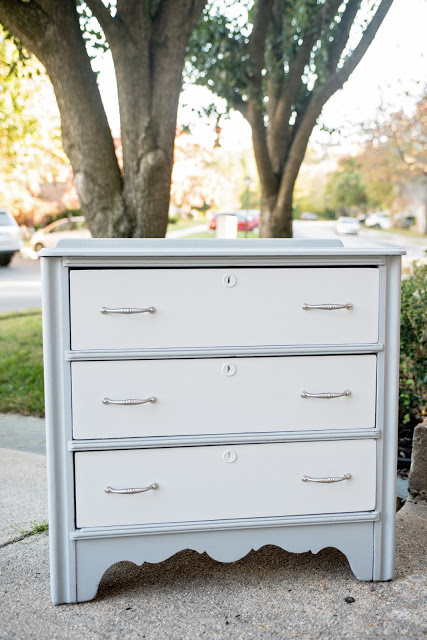
was thrilled with the results and I’m so excited she loves it in her home.
of your own!
-
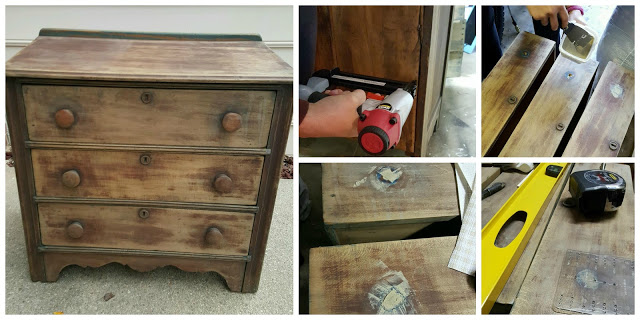
Start by examining your piece. Make it sturdy (this piece needed a little reinforcement on the backing with some nails) and sand any chipping paint.
-
Remove handles and drawers. Give the drawers a thorough wipe down inside and out.
-
If you want a different style handle (for this one we went from a centered one handle to a two hole handle), use wood filler and let sit overnight. Once cured, sand so you cannot feel the bumps and the surface is smooth. Then measure the new holes (we have this amazing tool). Drill the newly measured holes. Lastly, wipe you drawers down again to remove any dust. *These silver handles were a great find at my local Habitat of Humanity for $0.50 each!*
-
Start painting. You don’t have to have an expensive brush, just use something with long flexible (not too floppy) natural bristles or a flat brush for smoother look. See my post also about comparing chalk paints here.
-
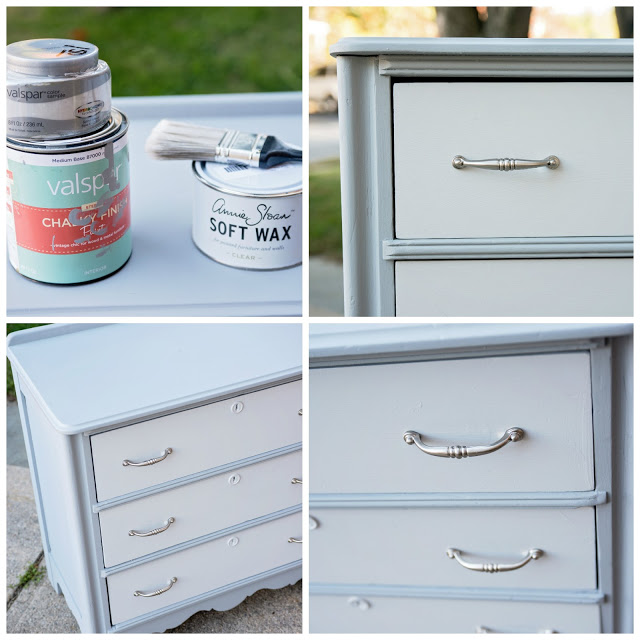
We used Valspar chalky finish paint from Lowe’s for the main body of the dresser (the darker grey). Although Valspar advertises 40 tintable colors, our Lowe’s was able to match a grey that Kimberly LOVED called Metropolis (tinted off the medium base). Then we just happened to be lucky enough to find 2 Valspar sample pots (just regular paint) of a light grey for the drawers.
-
I painted the body of the dresser and the inside of the drawers using the Valspar chalky finish paint. (2 coats with 24 hours drying time in between coats)
-
Then I made my own chalk paint for the outside of the drawers (2 coats with 24 hours drying time in between coats). Recipe upcoming 🙂
-
Once completely painted and 24 hours have passed from your final coat, it is time to wax. If you prefer not to have the sheen leave it off, but I do think it’s an important step for the durability of your piece. I used Annie Sloan since I had leftover from my Shabby Chic dining table.
-
Screw and handles and replace drawers into their place and DONE!


Can I say — GORGEOUS!!!!!! Absolutely love this.
Thrifting Diva
http://www.thriftingdiva.com