Monday, March 13, 2017

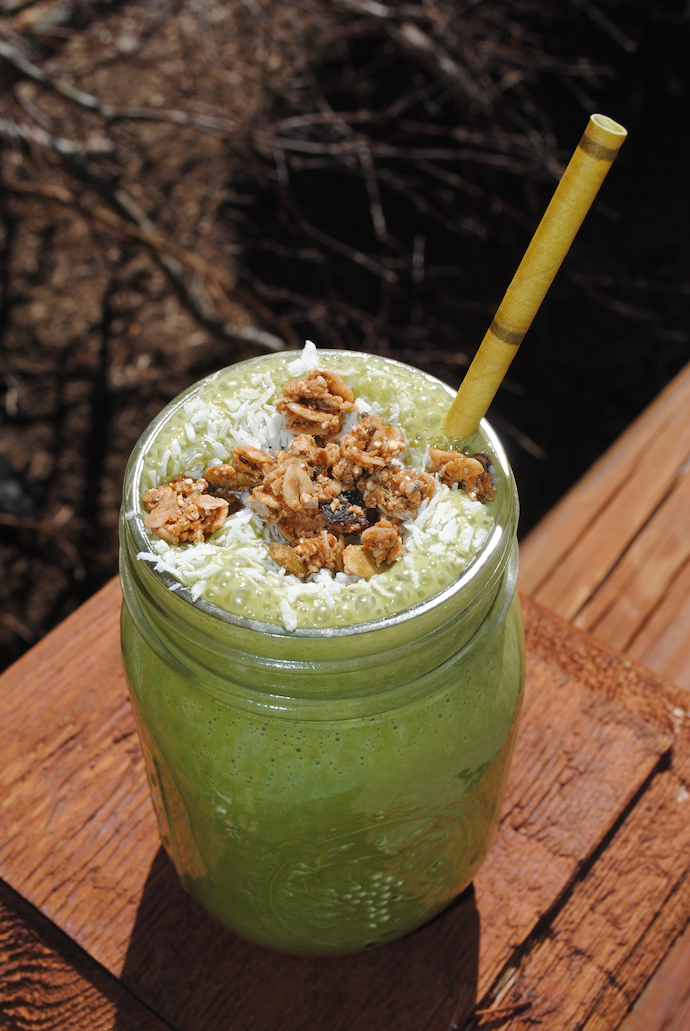
Post-Workout Matcha Superfood Smoothie

It’s been 5 months since I completed my Whole30 and Bikram 30 Day Challenge and I’m starting to lose any energy and posture progression I gained (and I’m sooooo bloated…ughhh). I was incredibly proud of myself with combing those challenges during October. I completed 26 out of 30 Bikram yoga classes and ate 80% Whole30 (weddings, social events, and not being able to fully kick my coffee half-and-half decreased my full commitment), sooooo I was in desperate need of a pick-me-up!
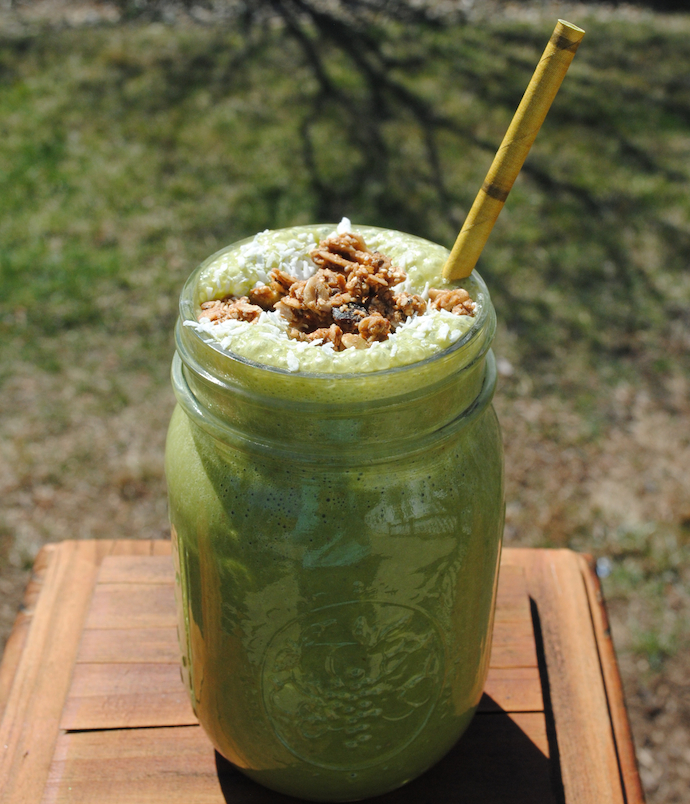
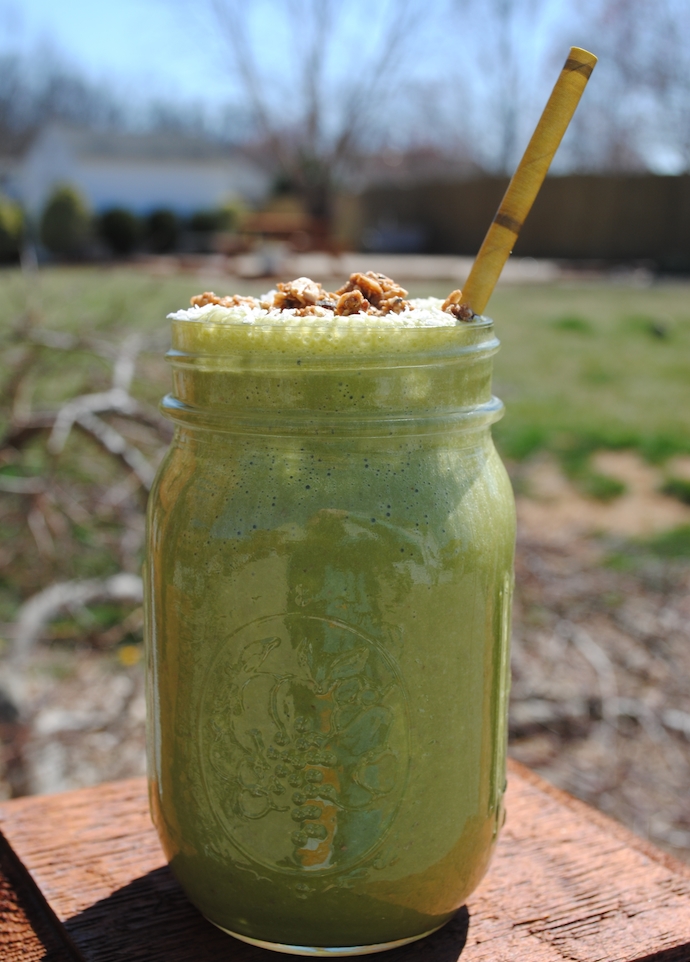
I love smoothies for breakfast or after a hard workout like hot yoga. For those that have practiced Bikram, you really don’t feel like a huge meal afterwards, so guzzling down a protein packed smoothie is so satisfying. I know Whole30 does not recommend this in their eating plan, but for me it is the perfect way to refuel after a sweatsesh. It’s also a perfect meal replacement for times like this where my stomach is just not liking what I’ve been eating.
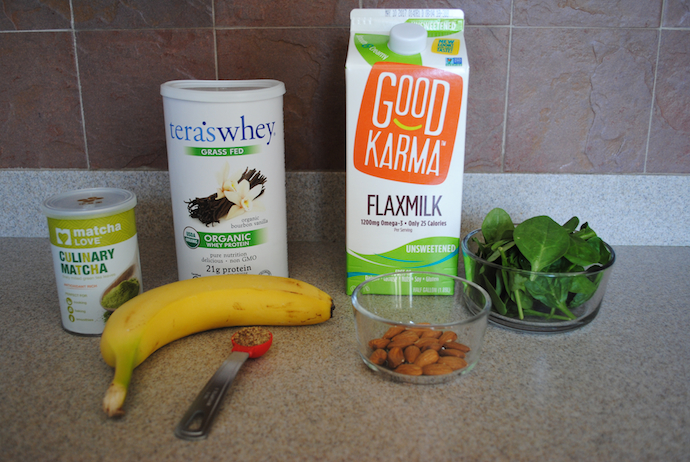
This smoothie combines my new obsession of matcha tea and nut milk. Matcha Green Tea is a high-quality powdered green tea. It is packed with antioxidants, slight caffine boost, and is said to help with memory, concentration, calmness, endurance, energy levels, detoxification, and the list goes on. I LOVE a great iced matcha latte with almond milk. It’s so refreshing with a little boost of caffeine for an afternoon refreshment, so I thought, why not start adding to my smoothies? I have been using Good Karma Flaxmilk (unsweetened) lately because #1 it’s convenient (and has been on sale), but I also like the taste and it’s just provides just enough body and creaminess to the smoothie without a lot of calories (only 25 calories per serving). If I have the time I will also make my own almond milk and use that in my smoothies too. Here are the rest of the ingredients:

Post-Workout Matcha Superfood Smoothie

  • 1 scoop of protein – you can use any CLEAN protein you like here (I emphasize clean because have you ever read the back of some of these protein tubs?!?! I personally like whey protein the best, but I also have a vegan protein I use)
  • 1 cup nut milk
  • 1 cup fresh spinach
  • 1 banana (I only had a fresh one, but I highly recommend freezing your bananas in an air-tight container for smoothie prep – it provides such a richness that really nothing else can. For days you want to limit sugar, only use ½ banana)
  • 3-6 ice cubes depending on desired thickness
  • 1 teaspoon of Matcha Green Tea Powder
  • 1 teaspoon of ground flaxseed (you can also add chia or hemp seeds)
  • About 10 almonds (optional – I only do this as a little extra protein after a hard workout)
  • optional – garnish with granola and unsweetened coconut flakes, you can also make this a smoothie bowl!
What I also love about smoothies it’s something so easy you can make in a rush or prep the night before in a portable shaker. I have this single serve blender system at work, so I just prep everything the night before and store it in the freezer and then pack to bring into the office to blend up whenever I’m ready. I also give some credit to smoothies for getting some baby weight off because sometimes it’s all I had the energy to make and ability to drink down in between juggling being a new mommy.
I’m starting my 3rd week of Pure Barre. I’m so surprised how addicting this exercise program is and can’t wait to share my full experience after my 5 weeks of unlimited classes ends. I will have to find a way to figure out a way to pay for classes after the amazing grand opening deal they had, because it really is a fabulous toning/core-strengthening program.

Hope you all have a great week and bundle up for the impending snowstorm!!
Monday, February 27, 2017

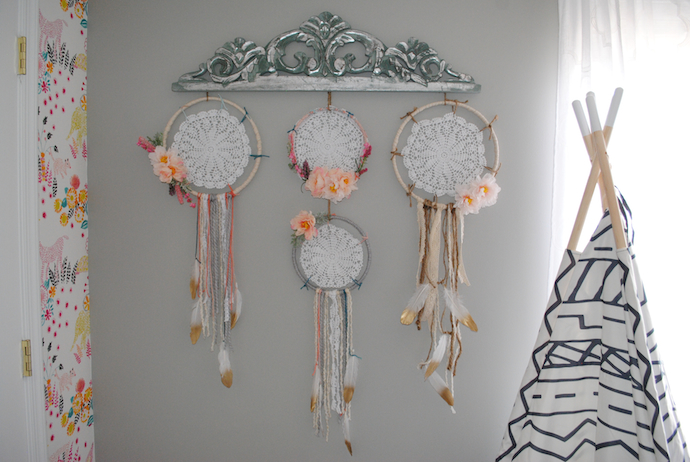
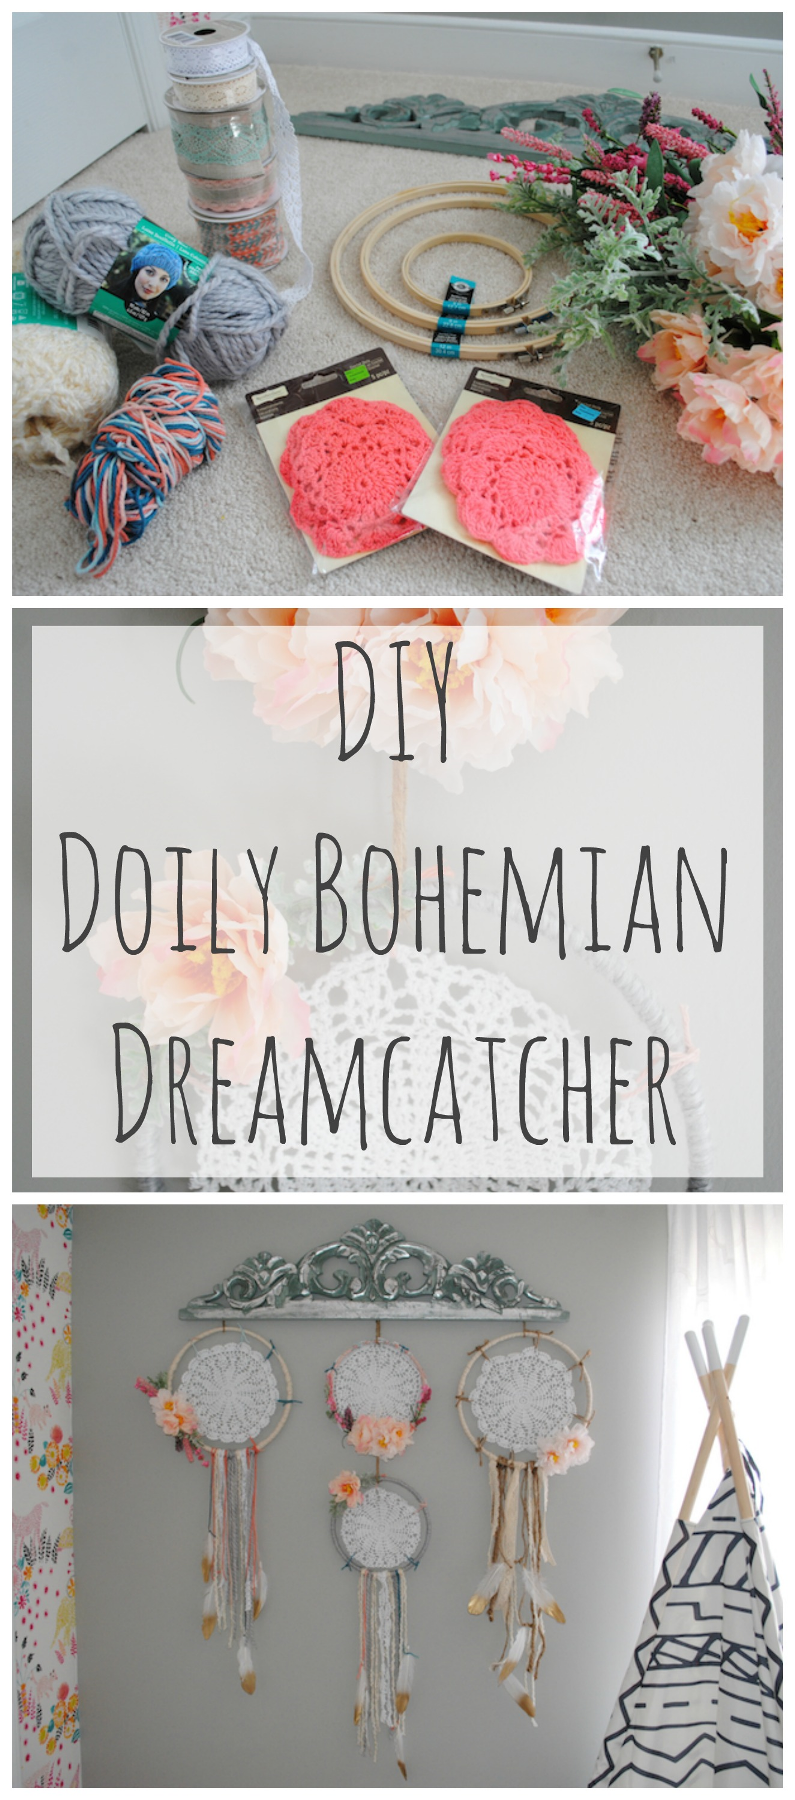
DIY Doily Bohemian Dreamcatcher

Hope everyone had a fabulous Valentine’s Day! I took Hartley to get her nails painted for the very first time and she LOVED it. She got one hand pink and one hand red with sparkles on-top (of course). If you’ve been following my blog for a while I am superstitious and have to have my nails painted OPI Big Apple Red for Valentine’s Day, since my first date with Willie (13 years ago, oh my gosh) he picked me up from the nail salon and I had that color and we’ve been going strong since. Hartley was so proud and showed EVERYONE her nails at dinner, ahhh she melts my heart.

I’m ecstatic for this dreamcather project to be done because it means I’m that much closer to finishing Hartley’s big girl room! I’ve been procrastinating finishing her room because she is so good in her crib that I kind of want to leave her in there forever (can I?). And as a mom, I feel like leaving the crib is a HUGE milestone, that I may tear up for a bit.  This was the last major piece I wanted to finish before putting everything on the walls. Thanks to Pinterest I had some fabulous inspiration and gathered numerous ideas from different bloggers to create my unique take on the DIY Doily Bohemian Dream Catcher.

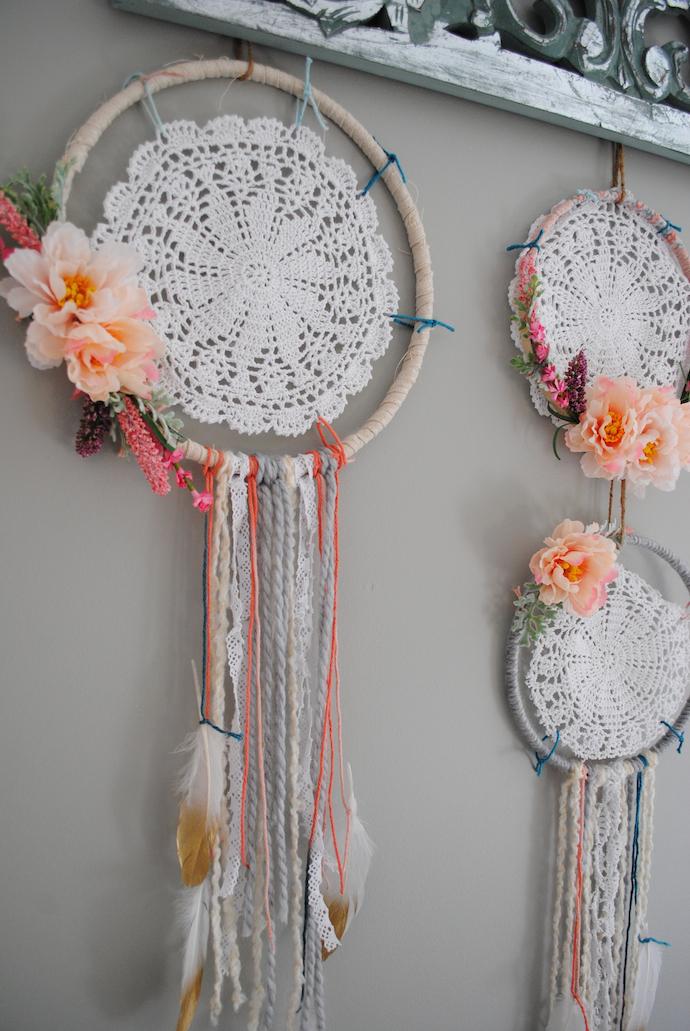
For mine, I incorporated store-bought doilies (you can use vintage ones if you can find at an antique market or thrift store, I even thought of using my grandmother’s handmade ones, but thought lightning would strike me if I did that!), flowers, lace, ribbon, and feathers (I re-used the feathers from my Thanksgiving tablescape). I also saw lots of people using wood as their top hanging piece, but I found this beautiful molding at the At Home store that I thought would make a better topper for the boho/vintage look I was going for. You also don’t need this piece if you are just creating a single dreamcathcer. Just follow the tutorial and stop when connecting the multiple embroidery hoops.

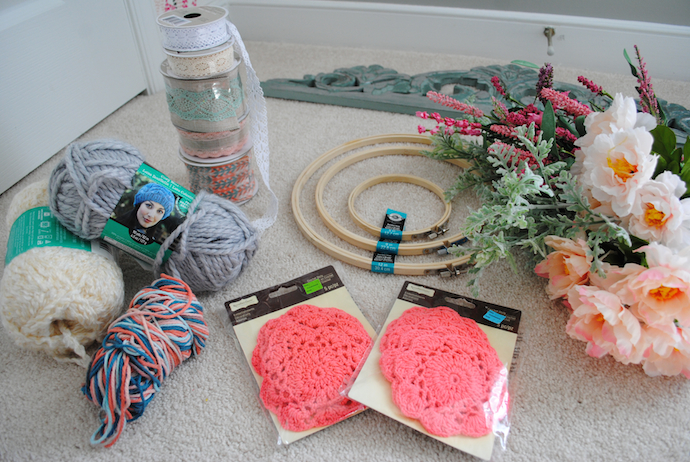
Here is what you will need:

  1. Wood/Molding Topper – mine was a little pricy at $24.99, but you can slash this cost using wood or twine
  2. Embroidery Hoops(I bought 2″ for the pink doilies but didn’t end up using, so for what I created I used 9-Inch and 12-Inch)
  3. Doilies (I found the 2” pink ones on clearance at Michaels for $2.99 for 4pk (I didn’t end up using these but have mini ones for a gift or something) and then ordered the 4pc- 9 Inch White Doilies ones for $12 – I have seen these at the thrift but I did not have luck on my recent trips)
  4. Torn fabric to wrap around hoop (you can use ribbon but that would get expensive, try using an old drop cloth, pillowcase, linen shirt or tablecloth) – I used a mix of cut ribbon and a dropcloth by cutting thin long pieces
  5. Yarn (thin for attaching doilies and thicker version for hanging pieces)
  6. Ribbon (go straight to the $1.99 bin of ribbon first) – Michaels has a fabulous selection
  7. Hot Glue Gun and Glue
  8. Artificial Flowers (optional)
  9. Feathers (optional)

Total Cost was about $65 (like I mentioned I went ALL OUT on mine, but you can make a version of this much cheaper but excluding items and/or using a different hanging method)

How to create:

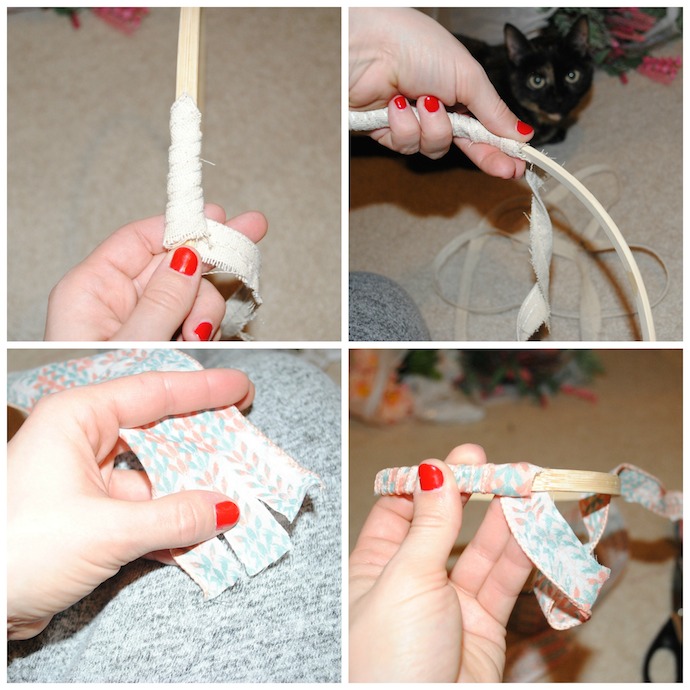
  1. Start with wrapping all the embroidery loops with the torn fabric , glue the start and try using long enough pieces to make it fully around the loop, then glue the end.
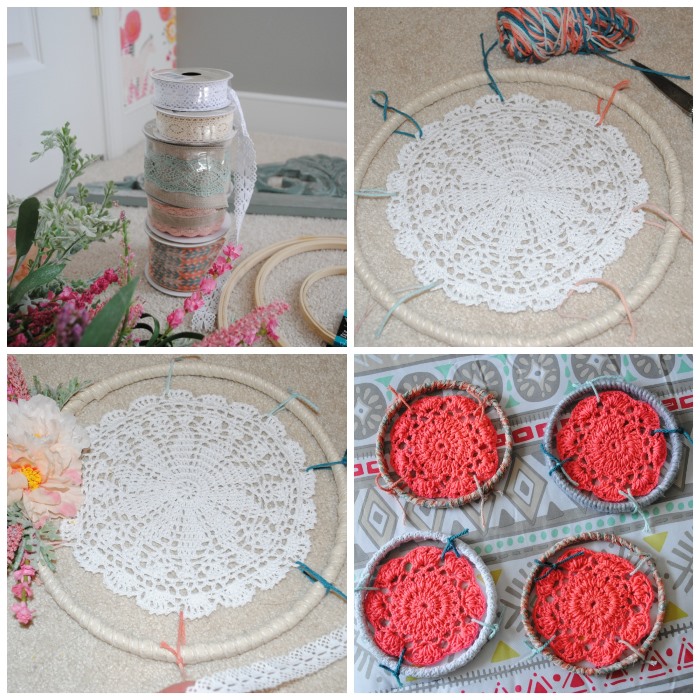
  2. Once fully wrapped, start connecting the doilies using a thinner yarn on the edges. Just loop the yarn through the doily hole and knot on the edge. For the lower hanging dreamcatcher on the 9″ loop, I cut of .5″ around the edge to make it smaller then the one on-top of it.
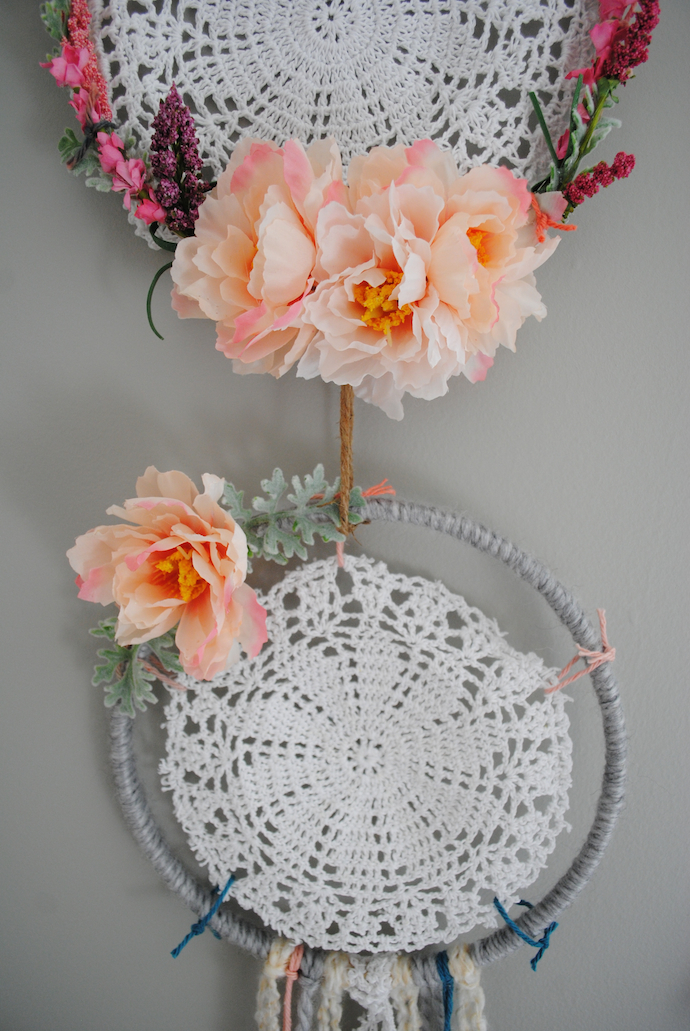
  3. If you are doing a multiple version like I was, map out your placement before you add the embellishments. You will not want to add hanging embellishments for those that are connected at the top. For those that have the ability to get hanging ribbon, and lace…start adding by simply cutting a long enough piece to fold in half (not perfect) and attach by a loop-pull-through over the hoop on the bottom. Add the feathers by just using the ends of the twine or yarn to make tight knots. Add flowers by disconneting the stem and cutting off the hard green piece (you will know what this is once you have them) and attach to the loop with hot glue.
  4. Once all the dreamcatchers are completed, finish by connecting the individual ones to connect to one another in the design template you created. I was orginally going to use the small hot pink ones, but didn’t like them, so I just had to connect one.
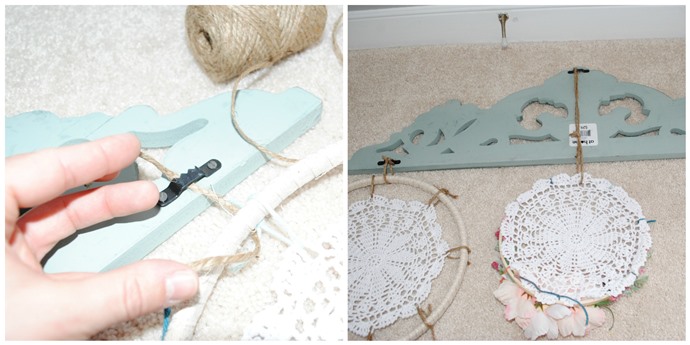
  5. Finally connect the dreamcathers to your molding, I lucked out because there was already hangers on the back so I just connected the the three top dreamcathers with twine and knotting around the hangers, but you can wrap around, add nail hangers, or glue on.

Finally make your nail hole on the wall and voila! A beautiful boho chic dreamcather any girl would love. I love the way this turned out and super excited for her room to be done since it’s been such a pouring of love and sweat to make her room just as perfect as she is (cheesy…I know). Hope you enjoy creating one of your very own!

<

Tuesday, February 21, 2017

DIY Gallery Wall Inspiration

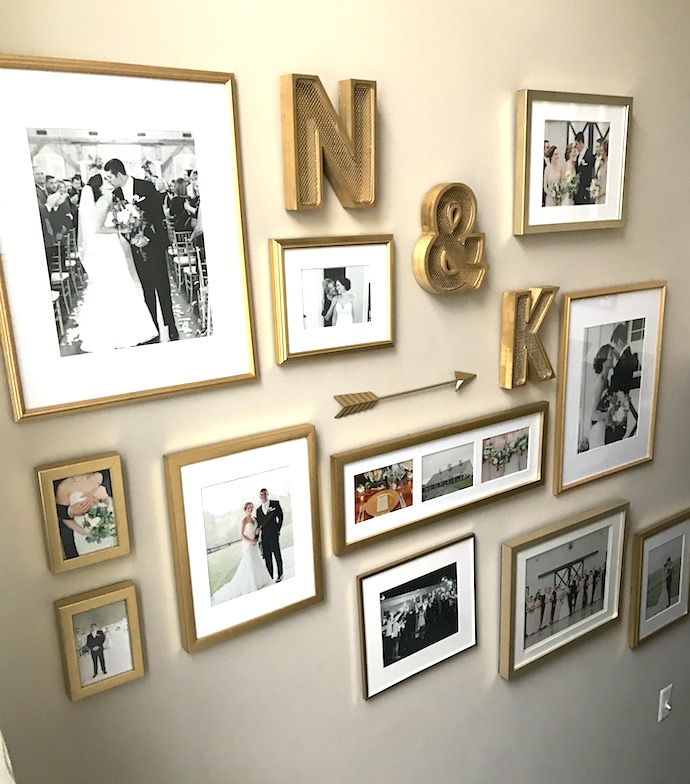
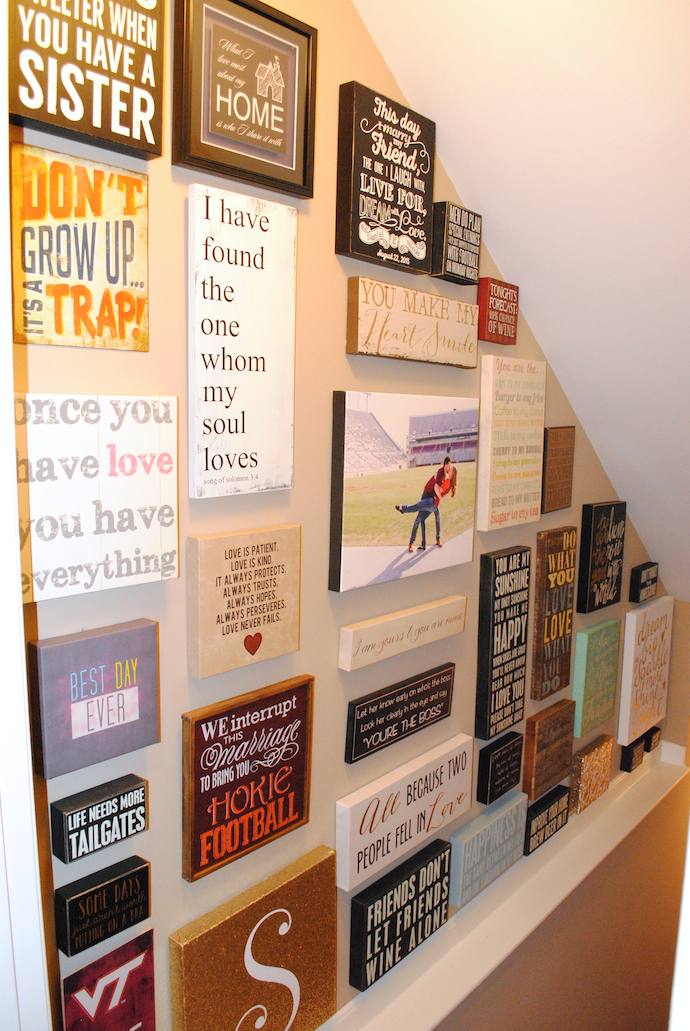
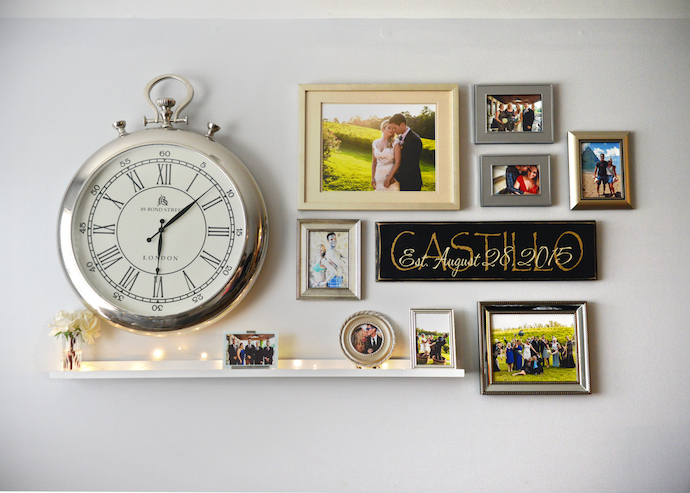
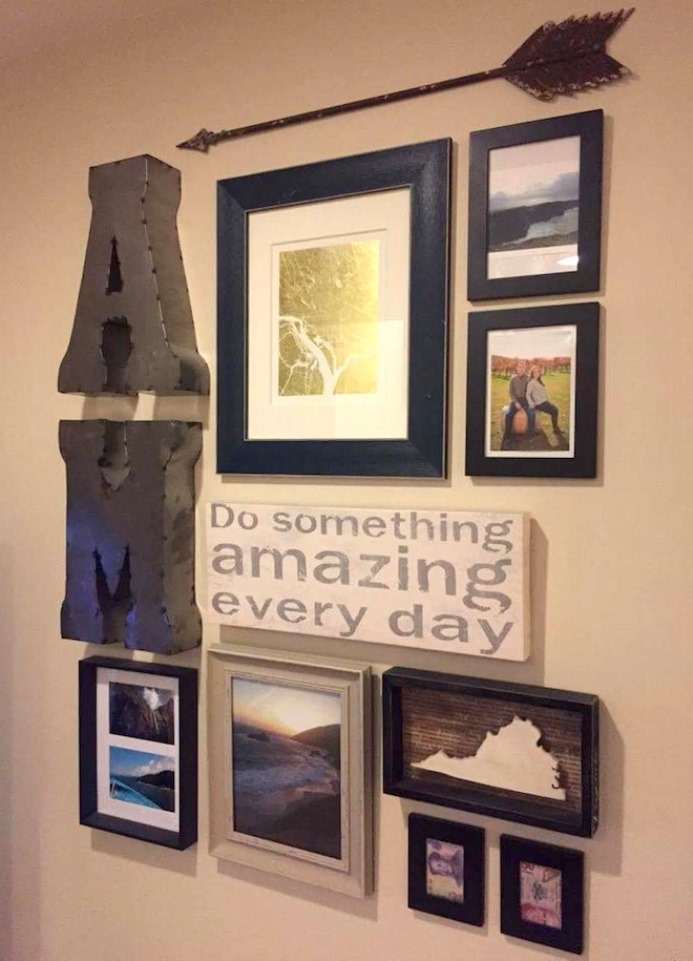
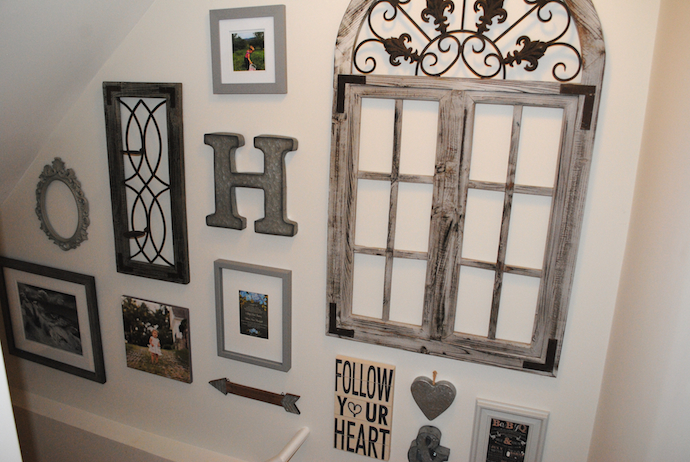
I’m OBSESSED with gallery walls right now and lucky for me I have some fabulous friends that have caught onto the trend and made some amazing displays themselves! Here are some of my favorite DIY Gallery Walls that my creative friends have made! Excuse the lighting in some of these photos…staircases seem to be a great spot for gallery walls, but not so great for natural light photos!

Coastal Hues

Gold All The Way

Wall of Quotes

Vintage Romance

Wedding & Honeymoon Highlights

Adventure Together


Rustic Glam

Gallery of Initial

My gallery wall tips:

Make it personal –

  • Should be a reflection of you and your family
  • Time to incorporate canvas or framed photos (wedding, newborn, family vacation), monograms, quotes, DIY project

Mixing scale –

  • Use all different sizes and shapes
  • Find a few anchor pieces that will serve as main focal points
  • Once you determine your focal pieces, start building your wall around them

Layout –

  • There was a mix of approach for this, some carefully laid out each piece and created a mock wall with paper and tape, and others just completely winged it
  • If you are comfortable with what you have in your head, go for it, otherwise take the time to lay it out before nailing
  • Don’t worry about spacing or making everything line up

My final tip – the painters tape trick for hanging items needing more than one nail…GAME CHANGER

  • If your photo is larger it will probably need a nail on each side, for easy measuring for nails simply apply blue painters tape across the back of the photo, poke holes in the center where the nails should go, remove the tape from the back and place on your wall where you would like to hang, finally nail where you made the holes and remove tape and place photo up…viola!

Have you created a gallery wall? What was your inspiration? Have some photos you would like to share? Email me (address in About section)!

I’m working on a mancave/sports gallery wall, so be sure to keep your eye out for that on my Instagram page!

Thursday, February 9, 2017

Military Inspired Look

For not being the biggest sports fan, even I could appreciate the excitement and anticipation for the Super Bowl. We had a birthday/Super Bowl party, which was epic! Great food, friends, and some fabulous wagers and bookie skills made the party so engaging for everyone. Oh and what a game?!?! Made overtime history and down to the very last second had everyone on the edge of their seats…what a comeback!

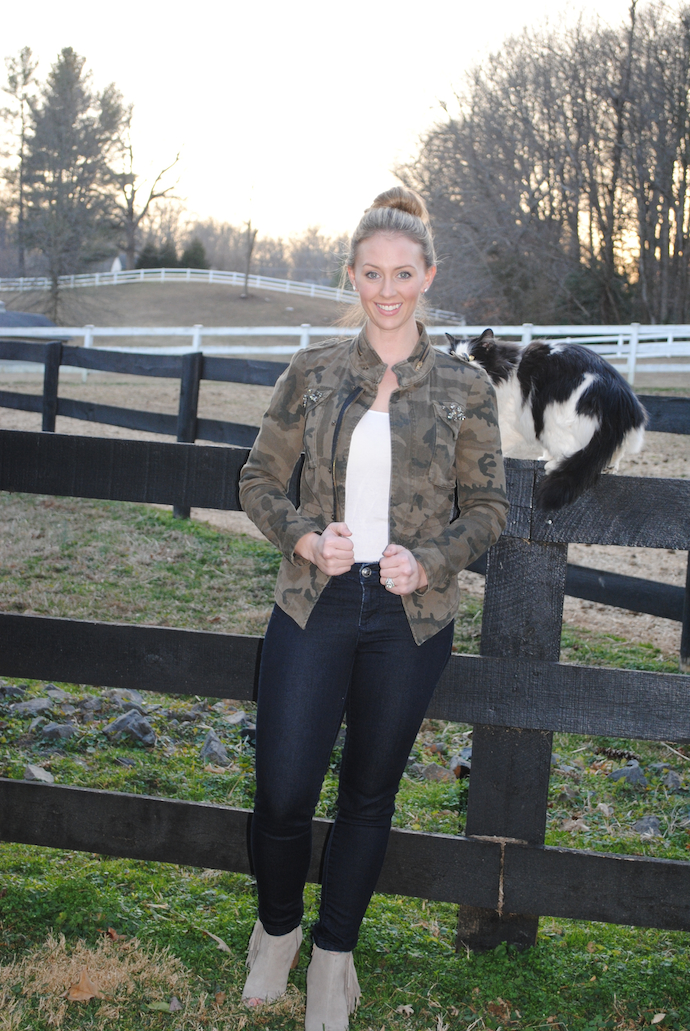
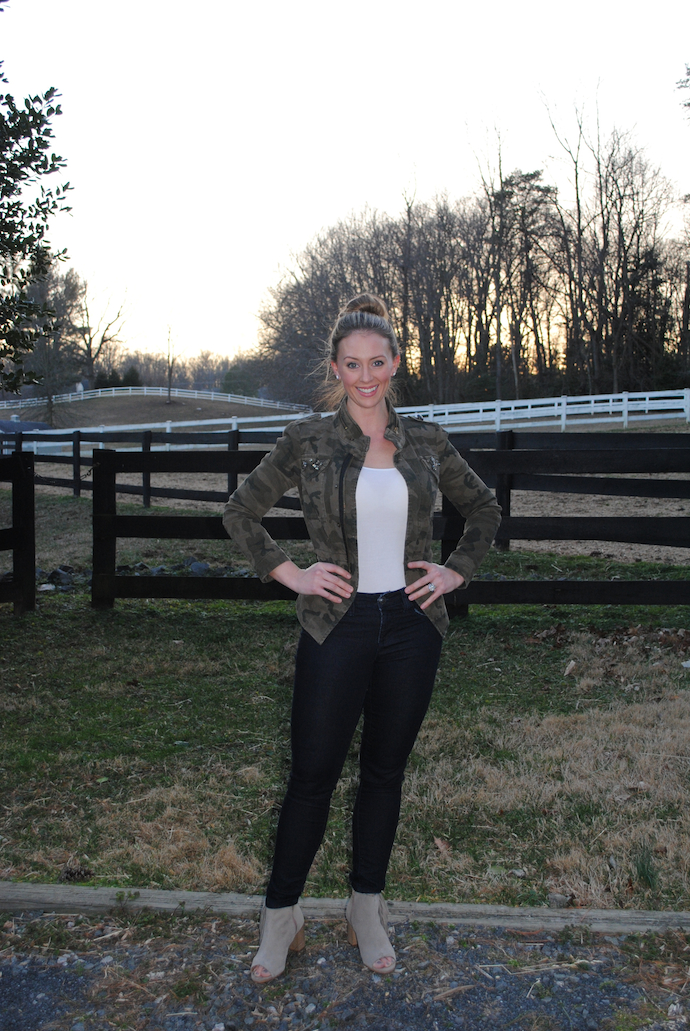
OK ok, enough sports. My fabulous outfit was the biggest touchdown in my mind 🙂 I found these BRAND NEW (with tags) ELLE jean leggings for $6 and this stunning embellished military ZARA jacket for $9 from my fave thrift store. The heels were a clearance of a clearance from $49.99 to $14 at Marshalls. Combining the sleek jeggings, white tank, and adorable fringe heels was a great way to get the military inspired look but in a feminine way…if I do say so myself 🙂

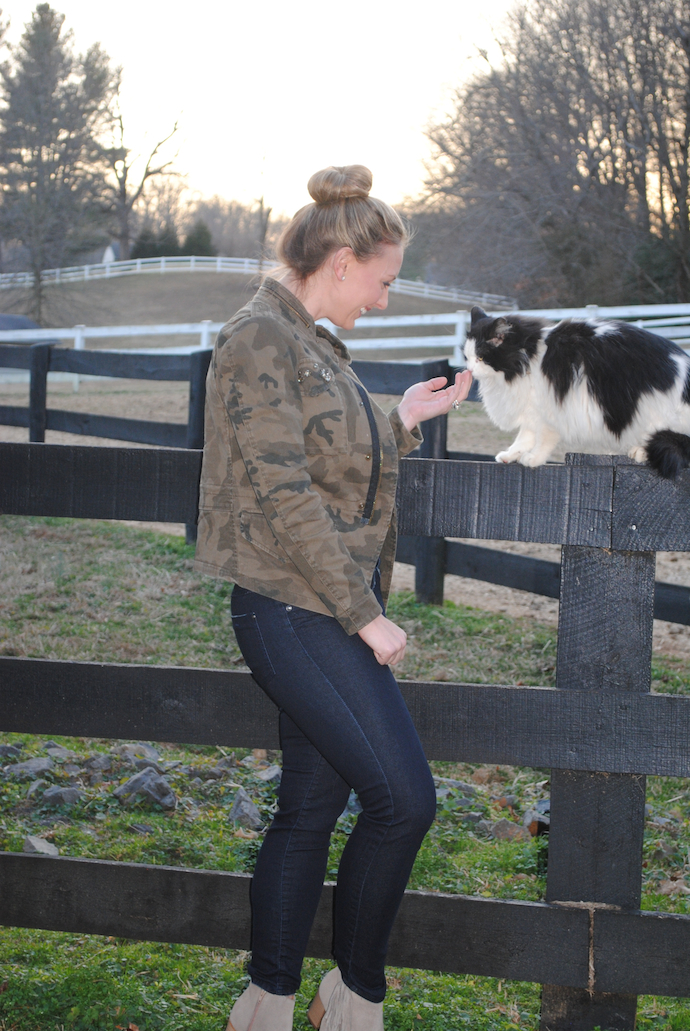
I was so embarrassed trying to snap some photos before the party and trying to beat the sunset, thankfully Willie got a few and we had a super helpful kitty down at the barn! Just hope no one from the party laughed at my horrible modeling skills.

Is everyone ready for Valentine’s Day? If you haven’t entered the giveaway yet, it ENDS TONIGHT! Also, I created 4 Easy {and Insanely Adorable} Valentine’s Day Crafts for Kids for Kalyn with Creative Savings Blog. Hope you check that guest post out and send me any photos if you create the crafts using my tutorials! I would love to see them!

Happy Thrift Thursday!