Friday, September 23, 2016

Budget Friendly Travel Essentials For A Toddler

Traveling with toddler? Hold on…it may be a bumpy ride, but these tips will surely help!

We have had two long trips the past five months. One
to Jamaica (long flight, long shuttle) and one to Tennessee and North Carolina
(extremely long car rides). Both trips were AMAZING and I thank it to
being prepped and able to entertain and feed our raging toddler. I was so excited
(and a little nervous) to go on these HUGE family adventures because the only real travel we had done before was when she younger and a 2 hour flight where we were staying with family who has
a similar aged child, so all the toys, diapers, snacks, accessories they had
readily available to us #lovepeoplewithbabies. But these trips,
we had to think of EVERYTHING! How do we keep her happy, us sane, and the
people around us happy??!!

After lots of blog reading I was ready to tackle
these packing excursions. So here it is, the best budget friendly way to
prepare for long travel with a toddler, but mainly it boils down to having lots
of toys, lots of food, and LOTS of patience.

Tip 1: Go to a Dollar Store, thrift store,
or discount market and get a bunch of small, new toys that your kid has never
seen before. You can also create some fabulous DIY toys that will keep them just
as entertained.

  • Here are some great examples of what I purchased
    at the Dollar Store:
    • Stickers
      (lots of them!) for the plane I also found gel stickers that could go on the window and tray table, which were so cool!! If your Dollar Store doesn’t have them, try these.
    • Crayons
      and coloring books
    • Little
      animal figurines
    • Matchbox
      cars
    • Play-Doh
      (not really car friendly, but this was great on plane tray table and at
      restaurants)
    • Slinky
    • Bouncy ball
    • Large
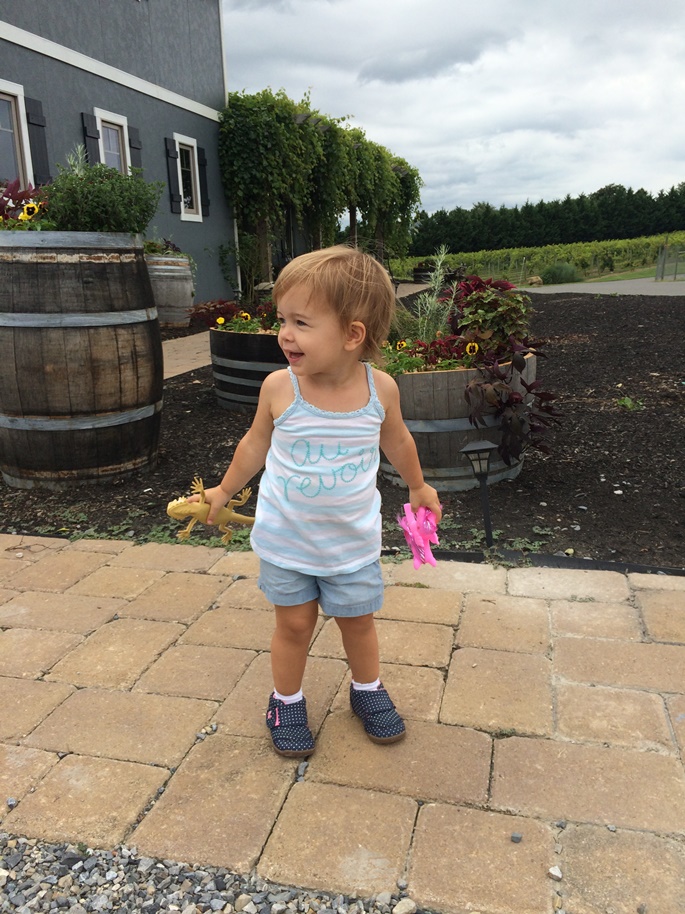
      lizard and mini pony that my daughter thought was amazing
  • I also found a couple of  interactive
    booksat HomeGoods that were lifesavers and showed her noises for
    transportation, so helped her understand.
  • Some DIY toys and engaging ideas that our little girl LOVES:
    • String
      and cheerios
    • Ice
      in a cup, totally free and weird, but this is the best (straw+cup+ice=toddler
      fascinated)
    • Take a old plastic container and make holes to be able to poke pipecleaners or pom-poms through
    • Peek-a-boo
      or iSpy with family or travel mates
    • Learn your nursery rhymes! Willie and I were a musicial choir on our car trips. Those songs are hidden in your memory somewhere…go ahead and tap into that brain!

Tip 2: My diaper bag included: diapers,
wipes, gallon sized Ziplocs (for toys or if a clothing accident occured), band aids, change of clothes, snacks and plastic
straws (more detail below), hand wipes/spray, toy/area wipes, waterproof bib,
sunscreen, and snacks (more below).

Tip 3: Pack sippy cups and plastic straws. I
carry plastic straws everywhere since I know she can have a drink anywhere I go without
the hassle of cleaning/finding my sippy cup.
Tip 4: Pack lots of different kinds of
snacks (familiar and new) in small zipper bags or containers. This saves you so much since you
don’t have to pay the upcharge within the airport or even at the hotels.
  • A nifty trick for plane entertainment, grab a daily pill boxfrom the Dollar Store and hide snacks inside. You can also do this trick with plastic Easter eggs.
  • For the car ride since we had more baggage
    ability, I bought lots of treats that she normally doesn’t get from
    the Dollar Store as a disraction and reward for good behavior. This bag of
    goodies on the long car ride was essential. What the magic of a Cheetos and
    M&Ms will do 🙂
  • For these longer trips I also brought a few easy
    meals in case of emergency.
    • Hartley
      loves granola bars and applesauce, have some in your diaper bag but also bring
      a box in your check-in for easy on-the-go meals.
    • These Annie’stravel pastas are wonderful to have for emergency meals. I put a few of
      these in our check-in bag to have at the hotel.

Tip 5: Make a plan with your partner and
family (if traveling together) about the expectations for the flight and daily
activities so everyone can enjoy the flight and vacation.

Tip 6: Take care of yourself or everyone
will be miserable. If you are hungry, thirsty, or unhappy, everything your
child does will be that much more annoying. I always pack snacks for us too. If
your husband is anything like mine, they get HANGRY real fast and there is
noooo turning back until they are satisfied. When I used to travel
internationally for work with long flight times, my favorite essentials were
protein bars, PB&J sandwiches, raw nuts, dried fruit, and a fresh banana or apple. I also always
have an empty water bottle to fill once I pass security so I don’t have to pay
the enormous upcharge for a water bottle at the airport stores.
Tip 7: If your child is soothed by a
pacifier, make sure you have it. Hartley would be devastated if her “B” didn’t
make the flight. We would be those parents running through the airport to find
one or borrow one I’m sure. For the chance of further discomfort from a cold or
earache, always pack a children’s pain/fever reducer.
Tip 8: Bring a baby carrier, wrap, or
backpack. We brought our Ergobaby and a stroller for the trip. Hartley prefers the
stroller, so that’s what we used most of the time and through the airport
(along with chasing her around to get some energy out).

Tip 9: For the Jamaica flight, we
checked our carseat at the boarding door, but if your child is small enough
just make sure your car seat is flight compliant. Checking a carseat is free on almost all airlines, so it really is just more of a necessary hassle than anything.

Tip 10: Bring the iPad if your other
distractions aren’t working. Hartley rarely watches TV but she is fascinated
with “Elmo” aka the iPad and will watch him for hours.

Tip 11: For our Jamaica destination we packed some
tropical essentials:
  • Bathing suits (a lot we’ve found at the thrift
    store for CHEAP)
  • Swim Shirt (these are bountiful at the
    thrift store)
  • Sun Hats and/or waterproof hat (again these are
    bountiful at the thrift store)
  • Puddle Jumper(found this at the thrift store,
    but we also saw at Costco for $15)
  • Sunscreen (Oxybenzone free) For Hartley we use
    The Honest Company Mineral Based Sunscreen and Arbonne’s sunscreen
  • Bug spray
Tip 12: The Jamaica hotel had a crib setup and most
have an option for play-n-pack, so just make sure you have that confirmed
before arrival (some may have applicable fees for this, so if you can carry a travel bed, that may be a good option). I also packed some crib stuffed animals, a nightlight, and her
sleep sheep just to make sure she was comfortable. Anything you can bring to
make sure they sleep on vacation is great!

Tip 13: We did not bring a travel highchair.
She does not care for the small fabric seats and just ate her meals on our laps
or next to the pool in a lounge chair (yes…already a diva). But if you are
going a lot of places that wouldn’t have a chair option or you prefer sitting
them in something, go ahead and pack it.

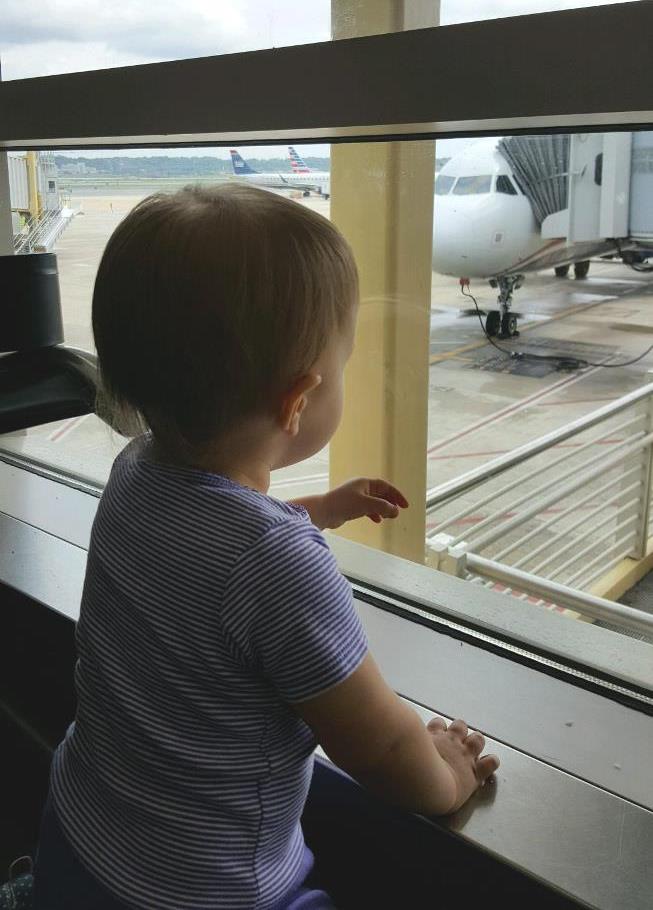
Tip 14: Find a way to exercise. When flying get to the airport a little early and find a non-crowded area to let your little one run and view the planes. Once safe in the air, you can also use the aisles to your advantage. As long as this isn’t a red eye flight and everyone is trying to sleep, everyone will get a smile out of your curious baby. For the car rides, take breaks. Stop and use the restroom, scenic spots, coffee, etc. These little stops can help extend their patience and also get a little energy out.

Tip 15: Smile, laugh and enjoy your vacation!!!

Do you have any great tips to share?
Wednesday, September 14, 2016

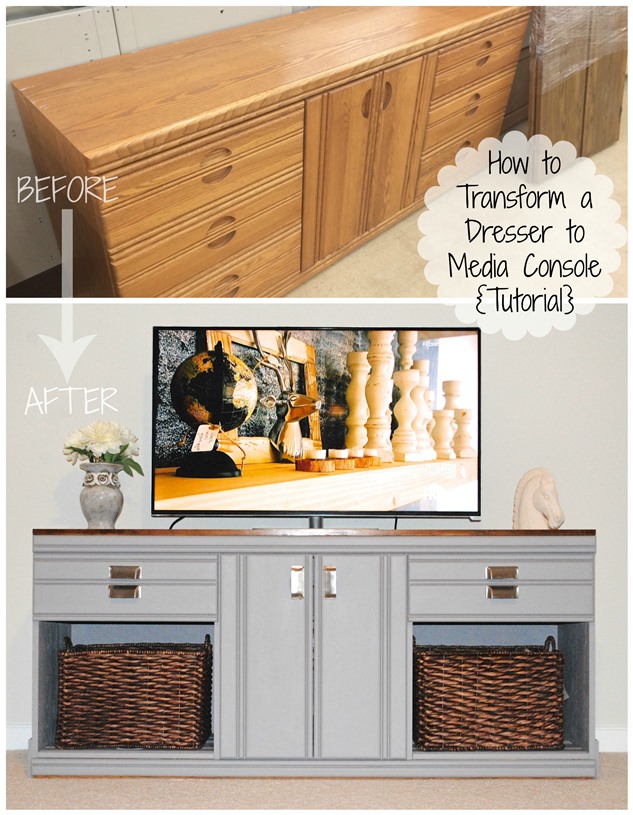
How to transform a dresser to Media Console {Tutorial}

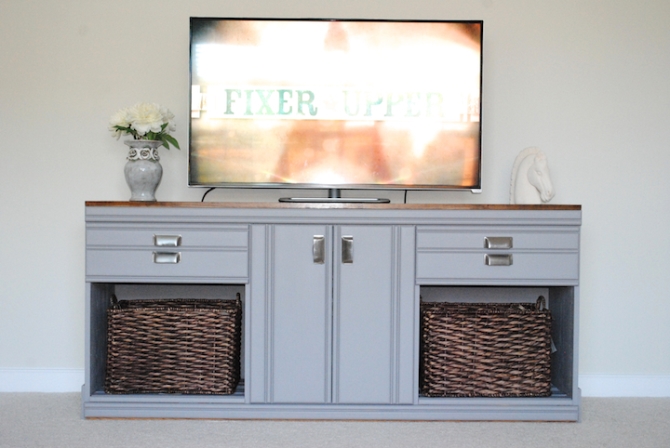
Another fabulous find from Habitat for Humanity! Our farmhouse media console turned out perfect! We looked for a few months debating on what type of media console we wanted and with most manufactured sets costing well over $500 we started adventuring to the Habitat on a weekly basis to try to find the perfect dresser to convert…and by luck we did! Although it isn’t very ornate, the selling point for this dresser was it’s perfect size (70 inches long exactly). We needed the size because we have a very long wall in our family room and with the hopes for a TV upgrade in the next year, we wanted to have the balance that would work with a bigger TV.

I’m super proud of the transformation and these quotes made me so much more excited to have something in my house that I repurposed while also supporting a great cause:

“Shopping at Habitat For Humanity ReStore does even more than assist Habitat’s mission of eliminating poverty housing! Your purchases grant a second life to items and prolong the life of our landfills by reducing waste.”
“At Habitat for Humanity, we build. We build because we believe that everyone, everywhere, should have a healthy, affordable place to call home. More than building homes, we build communities, we build hope and we build the opportunity for families to help themselves. Your donation will help families break the cycle of poverty and build long-term financial security. With an affordable, stable home, families have more to spend on food, medicine, child care, education and other essentials. Your support can help us do more in all the many ways that Habitat builds.”

What we used and cost:
Cost of Dresser = $42.40 (with tax)
Total Materials Cost = $119.51
*The material cost will go down significantly if you want to paint the top or your dresser has a real wood top that you can sand down and re-stain. Ours was not, which made us buy lumber and create a stained rustic farmhouse top to tie in our other furniture.

    • (2) 1-2-6 select pine = $7.24
    • (1) 1-4-6 select pine = $6.96
    • (2) 1-6-6 select pine = $23.52
    • Valspar Chalky Finish Paint (color – Cathedral Stone), Quart = $29.99 (lasted the whole project) *again they warned not going with the “tinatable colors” but the paint color ended up exactly like the swatch so I was pleased
2 Wicker Baskets Cost (HomeGoods) = $40Total Media Console Cost = $201.91 (3 days of drying and labor time)

How we did it:

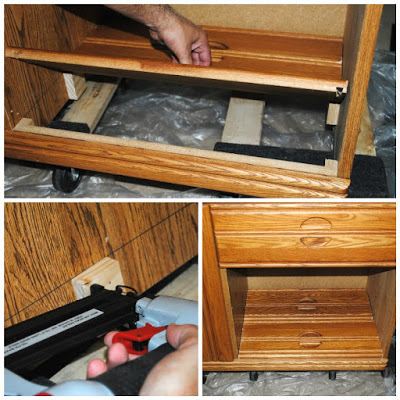
    1. Removed the 2 bottom drawers and drawer rail sliders on each end
    2. Dissembled drawer fronts from base and used to build the bottom of each side so baskets could sit inside
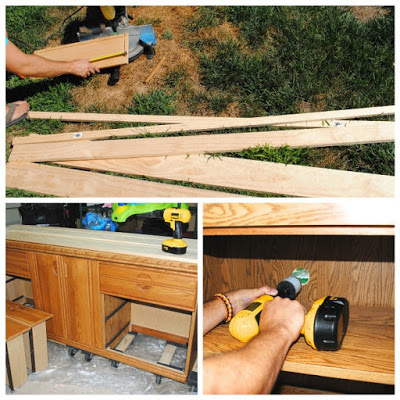
    3. Cut the holes in the center area for the wires using a 2” hole saw
    4. Used the wood from the dissembled drawers to cut a small block as the anchor for the drawer fronts to sit on – attached with nail gun
    5. Once the base was secured, the drawer doors were cut to size to fit perfectly on the bottom and were attached with a nail gun
    6. Used the wood from the disassembled drawer sides on each side of the dresser to add a little character and cover up some damage it had from transportation (cut to width)
  1. Used the cabinet drawer template to pre-drill the holes for our new hardware
  2. Wiped the entire dresser down with a damp rag and let dry for 20 minutes
  3. Painted the entire dresser (minus the top as we added the wood pieces) with one coat of paint and let dry overnight
  4. While the dresser was drying, we cut all our lumber for the new farmhouse top to fit the length of 70” and roughly sanded both ends
  5. Applied one coat of stain to all of the wood and let dry overnight
  6. 24 hours later, apply one more coat of paint to dresser and one more coat of stain to wood
  7. 24 hours later, check for missed areas on paint and apply one more spot coat if needed to dresser. I also ended up applying 3 coats of stain to my pine wood. The 3rd coat of stain was in the AM and when I didn’t like the way the stain took to 2 of the larger pieces I dry brushed the Valspar paint on in a very rustic manner to cover the botched stain. I actually like this method and glad I did it even if the stain came out, it gives it so much character!
  8. Liberlly applied Valspar wax sealant with a paint brush to the painted dresser
  9. Once everything is dry, we arranged the wood on the top and secured with the nail gun and attached the new drawer hardware
  10. Finally, we placed the baskets in to complete the rustic farmhouse look
  11. In order to keep the cable box hidden behind the doors, you can buy an Infrared Receiver Extender Cable which will allow transmission from the remote to the box…heck yes, no ugly box!
  12. All done!
Wednesday, August 31, 2016

DIY Bubble Inspired Birthday Cake

Creating a special 2nd birthday cake for my precious daughter was so much fun and she absolutely loved it! I knew we weren’t having a party since we are still getting things at the new house settled and everyone is just always so busy end of August it’s hard to plan something. So just super low key this year with just the grandparents and a photo shoot, which upon the dismay of my husband, I am trying to make family photos an annual occurrence. Her birthday is the perfect millstone for those photos right now and I cannot wait to share some that my wonderful Kimberly took!

So what do you make for a bubble obsessed toddler? How about a fun bubble inspired cake!?!

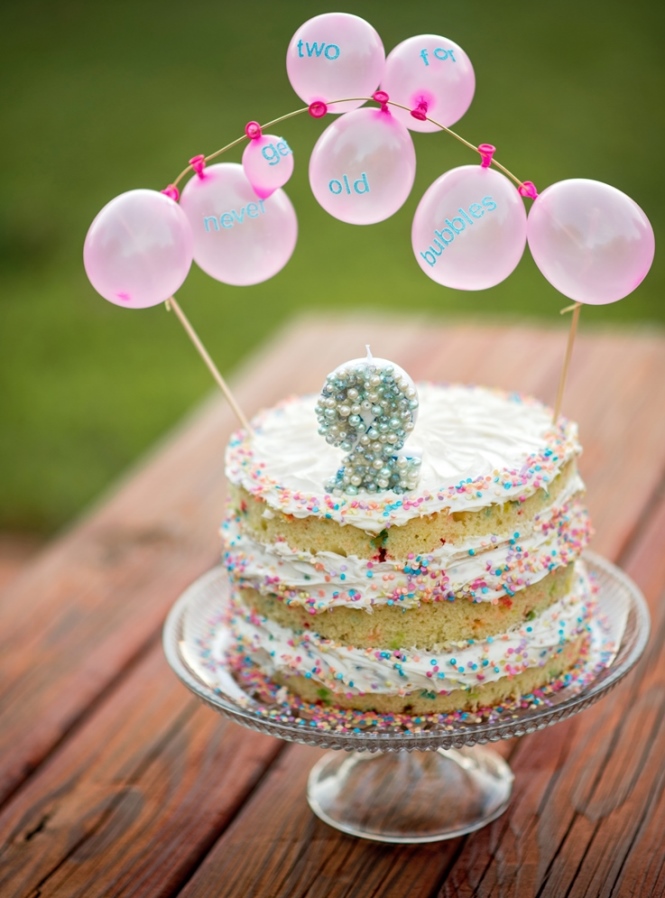
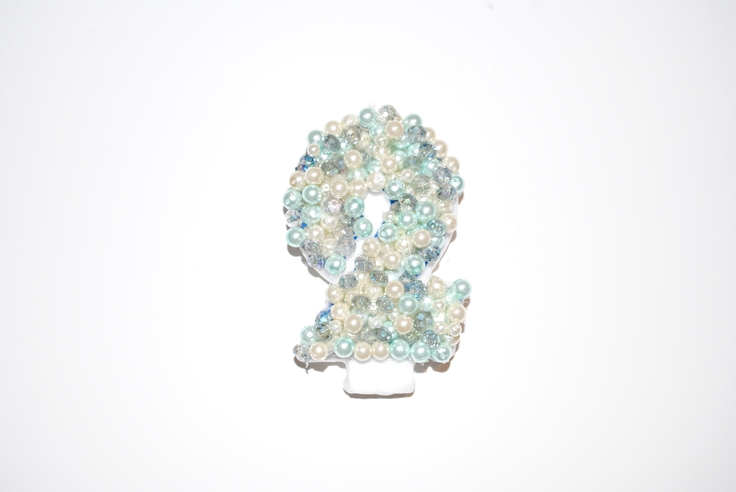
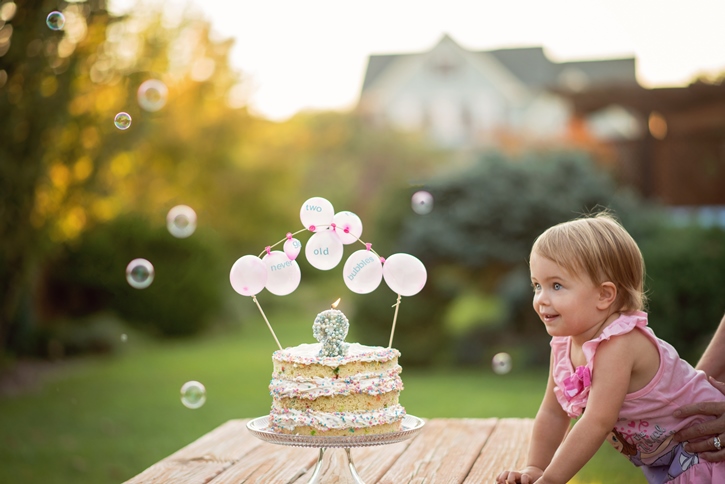
The DIY glam bubble candleand cake topper were so perfect on top of the naked funfetti cake I made. Here is how I did it…

The cake was super simple. I used two boxes of the funfetti cake mixand made three batches using a 9″round cake pan. Once they cooled I followed inside the outer circle outline to get rid of the brown edges to expose the colorful inside. Then I started stacking the cakes filling each layer with a tremendous amount of rainbow chip frosting(I LOVE icing, so it was more for me than anything cake decorating wise…you will need about 3 tubs of icing if you put around the same amount as I did). I used a butter knife on the top icing layer to make swirls and finished the corners and edges with multi-colored confetti sprinkles.

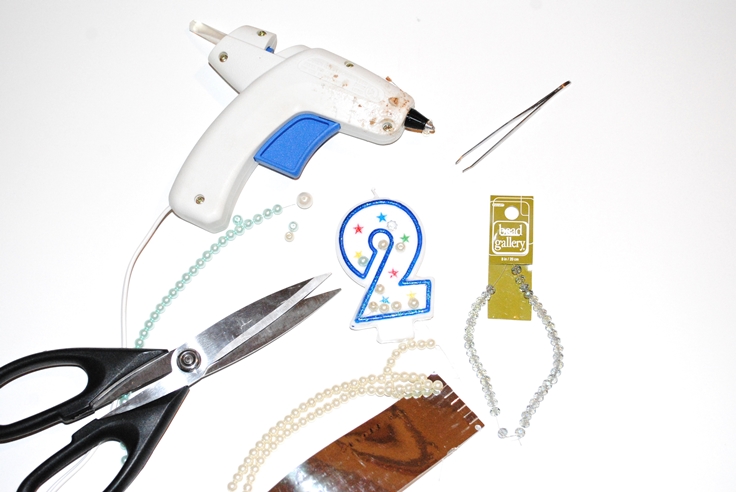
For the glam bubble inspired candle I took a cheap dollar
store candleand just hot glued the beads of choice onto the candle
layering and alternating the colors and sizes of the beads. At first I freaked
out, because duhh…wax melts, but be patient! Once you get a few on, it will
start building upon one another and start coming together. I was able to do the
beginning layer by just putting hot glueenough for about 5-6 beads directly on
the candle and then just sprinkled them on randomly. Once you do the first
layer you can start building upon with more precision one at a time either
pinching with your fingers (be careful, I took some stings from the glue) or
buy $1 store tweezers and use those for the precision areas.

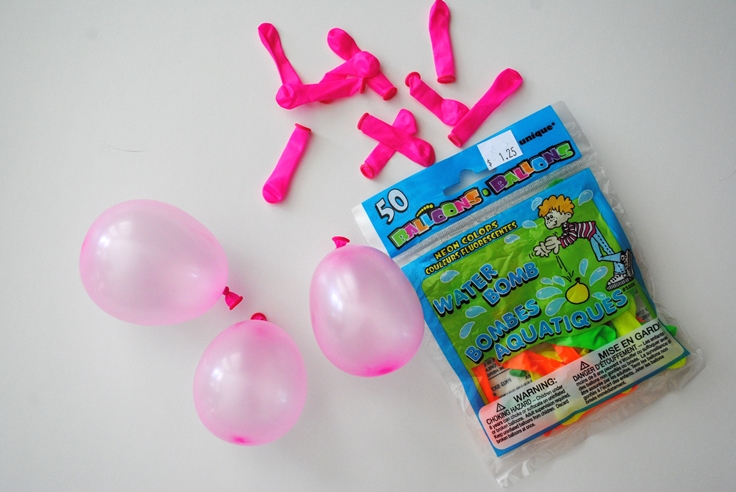
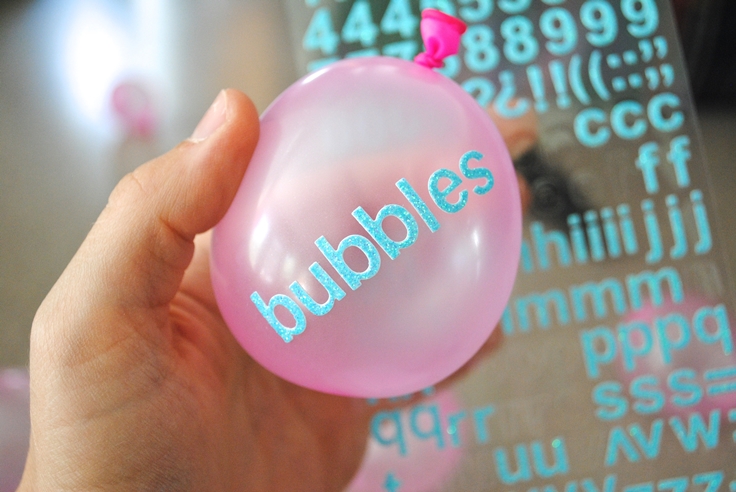
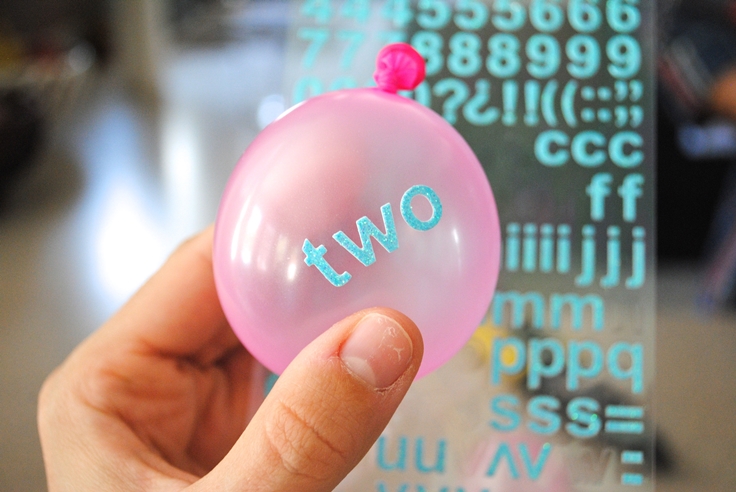
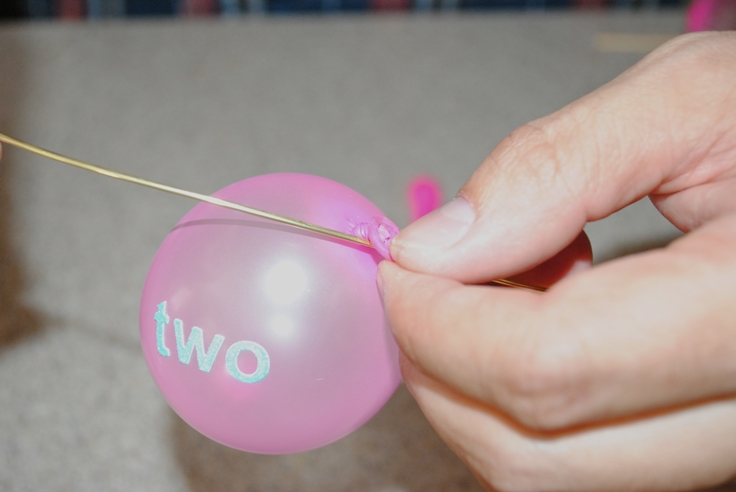
For the cake topper I actually found small water balloonswere the perfect size and extremely reasonable than paying for mini or regular balloons. I got a bag of 50 balloons 25% off $1.25 so it was practically a steal!  I chose to use the neon pinks colored ones and just blew all of them up (well not me, Willie blew them up for me) in random sizes and picked the best ones I liked to apply the stickers to. I used aqua glitter letter stickersfrom Michaels and put one word on each balloon to have the full quote of “never get TWO old for bubbles” across the cake. Once you put the balloons on the wire, you can always make adjustments to the word orientation if some balloon won’t go in the direction you want them to. Once all the words were on the balloons, we pierced the balloon ends carefully with a brass wireto attach each balloon in the order we wanted. I did a blank balloon on each side of the quote just as a little filler. Then just attach the wire to some long bamboo skewersor straws, place in your cake, and viola the most fun cake topper EVER!

Hartley absolutely loved her cake and for the following days went around the house yelling “cake, cake, cake, eat, cake”!! I cannot believe I have a 2-year-old daughter. Time is going way too fast and I’m trying to not miss a second. The pressure of being a working mom has gotten to me recently, but all you can do is try you best and embrace every moment you can spend with your children. I cannot wait to see what the next year brings us. I hear the 2s are the worst, but fun days like this and creating something magical for her is totally worth all the tantums I am about to endure. Wish me luck!

Cake photos: Kimberly Lyddane Photography

Thursday, August 11, 2016

Trendy ripped jeans under $3

Happy Thrift Thursday!!

This summer is flying by, but that’s ok with me because I am
so over this extreme heat and ready to enjoy being outside again. I have BIG plans for our new backyard once it cools down a little and if you know be any…I’m
not patience…if only mother nature knew my A-type personality.  However, I have been better at pacing renovations
at the new house. I’m doing reasonable things and trying to not give
my husband a heart attack by asking for new things every week, so maybe I am
relaxing a little…maybe??!? Or maybe it’s the little toddler running around
that doesn’t let me get anything done and has high interest in every tool which she either steals, hides, throws, or runs with?
  

As I slowly make progress on the house, I needed
a closet pick-me-up. The cool girls of Instagram finally convinced me to try the
casual ripped jeanslook. Since I was a teenager, I’ve always wanted huge knee ripped
jeans but the astounded horrified look from my grandmother and mother as they
questioned “why are you going to spend money on jeans with holes and rips in them” still
festered in my mind. So as my memories faded with laughter and complete understanding
as a mother now…I stumbled upon a $3 pair of jeans at the thrift store and
thought “what the heck…let’s take a scissor to them and see what happens”.

So
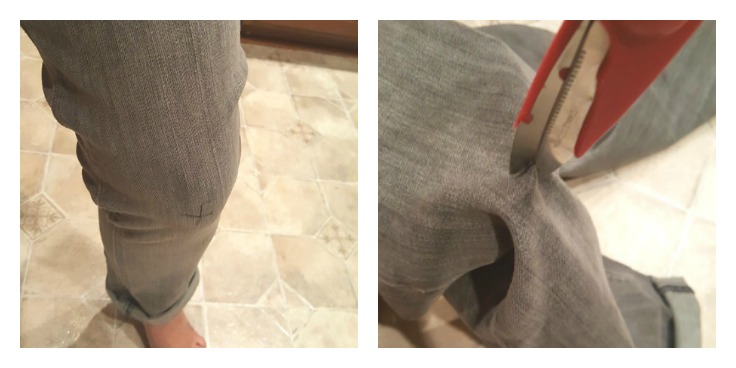
that is exactly what I did. I put them on and right at the knee I made an X with a
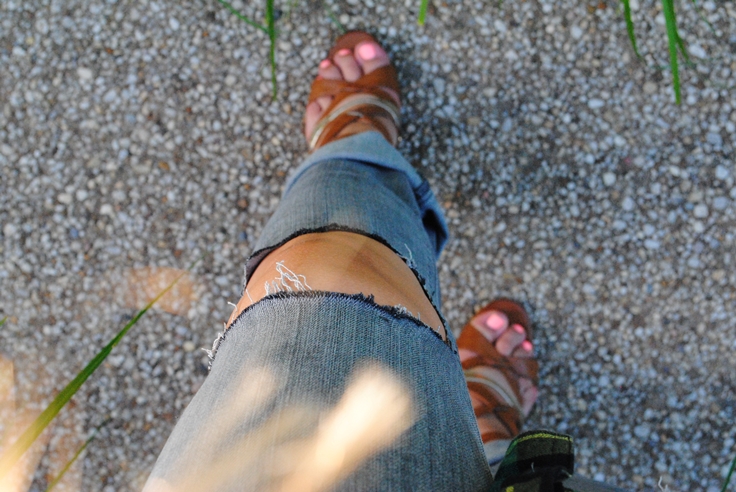
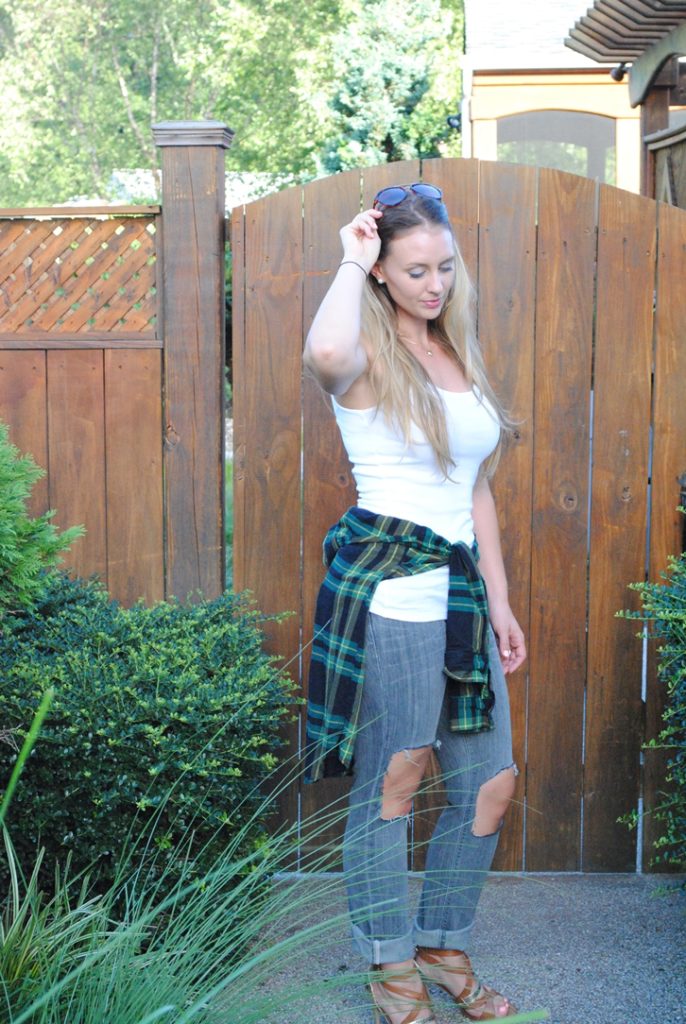
pen. That gave me a good outline of where I wanted the hole to be. I took them off and laid them on the floor, sperated the front and back fabric and cut right at the X by pinching the front fabric together. Then I just cut a large square shape where the knee is. After I finished cutting it did
look like someone just took scissorsto them and not really the designer celebrity
look I was going for, so I just used my nails and scraped and tugged on the hem
until the fabric started fraying.

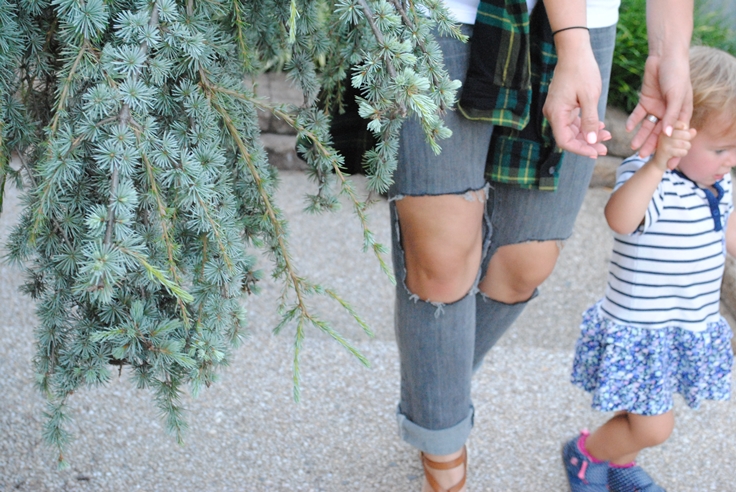
I paired it with a classic white tank, flannel shirt tied
around the hips (all the cool kids are doing it haha) and these fabulous clearance heels I got from Marshals. What do you think? Worth the $3
and a pair of scissors?