Friday, March 17, 2017

Vintage Inspired Girl’s Room

I’m so excited to finally have this room DONE!
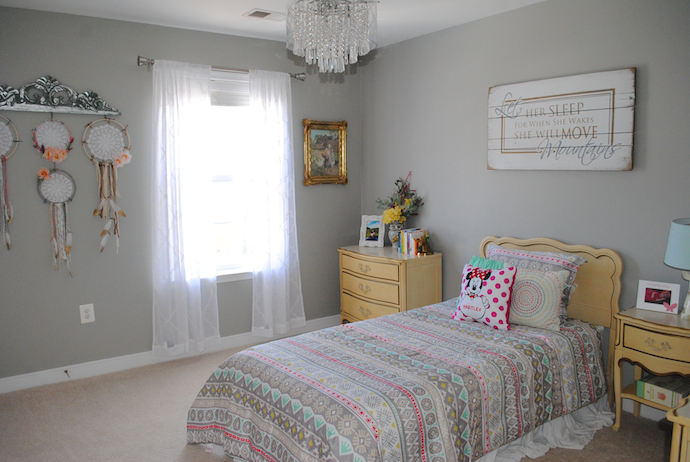
I wanted a whimsical vintage room with a splash of bohemian flair for my daughter, and I think I accomplished that. First change was the beautiful grey paint color which is Sherwin Williams Mindful Gray. Then the wallpaper…oh the highly debated, highly contentious wallpaper. I fell in LOVE with this botanical wallpaper and just thought it would bring such a fun unique touch to the room without a huge cost (keep an eye out for the price, I got it when it was $0.98/sq ft). We got it up but not without Willie saying about a 100 times “I hate this” and “wallpaper is stupid”. If there is one thing that can cause divorce, it may be putting up wallpaper together 😉 BUT we made it and he loves it now. This wallpaper was a pre-pasted roll that you spray on and let sit for a few minutes and then apply to the wall. I found the pre-pasted much harder to work with then the traditional gluing method I did in the bathroom. It wasn’t as manageable and wasn’t as sticky so it slid and the edges would not lay down. We have a few mistakes, but for not being pros, I think we did a fabulous job…and we are still married.
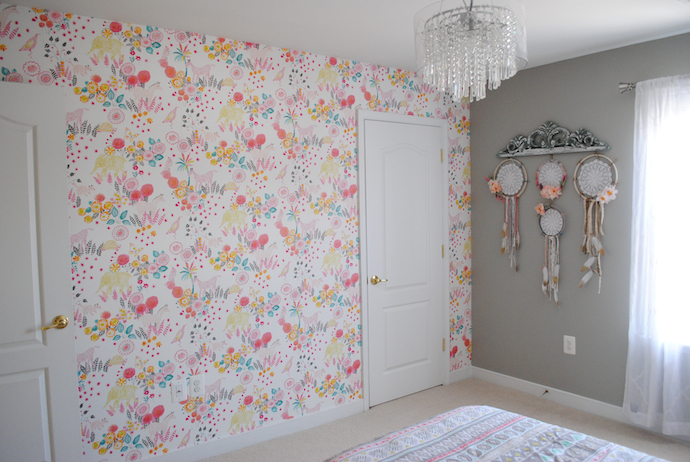
The furniture is the same as what we used in her nursery. Willie’s grandmother’s furniture set included a twin headboard, so I really wanted to incorporate all the pieces in her new room. It has such an amazing sentimental value and vintage look that just makes it perfect for her.  I got an organic bamboo mattress for her and stunning Target bedding. She is really going to sleep like a princess.
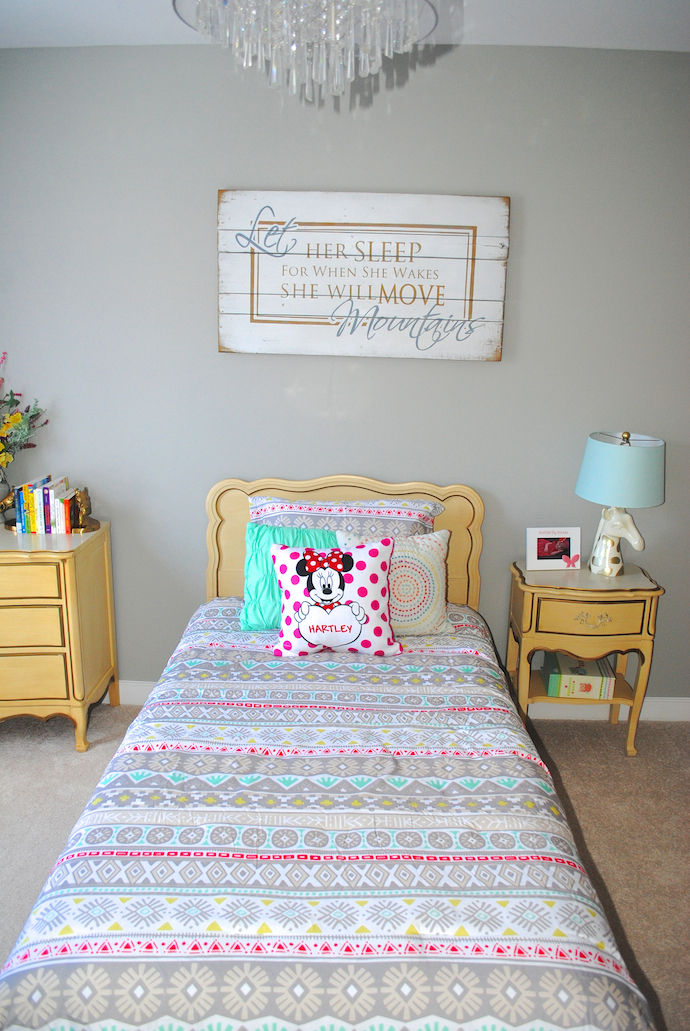
Oh the chandelier…gorgeous. We just happened to stumble across this $200 beauty and because our Lowes had it on clearance and then it was the only one left so we took the display, we got it for $80. Added a little ceiling medallion and my super handy husband got it wired for me. I always get the best shoulder workouts on fixture changes, because I get the gruntwork of holding the thing up while he wires…maybe I need to learn so he can hold!
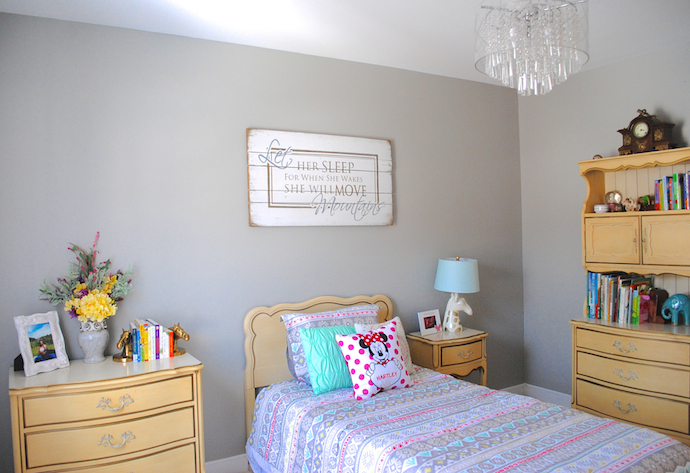
The giraffe lamp was from Homegoods. The gold framed art was $5 from the thrift store (I am thinking of making into a button art piece or getting a friend to print out a stencil for me and painting the glass). The large pallet art is from Willie’s cousin that was a shower gift (if you haven’t checked her out on Etsy, you need to). And my favorite part, the amazing DIY dreamcathers. The rest of the décor are just some of her favorite books, leftover flowers, knickknacks from great-grandparents, grandparents and photos. I want to add a large laundry basket under corner floating shelves, but for now, it’s perfect.

This girl better get ready because she is about to get a HUGE surprise!

Monday, February 27, 2017

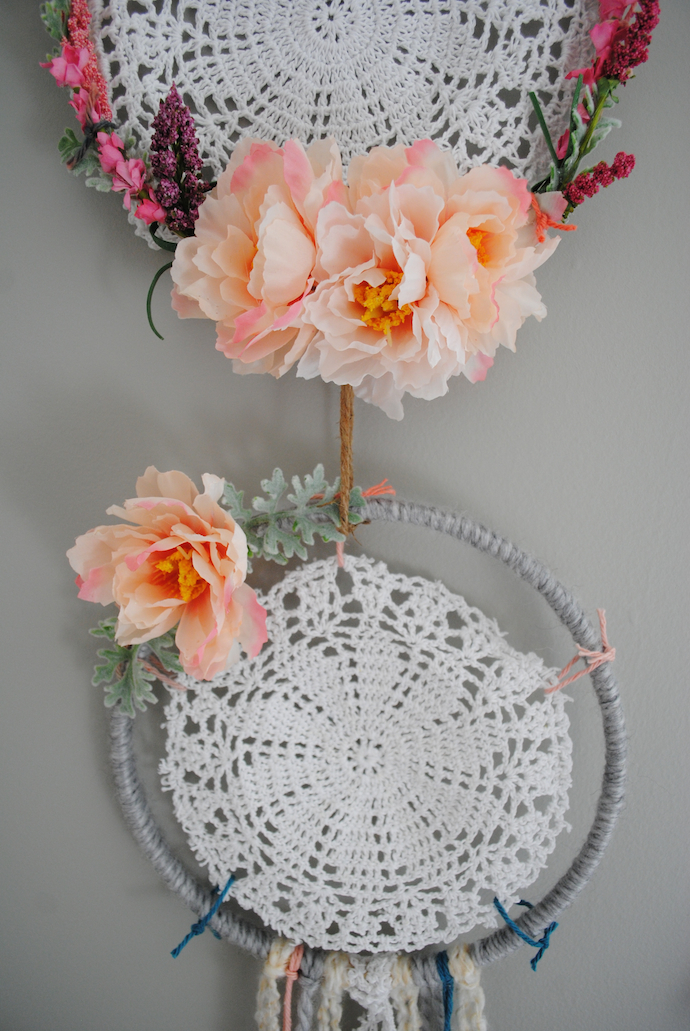
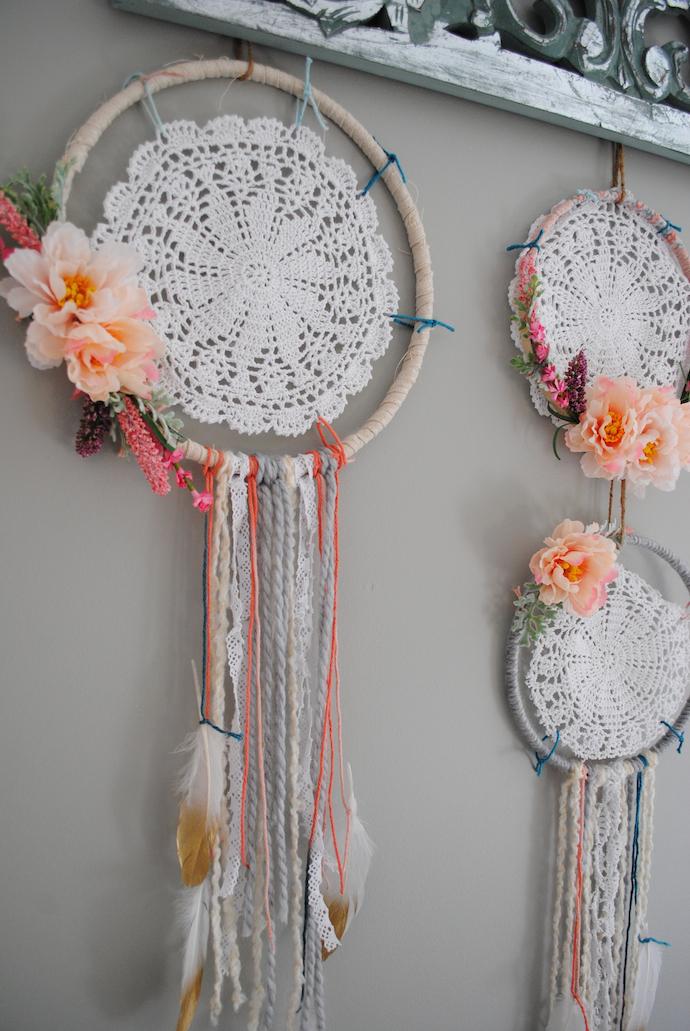
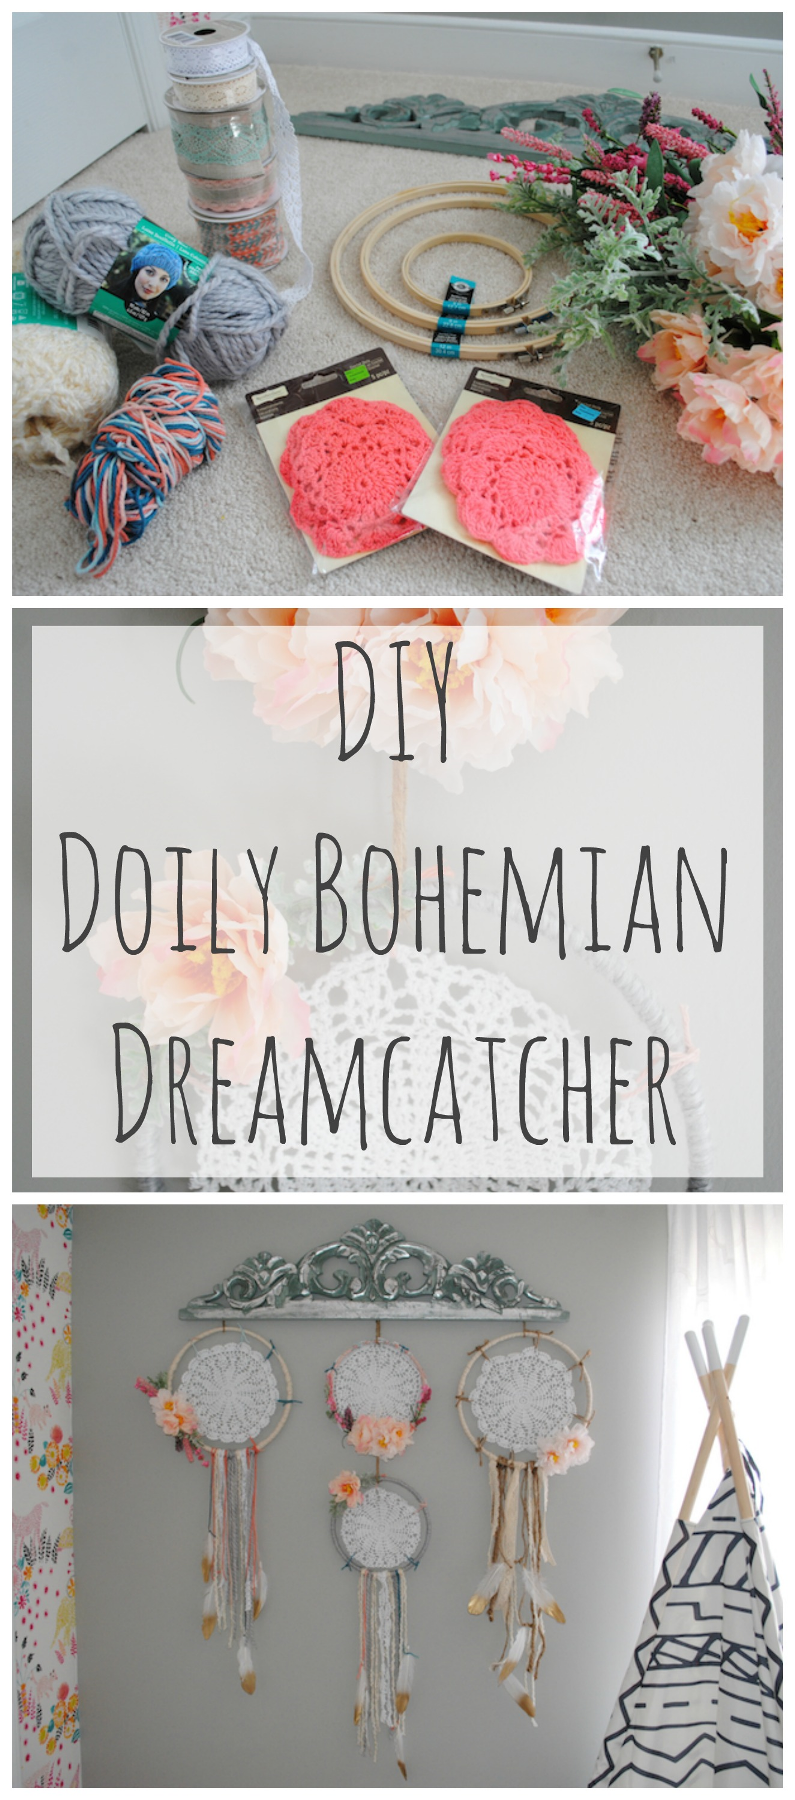
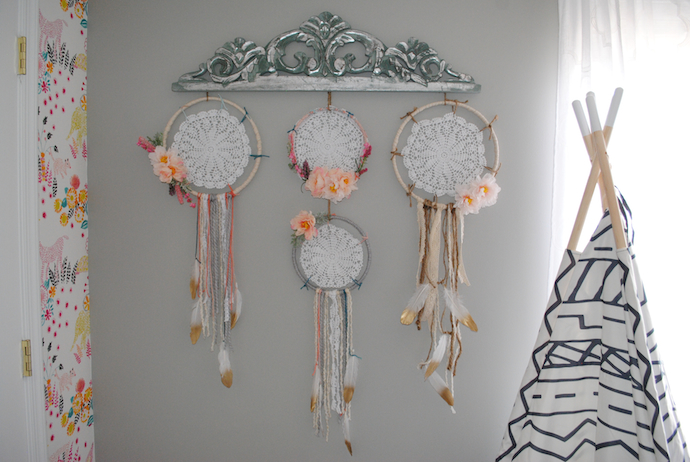
DIY Doily Bohemian Dreamcatcher

Hope everyone had a fabulous Valentine’s Day! I took Hartley to get her nails painted for the very first time and she LOVED it. She got one hand pink and one hand red with sparkles on-top (of course). If you’ve been following my blog for a while I am superstitious and have to have my nails painted OPI Big Apple Red for Valentine’s Day, since my first date with Willie (13 years ago, oh my gosh) he picked me up from the nail salon and I had that color and we’ve been going strong since. Hartley was so proud and showed EVERYONE her nails at dinner, ahhh she melts my heart.

I’m ecstatic for this dreamcather project to be done because it means I’m that much closer to finishing Hartley’s big girl room! I’ve been procrastinating finishing her room because she is so good in her crib that I kind of want to leave her in there forever (can I?). And as a mom, I feel like leaving the crib is a HUGE milestone, that I may tear up for a bit.  This was the last major piece I wanted to finish before putting everything on the walls. Thanks to Pinterest I had some fabulous inspiration and gathered numerous ideas from different bloggers to create my unique take on the DIY Doily Bohemian Dream Catcher.

For mine, I incorporated store-bought doilies (you can use vintage ones if you can find at an antique market or thrift store, I even thought of using my grandmother’s handmade ones, but thought lightning would strike me if I did that!), flowers, lace, ribbon, and feathers (I re-used the feathers from my Thanksgiving tablescape). I also saw lots of people using wood as their top hanging piece, but I found this beautiful molding at the At Home store that I thought would make a better topper for the boho/vintage look I was going for. You also don’t need this piece if you are just creating a single dreamcathcer. Just follow the tutorial and stop when connecting the multiple embroidery hoops.

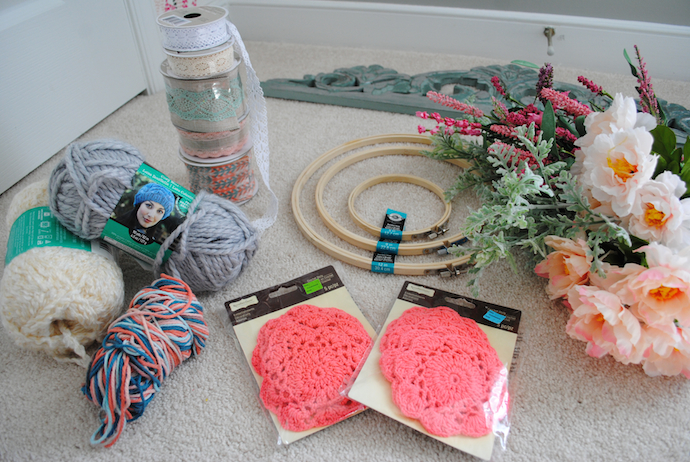
Here is what you will need:

  1. Wood/Molding Topper – mine was a little pricy at $24.99, but you can slash this cost using wood or twine
  2. Embroidery Hoops(I bought 2″ for the pink doilies but didn’t end up using, so for what I created I used 9-Inch and 12-Inch)
  3. Doilies (I found the 2” pink ones on clearance at Michaels for $2.99 for 4pk (I didn’t end up using these but have mini ones for a gift or something) and then ordered the 4pc- 9 Inch White Doilies ones for $12 – I have seen these at the thrift but I did not have luck on my recent trips)
  4. Torn fabric to wrap around hoop (you can use ribbon but that would get expensive, try using an old drop cloth, pillowcase, linen shirt or tablecloth) – I used a mix of cut ribbon and a dropcloth by cutting thin long pieces
  5. Yarn (thin for attaching doilies and thicker version for hanging pieces)
  6. Ribbon (go straight to the $1.99 bin of ribbon first) – Michaels has a fabulous selection
  7. Hot Glue Gun and Glue
  8. Artificial Flowers (optional)
  9. Feathers (optional)

Total Cost was about $65 (like I mentioned I went ALL OUT on mine, but you can make a version of this much cheaper but excluding items and/or using a different hanging method)

How to create:

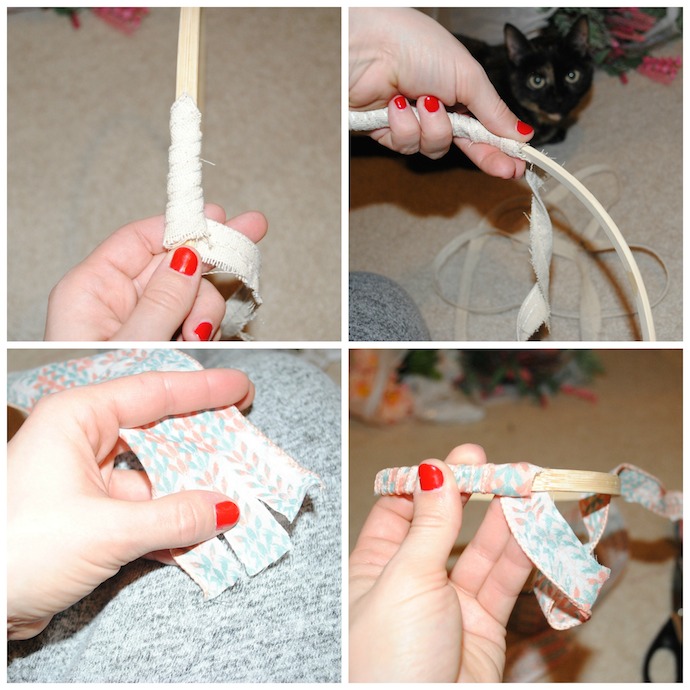
  1. Start with wrapping all the embroidery loops with the torn fabric , glue the start and try using long enough pieces to make it fully around the loop, then glue the end.
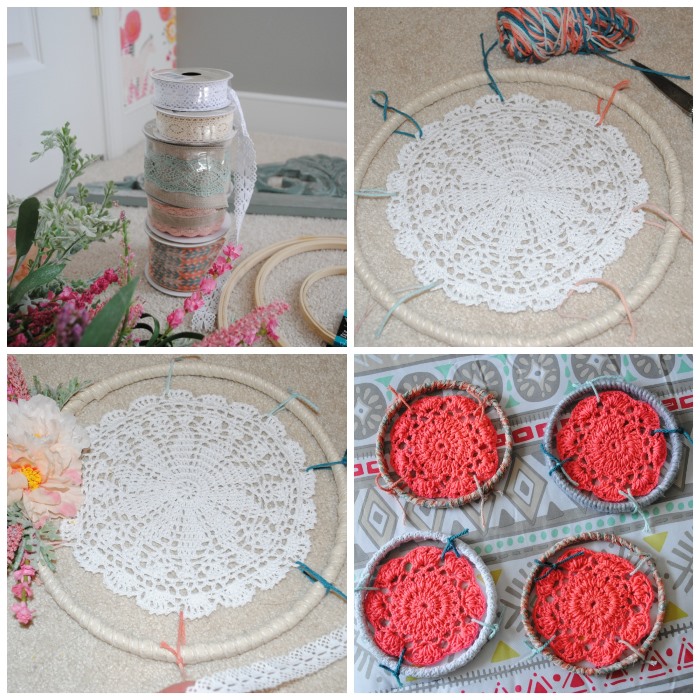
  2. Once fully wrapped, start connecting the doilies using a thinner yarn on the edges. Just loop the yarn through the doily hole and knot on the edge. For the lower hanging dreamcatcher on the 9″ loop, I cut of .5″ around the edge to make it smaller then the one on-top of it.
  3. If you are doing a multiple version like I was, map out your placement before you add the embellishments. You will not want to add hanging embellishments for those that are connected at the top. For those that have the ability to get hanging ribbon, and lace…start adding by simply cutting a long enough piece to fold in half (not perfect) and attach by a loop-pull-through over the hoop on the bottom. Add the feathers by just using the ends of the twine or yarn to make tight knots. Add flowers by disconneting the stem and cutting off the hard green piece (you will know what this is once you have them) and attach to the loop with hot glue.
  4. Once all the dreamcatchers are completed, finish by connecting the individual ones to connect to one another in the design template you created. I was orginally going to use the small hot pink ones, but didn’t like them, so I just had to connect one.
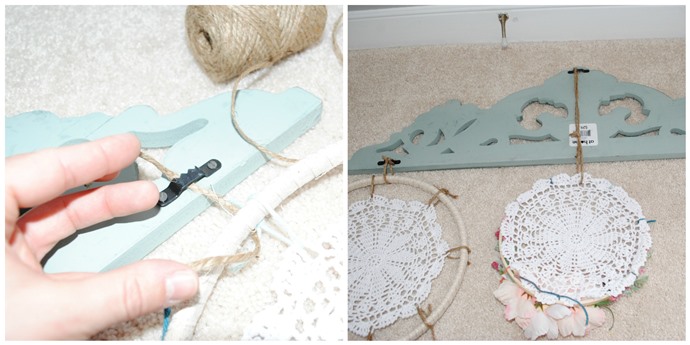
  5. Finally connect the dreamcathers to your molding, I lucked out because there was already hangers on the back so I just connected the the three top dreamcathers with twine and knotting around the hangers, but you can wrap around, add nail hangers, or glue on.

Finally make your nail hole on the wall and voila! A beautiful boho chic dreamcather any girl would love. I love the way this turned out and super excited for her room to be done since it’s been such a pouring of love and sweat to make her room just as perfect as she is (cheesy…I know). Hope you enjoy creating one of your very own!

<

Friday, September 23, 2016

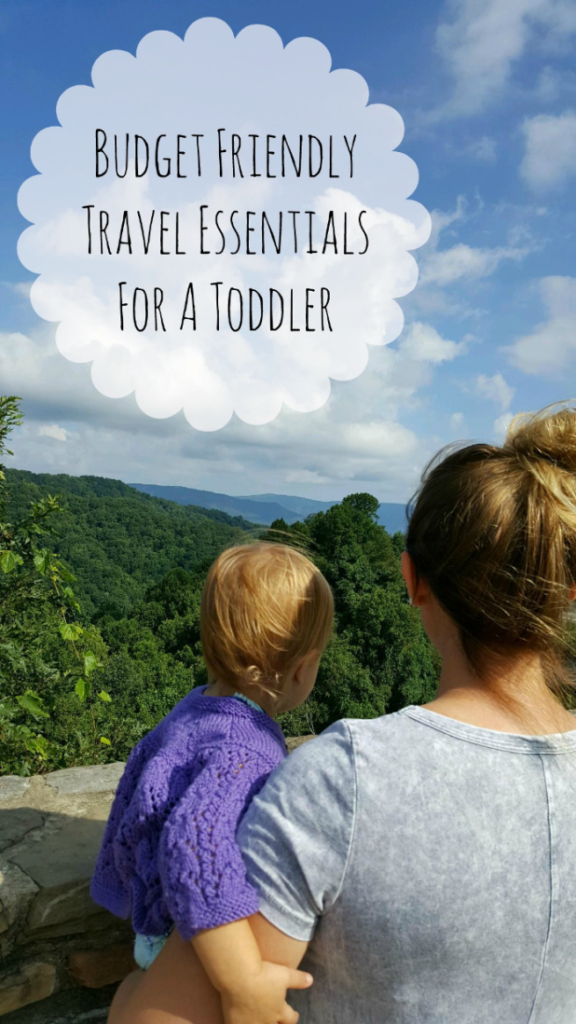
Budget Friendly Travel Essentials For A Toddler

Traveling with toddler? Hold on…it may be a bumpy ride, but these tips will surely help!

We have had two long trips the past five months. One
to Jamaica (long flight, long shuttle) and one to Tennessee and North Carolina
(extremely long car rides). Both trips were AMAZING and I thank it to
being prepped and able to entertain and feed our raging toddler. I was so excited
(and a little nervous) to go on these HUGE family adventures because the only real travel we had done before was when she younger and a 2 hour flight where we were staying with family who has
a similar aged child, so all the toys, diapers, snacks, accessories they had
readily available to us #lovepeoplewithbabies. But these trips,
we had to think of EVERYTHING! How do we keep her happy, us sane, and the
people around us happy??!!

After lots of blog reading I was ready to tackle
these packing excursions. So here it is, the best budget friendly way to
prepare for long travel with a toddler, but mainly it boils down to having lots
of toys, lots of food, and LOTS of patience.

Tip 1: Go to a Dollar Store, thrift store,
or discount market and get a bunch of small, new toys that your kid has never
seen before. You can also create some fabulous DIY toys that will keep them just
as entertained.

  • Here are some great examples of what I purchased
    at the Dollar Store:
    • Stickers
      (lots of them!) for the plane I also found gel stickers that could go on the window and tray table, which were so cool!! If your Dollar Store doesn’t have them, try these.
    • Crayons
      and coloring books
    • Little
      animal figurines
    • Matchbox
      cars
    • Play-Doh
      (not really car friendly, but this was great on plane tray table and at
      restaurants)
    • Slinky
    • Bouncy ball
    • Large
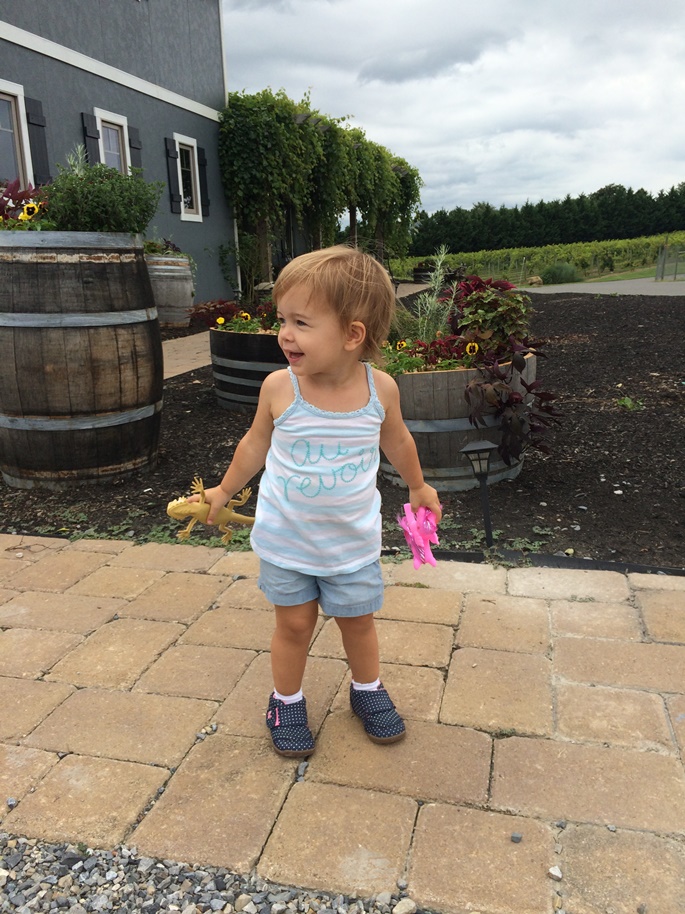
      lizard and mini pony that my daughter thought was amazing
  • I also found a couple of  interactive
    booksat HomeGoods that were lifesavers and showed her noises for
    transportation, so helped her understand.
  • Some DIY toys and engaging ideas that our little girl LOVES:
    • String
      and cheerios
    • Ice
      in a cup, totally free and weird, but this is the best (straw+cup+ice=toddler
      fascinated)
    • Take a old plastic container and make holes to be able to poke pipecleaners or pom-poms through
    • Peek-a-boo
      or iSpy with family or travel mates
    • Learn your nursery rhymes! Willie and I were a musicial choir on our car trips. Those songs are hidden in your memory somewhere…go ahead and tap into that brain!

Tip 2: My diaper bag included: diapers,
wipes, gallon sized Ziplocs (for toys or if a clothing accident occured), band aids, change of clothes, snacks and plastic
straws (more detail below), hand wipes/spray, toy/area wipes, waterproof bib,
sunscreen, and snacks (more below).

Tip 3: Pack sippy cups and plastic straws. I
carry plastic straws everywhere since I know she can have a drink anywhere I go without
the hassle of cleaning/finding my sippy cup.
Tip 4: Pack lots of different kinds of
snacks (familiar and new) in small zipper bags or containers. This saves you so much since you
don’t have to pay the upcharge within the airport or even at the hotels.
  • A nifty trick for plane entertainment, grab a daily pill boxfrom the Dollar Store and hide snacks inside. You can also do this trick with plastic Easter eggs.
  • For the car ride since we had more baggage
    ability, I bought lots of treats that she normally doesn’t get from
    the Dollar Store as a disraction and reward for good behavior. This bag of
    goodies on the long car ride was essential. What the magic of a Cheetos and
    M&Ms will do 🙂
  • For these longer trips I also brought a few easy
    meals in case of emergency.
    • Hartley
      loves granola bars and applesauce, have some in your diaper bag but also bring
      a box in your check-in for easy on-the-go meals.
    • These Annie’stravel pastas are wonderful to have for emergency meals. I put a few of
      these in our check-in bag to have at the hotel.

Tip 5: Make a plan with your partner and
family (if traveling together) about the expectations for the flight and daily
activities so everyone can enjoy the flight and vacation.

Tip 6: Take care of yourself or everyone
will be miserable. If you are hungry, thirsty, or unhappy, everything your
child does will be that much more annoying. I always pack snacks for us too. If
your husband is anything like mine, they get HANGRY real fast and there is
noooo turning back until they are satisfied. When I used to travel
internationally for work with long flight times, my favorite essentials were
protein bars, PB&J sandwiches, raw nuts, dried fruit, and a fresh banana or apple. I also always
have an empty water bottle to fill once I pass security so I don’t have to pay
the enormous upcharge for a water bottle at the airport stores.
Tip 7: If your child is soothed by a
pacifier, make sure you have it. Hartley would be devastated if her “B” didn’t
make the flight. We would be those parents running through the airport to find
one or borrow one I’m sure. For the chance of further discomfort from a cold or
earache, always pack a children’s pain/fever reducer.
Tip 8: Bring a baby carrier, wrap, or
backpack. We brought our Ergobaby and a stroller for the trip. Hartley prefers the
stroller, so that’s what we used most of the time and through the airport
(along with chasing her around to get some energy out).

Tip 9: For the Jamaica flight, we
checked our carseat at the boarding door, but if your child is small enough
just make sure your car seat is flight compliant. Checking a carseat is free on almost all airlines, so it really is just more of a necessary hassle than anything.

Tip 10: Bring the iPad if your other
distractions aren’t working. Hartley rarely watches TV but she is fascinated
with “Elmo” aka the iPad and will watch him for hours.

Tip 11: For our Jamaica destination we packed some
tropical essentials:
  • Bathing suits (a lot we’ve found at the thrift
    store for CHEAP)
  • Swim Shirt (these are bountiful at the
    thrift store)
  • Sun Hats and/or waterproof hat (again these are
    bountiful at the thrift store)
  • Puddle Jumper(found this at the thrift store,
    but we also saw at Costco for $15)
  • Sunscreen (Oxybenzone free) For Hartley we use
    The Honest Company Mineral Based Sunscreen and Arbonne’s sunscreen
  • Bug spray
Tip 12: The Jamaica hotel had a crib setup and most
have an option for play-n-pack, so just make sure you have that confirmed
before arrival (some may have applicable fees for this, so if you can carry a travel bed, that may be a good option). I also packed some crib stuffed animals, a nightlight, and her
sleep sheep just to make sure she was comfortable. Anything you can bring to
make sure they sleep on vacation is great!

Tip 13: We did not bring a travel highchair.
She does not care for the small fabric seats and just ate her meals on our laps
or next to the pool in a lounge chair (yes…already a diva). But if you are
going a lot of places that wouldn’t have a chair option or you prefer sitting
them in something, go ahead and pack it.

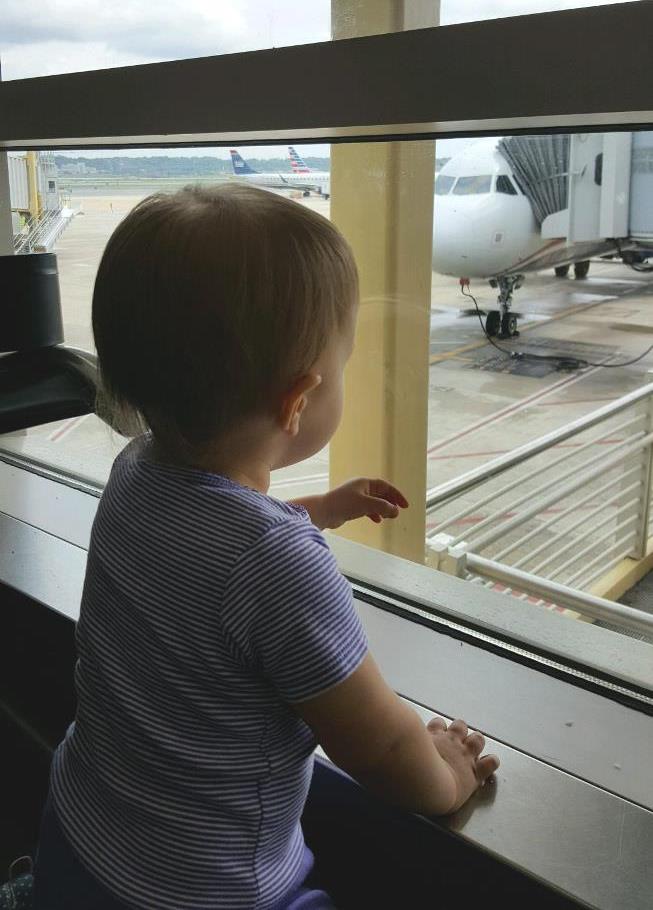
Tip 14: Find a way to exercise. When flying get to the airport a little early and find a non-crowded area to let your little one run and view the planes. Once safe in the air, you can also use the aisles to your advantage. As long as this isn’t a red eye flight and everyone is trying to sleep, everyone will get a smile out of your curious baby. For the car rides, take breaks. Stop and use the restroom, scenic spots, coffee, etc. These little stops can help extend their patience and also get a little energy out.

Tip 15: Smile, laugh and enjoy your vacation!!!

Do you have any great tips to share?

Wednesday, August 31, 2016

DIY Bubble Inspired Birthday Cake

Creating a special 2nd birthday cake for my precious daughter was so much fun and she absolutely loved it! I knew we weren’t having a party since we are still getting things at the new house settled and everyone is just always so busy end of August it’s hard to plan something. So just super low key this year with just the grandparents and a photo shoot, which upon the dismay of my husband, I am trying to make family photos an annual occurrence. Her birthday is the perfect millstone for those photos right now and I cannot wait to share some that my wonderful Kimberly took!

So what do you make for a bubble obsessed toddler? How about a fun bubble inspired cake!?!

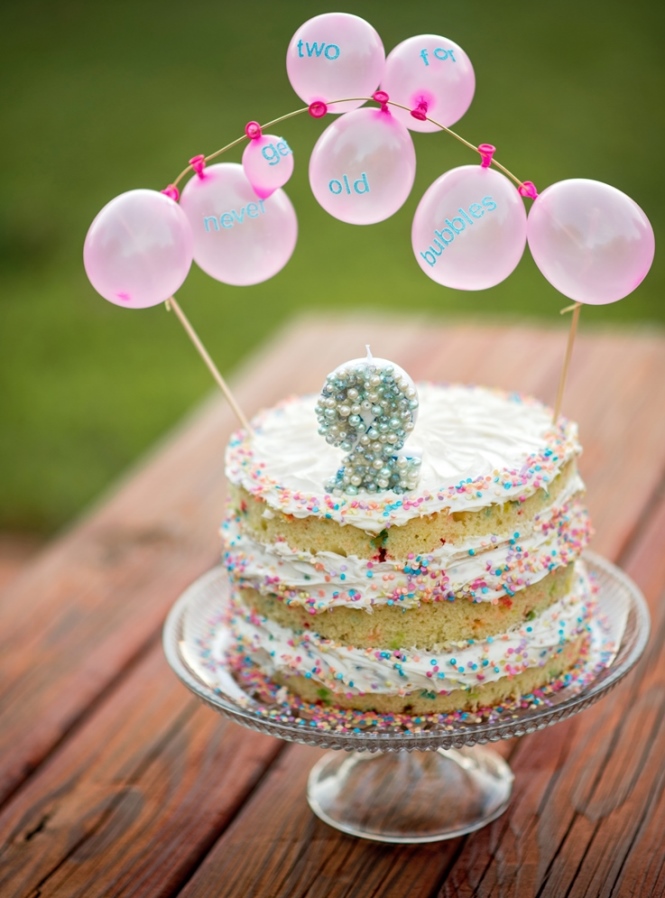
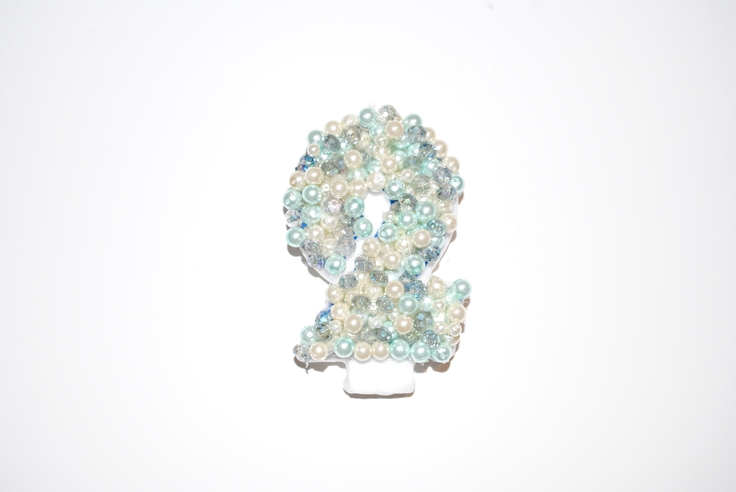
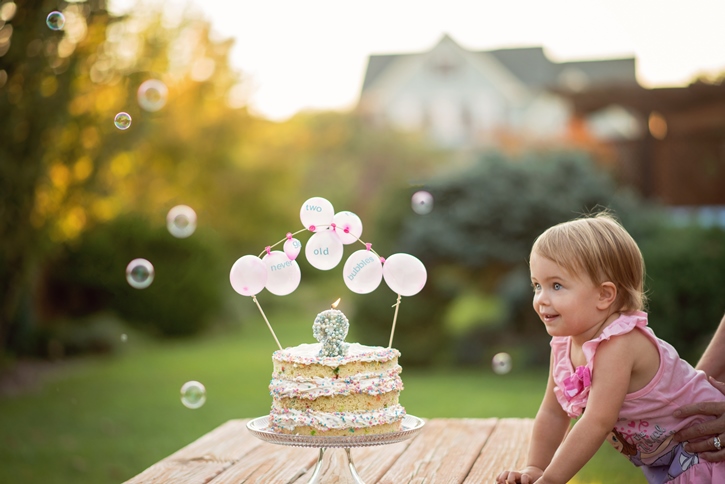
The DIY glam bubble candleand cake topper were so perfect on top of the naked funfetti cake I made. Here is how I did it…

The cake was super simple. I used two boxes of the funfetti cake mixand made three batches using a 9″round cake pan. Once they cooled I followed inside the outer circle outline to get rid of the brown edges to expose the colorful inside. Then I started stacking the cakes filling each layer with a tremendous amount of rainbow chip frosting(I LOVE icing, so it was more for me than anything cake decorating wise…you will need about 3 tubs of icing if you put around the same amount as I did). I used a butter knife on the top icing layer to make swirls and finished the corners and edges with multi-colored confetti sprinkles.

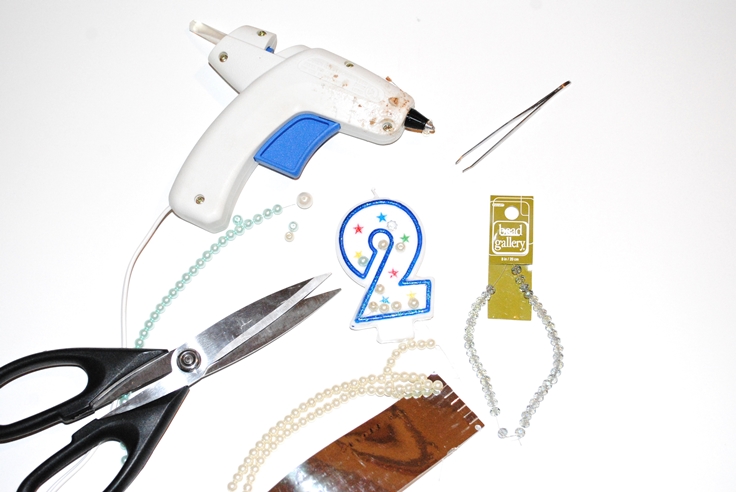
For the glam bubble inspired candle I took a cheap dollar
store candleand just hot glued the beads of choice onto the candle
layering and alternating the colors and sizes of the beads. At first I freaked
out, because duhh…wax melts, but be patient! Once you get a few on, it will
start building upon one another and start coming together. I was able to do the
beginning layer by just putting hot glueenough for about 5-6 beads directly on
the candle and then just sprinkled them on randomly. Once you do the first
layer you can start building upon with more precision one at a time either
pinching with your fingers (be careful, I took some stings from the glue) or
buy $1 store tweezers and use those for the precision areas.

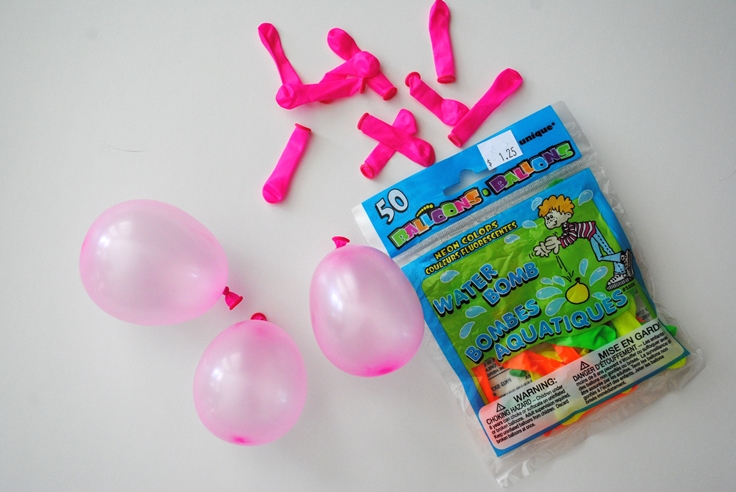
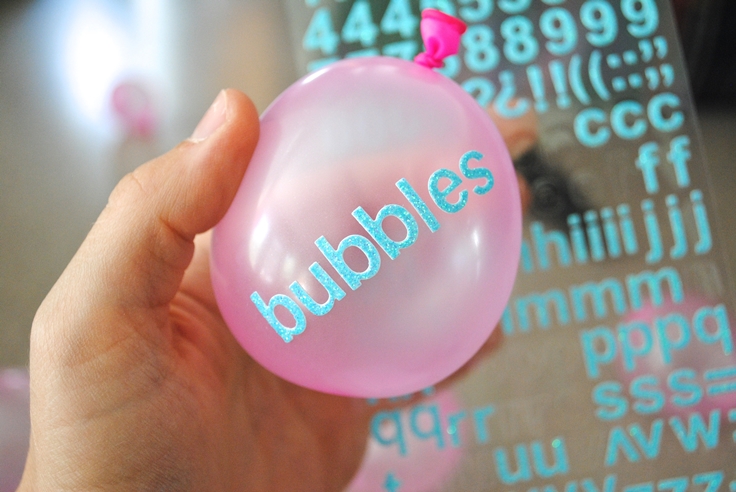
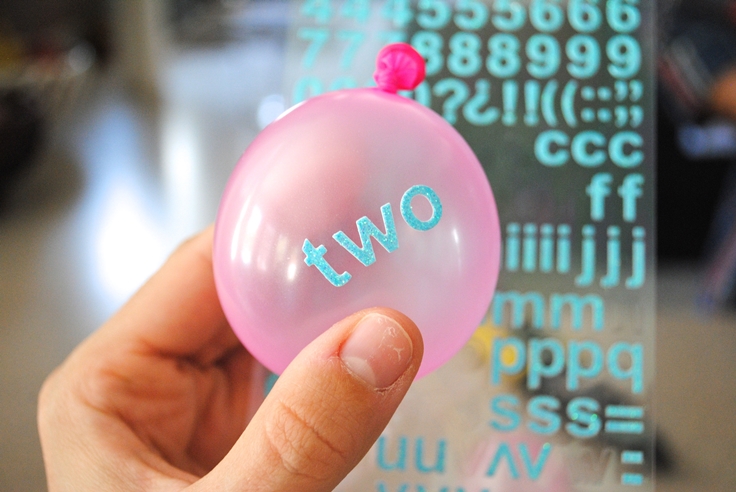
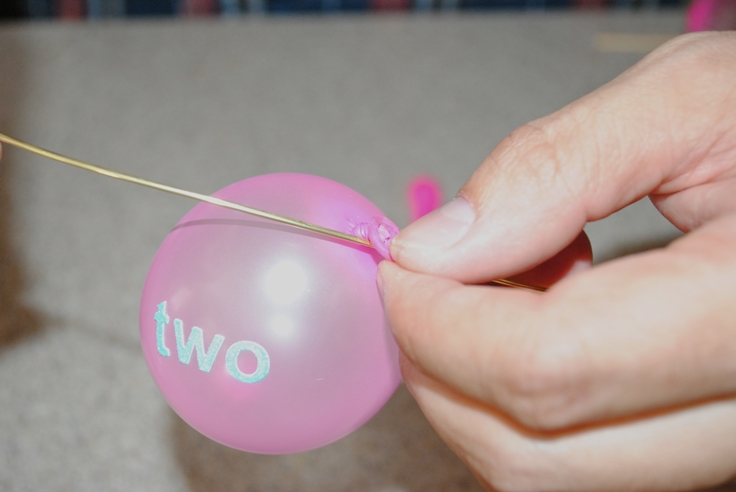
For the cake topper I actually found small water balloonswere the perfect size and extremely reasonable than paying for mini or regular balloons. I got a bag of 50 balloons 25% off $1.25 so it was practically a steal!  I chose to use the neon pinks colored ones and just blew all of them up (well not me, Willie blew them up for me) in random sizes and picked the best ones I liked to apply the stickers to. I used aqua glitter letter stickersfrom Michaels and put one word on each balloon to have the full quote of “never get TWO old for bubbles” across the cake. Once you put the balloons on the wire, you can always make adjustments to the word orientation if some balloon won’t go in the direction you want them to. Once all the words were on the balloons, we pierced the balloon ends carefully with a brass wireto attach each balloon in the order we wanted. I did a blank balloon on each side of the quote just as a little filler. Then just attach the wire to some long bamboo skewersor straws, place in your cake, and viola the most fun cake topper EVER!

Hartley absolutely loved her cake and for the following days went around the house yelling “cake, cake, cake, eat, cake”!! I cannot believe I have a 2-year-old daughter. Time is going way too fast and I’m trying to not miss a second. The pressure of being a working mom has gotten to me recently, but all you can do is try you best and embrace every moment you can spend with your children. I cannot wait to see what the next year brings us. I hear the 2s are the worst, but fun days like this and creating something magical for her is totally worth all the tantums I am about to endure. Wish me luck!

Cake photos: Kimberly Lyddane Photography