Saturday, April 23, 2016

Baby Shower Cake – DIY Style

Last Saturday I had the pleasure of attending a dear friends baby shower. She is Kimberly’s twin sister and although they do not look alike, they are both super fabulous in their own unique ways and hold a very special place in my heart. Brittney is having a girl…whohooo…I am overjoyed that I have a friend having a girl close to Hartley’s age. Play dates, make-up, dresses, dolls, bows and sparkles…here we come!

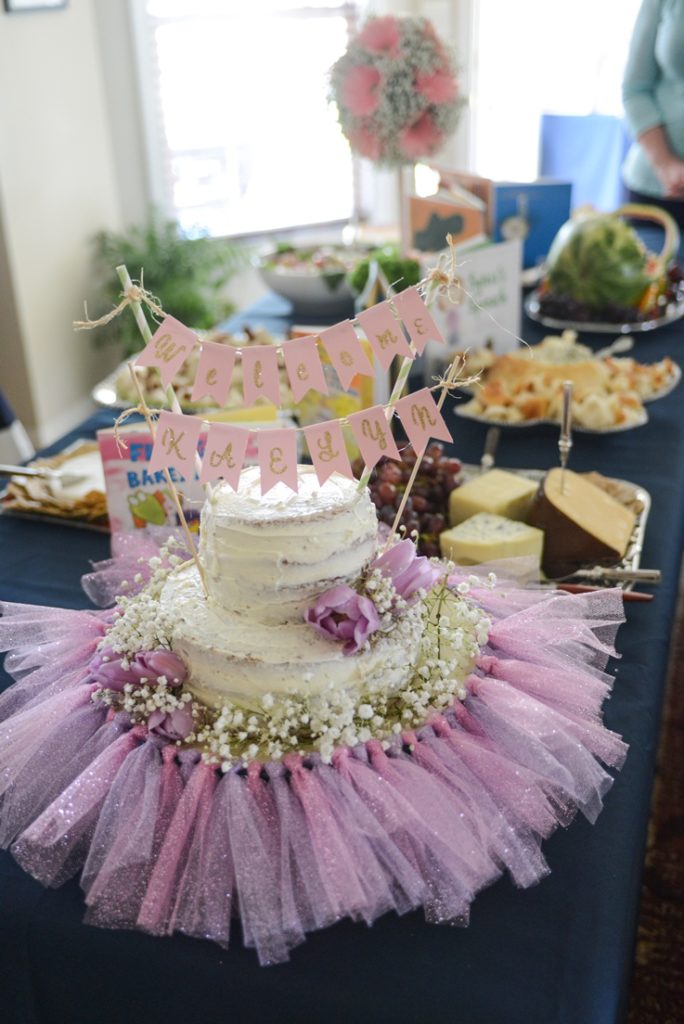
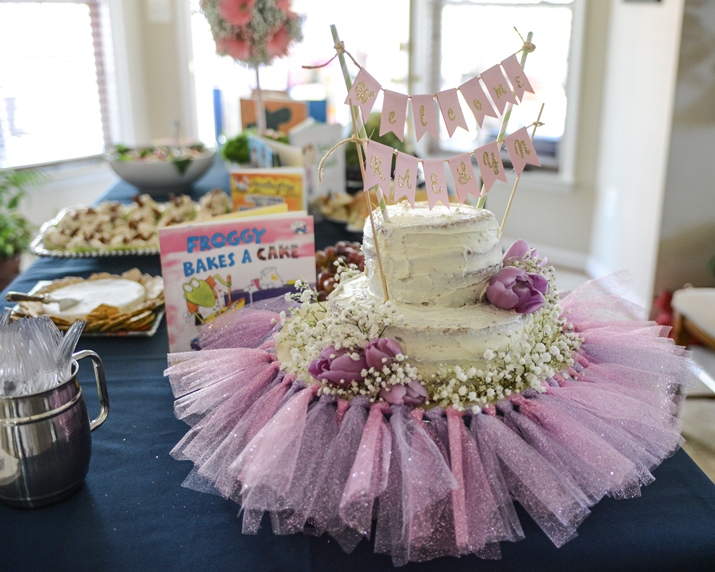
This cake was really a team effort. Kimberly tackled the DIY
tutu cake stand, while I made the cake, cake topper, and assembled it for the
shower. I’m no cake maker, but sometimes it’s fun to tackle something new and work off of a Pinterest inspiration 🙂

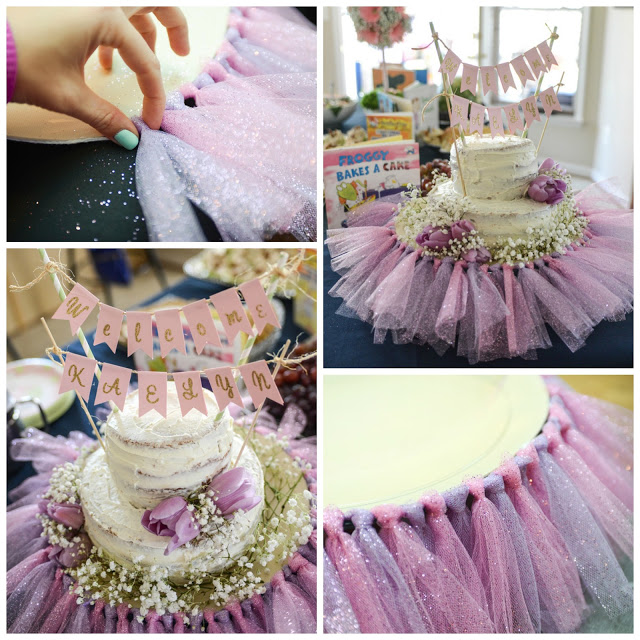
You know when you have a bestie when she takes step-by-step pictures
for you to capture how to make something PERFECT…thanks Kimberly!!

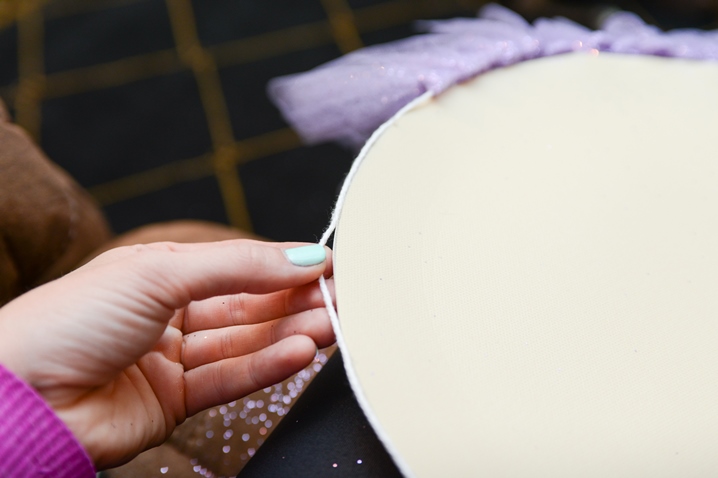
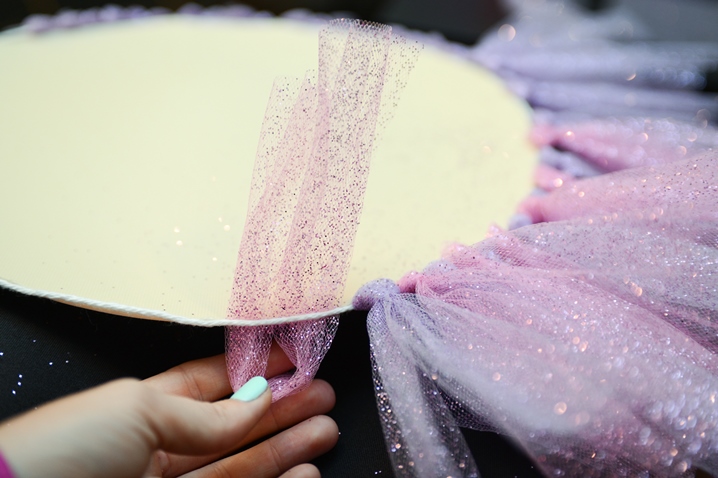
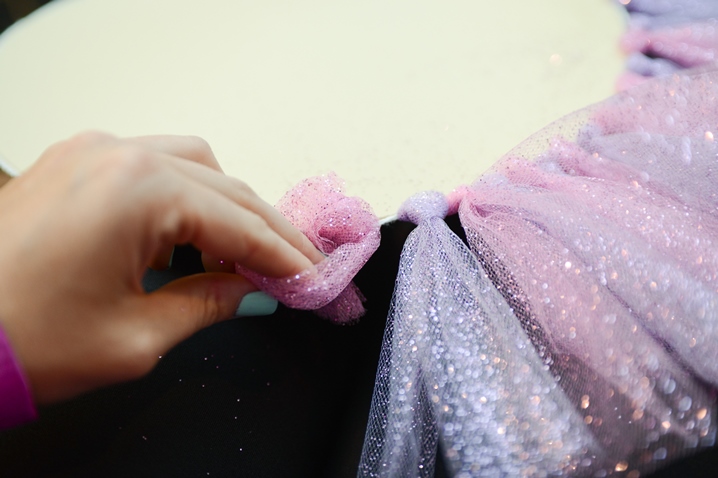
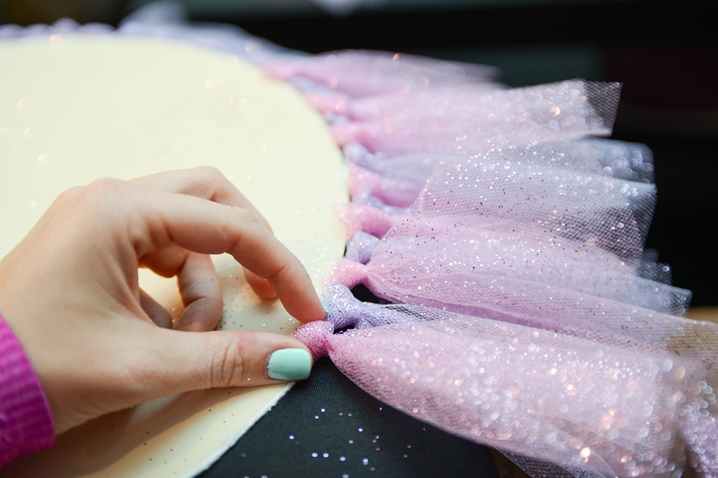
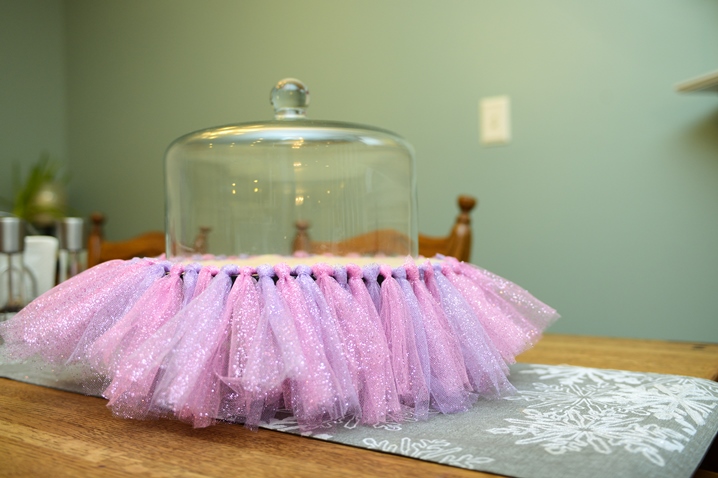
How she made this adorable DIY tutu cake stand. She cut a rubber placemat the diameter of the cake stand she had. Then she wrapped a piece of yarn around the edge and attaching it about every 1″ with a drop of hot glue. With two colors of glittered tulle, she started making loops to adhere the tulle to the piece of yawn (perfect simple no sew solution). She kept alternating the pink and lavender tulle until she made it all around the stand.

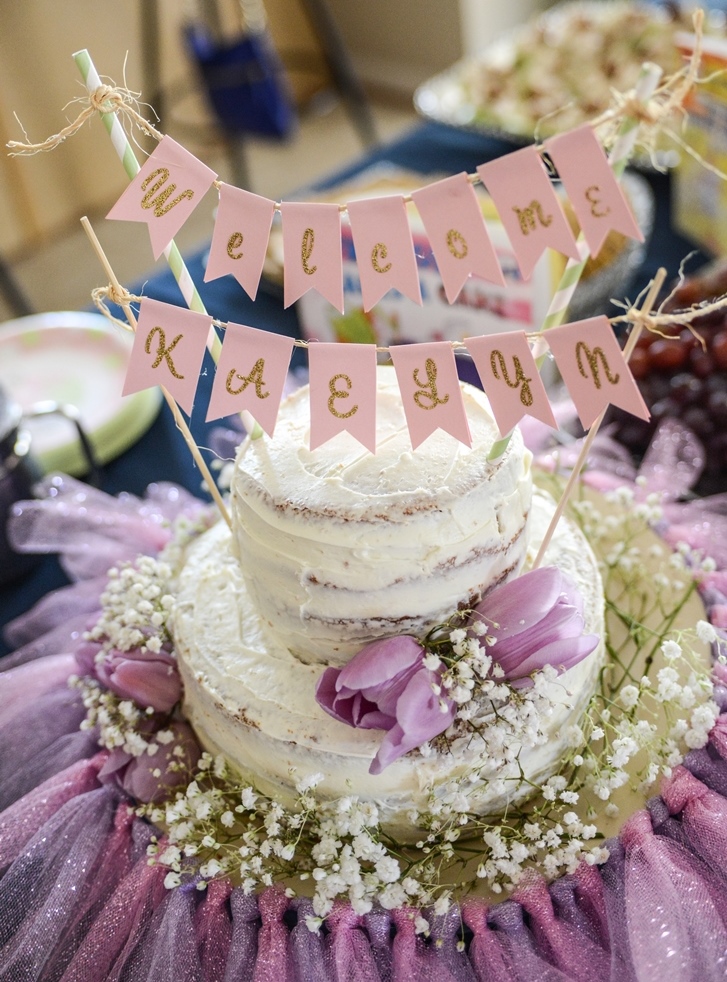
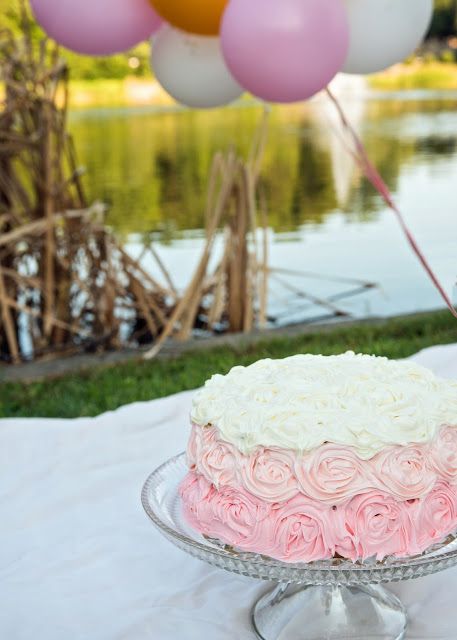
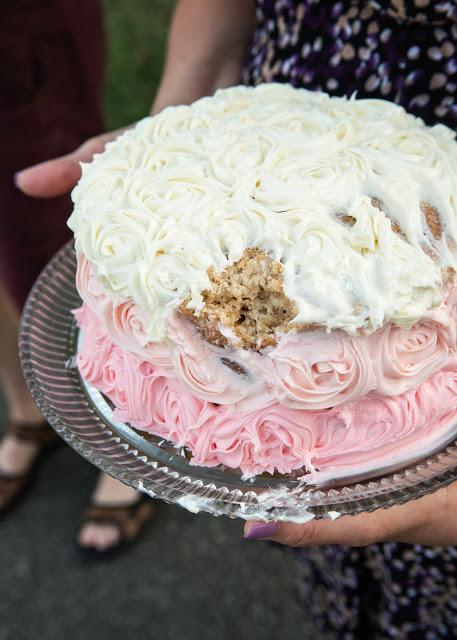
I baked the cake the night before. I choose a delicious French Vanilla flavor. Saturday morning all I did was cut the two 9″ round cakes I made in half each so my bottom layer had 4 cake layers and in between layers I put vanilla icing and a blackberry preserve. I placed 4 cake sticks in the middle of my bottom layer to serve as a support system for the top layer. I did a crumb coating of icing, which actually served as my final “rustic” look for icing as I was following a version I saw on Pinterest that I LOVED.

After the bottom layer was assembled on the stand I cut my two 6″ round cakes I made in half each so my top layer had 4 cake layers and in between layers I put vanilla icing and a blackberry preserve. Once the top layer was assembled separately, I used a large spatula to carefully place the top layer on the bottom layer. I placed three large kabob sticks from the top to the bottom in a triangle pattern through all the layers to give it a little bit more stability since I did have to transport it. Then, just ice top layer like bottom.

The topper I created by using:

  1. hard stock paper – pink 
  2. burlap twine
  3. hot glue
  4. scissors
  5. gold letter stickers
  6. straws/kabob sticks
  • Cut the paper in about 2″ long rectangle and then make the V by cutting into the middle from both sides, bend the paper in half so it is like a small tent
  • Place the letter stickers on the paper
  • Once the letters are all made, take your twine (or ribbon) and put the inside crease of you tent over the twine and secure the two side together over the twine with hot glue
  • Once all letters are attached to the twine, you are ready to attach to the straw/sticks by simply wrapping and knotting the twine
Finish the cake off with some beautiful fresh flowers. The tulips and baby’s breath were perfect for this lavender spring themed shower.

I was so proud to show this off at the shower and all the details Kimberly and her mother put together were absolutely amazing. Kaelyn has a wonderful family that is very excited to meet her!
Tuesday, October 13, 2015

Best Cake EVER

This will always be my
favorite cake. It represents a huge milestone in our lives. Our daughter is
one. We made it, she made, we loved every minute of it. I absolutely cannot
believe a year has passed.

I wanted something special and beautiful for her first birthday and cake smashing photo session without spending a fortune, so I knew I was going to have make my own. For being my first cake decorating experience (no I do not count throwing sprinkles on top as decorating), I think it turned out great and this style is very forgiving. Any beginner can do this 🙂

Of course I also had to
show off another GREAT find from the thrift store. This gorgeous cake stand
was only $9. This stand is super similar if you can’t find a used one. Wasn’t it perfect?!!?

Everyone was amazed by the cake and even more amazed that I made it. Look out for step by step instructions to make an ombre rosette cake of your own!

Special thanks to my bestie for some great photos! Thanks Kimberly!

Thursday, October 8, 2015

Biggest Bang for Children Consignment

Consignment shops or consignment sales sell secondhand goods
for owners, with some sort of fee kickback for the sell. Most consigned goods
are normally priced a little higher than thrift stores but most always lower
than the original purchase price. Both sellers and buyers can win through
consignment markets. As a seller you can get rid of closet clutter for a
reasonable profit and as a buyer you are getting quality clothes for a
discounted price. A lot of consignment stores do specialize in name brand or
luxury  clothing, jewelry and
accessories, making it more appealing for both the seller and buyer. The seller
doesn’t have to give away a high end item and for someone who cannot afford a
luxury item new, buying consignment puts an item in an a realistic price range.

My recent experience with consignment was not in a store but
through a community sale benefitting a non-profit called The Eastern Prince
William Mothers of Multiples Club. The Club is organized to be of aid to
mothers of multiples with networking and support, and also fund towards
education, research and charitable purposes. The prices were comparable to local thrift stores and I felt good actually seeing the women who
were selling their items and knowing that it was helping local mothers.

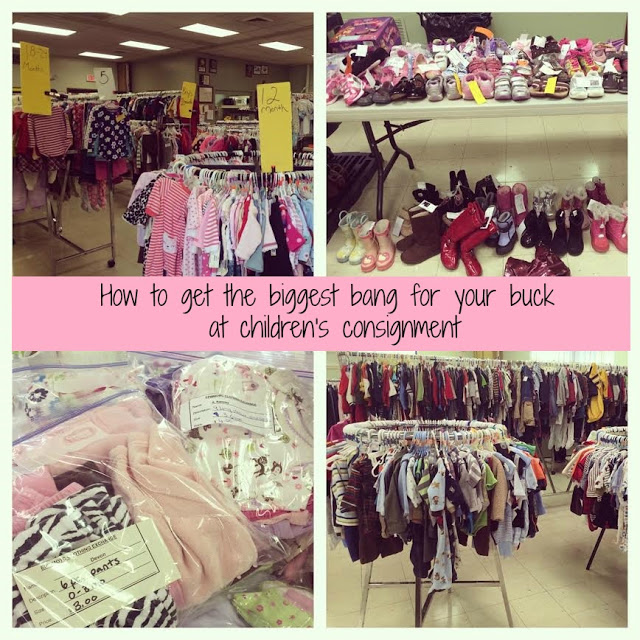
This was also possibly the MOST organized I’ve ever seen a
secondhand sale. Everything was categorized, fully labeled, in bags, prices,
etc. It was amazing! And I lucked out because it was a rainy morning, that the
sell was not that busy yet and I didn’t feel like I had to fight for things. I
had the girl 18-24 month aisle all to myself and took my time picking what I
wanted out. Of course with full arms in about 20 minutes, I had to still
reexamine my picks with Willie at the checkout, but we still walked out with a
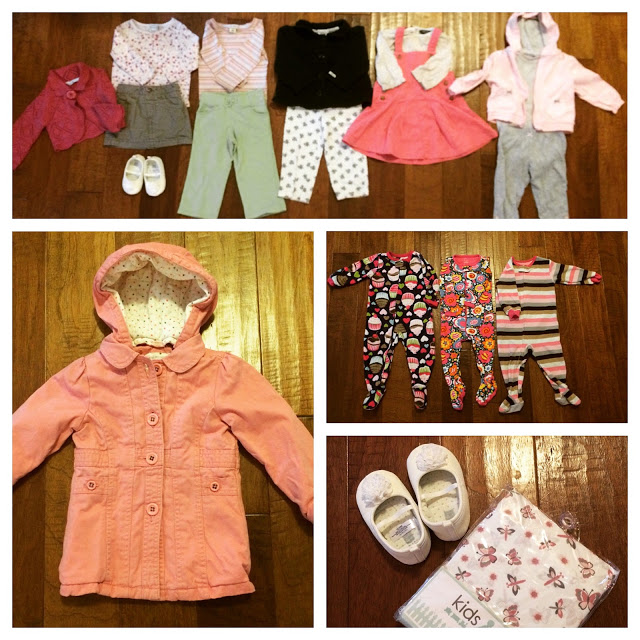
huge bag full of clothes for $50!! 18 items for $50 to be exact which averages
out to about $2.70 per item (1 jacket, 3 sweaters, 4 onesies, 3 pants, 2 skirt/dress, 3 pajamas, 1 pair of shoes, and one fitted crib sheet).

How to get your biggest bang for your buck?

  1. Look for jackets. The pink medium weight Oshkosh jacket was a great find at $8.
  2. Look for items still with tags or in original packaging (like the fitted crib sheet I found) = AMAZING 
  3. Look for full outfits. I got 5 full outfits for around $30!
  4. Pajamas. We love these easy zip up PJs and for $2-3/each, they were a deal from buying brand new at about $10 each. Buying secondhand  saved us over $21 for 3 pairs.
  5. Look for shoes. These adorable (brand new condition) Carter’s white toddler shoes were $4, which are normally $15 (70% savings!)

Some things to look out for:

  • Stains…yuck.
  • Socks are extremely hard to find in good condition. The bottoms just gross me out entirely.
  • Rips, tears, pulled fabric, missing buttons, and any imperfection that would make you unhappy with your purchase.

Support the recycling of clothes! Your baby grows way too
fast to splurge on new and it’s a great way to be GREEN!

Tuesday, June 30, 2015

Baby beach trip under $30

We are so excited to be heading to the Outer Banks for the
Fourth of July. This trip has meant so much to us over the years that it is fitting
that this will be our baby girl’s first trip to the beach. So this is a BIG
DEAL. We are a little nervous of all the things to pack, how to keep her cool,
safe, fed and most of all entertained for the long days we like to have at the
beach.

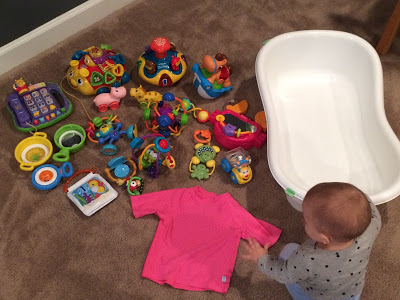
This weekend we were on a mission to take care of the entertainment
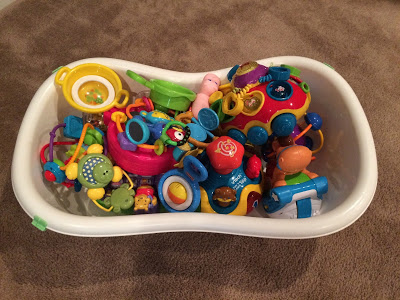
concern of the trip. Well…mission accomplished. We were able to beach prep for
under $30 at our local thrift store. You can spend $30 on two toys alone at the
conventional markets, so we were ecstatic with our finds. This way if they are
lost or ruined at the beach, we don’t have to worry about money wasted. I’m telling future parents now…this is one area you can save HUGE! Just
clean the toys off really well with children safe wipes or soap and you
have a practically new toy for your child. We also got a bath tub to make her a
safe sand/water play zone and an extra protective swim i play t-shirt (normally $15 alone) all included in
our $30 budget. Can’t wait!!