Monday, June 5, 2017

DIY Faux Brick Wall Tutorial

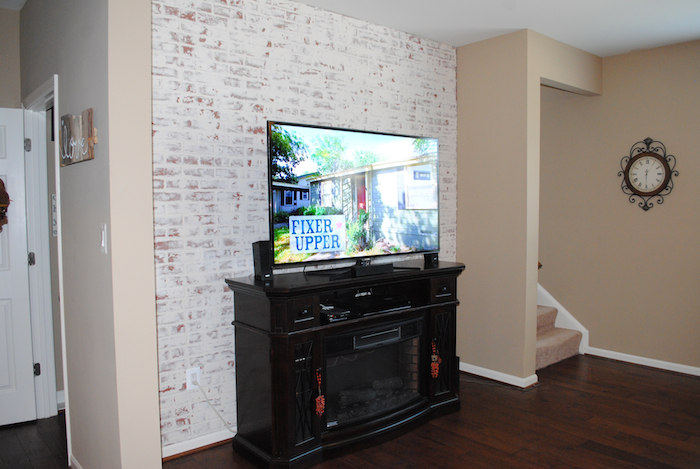
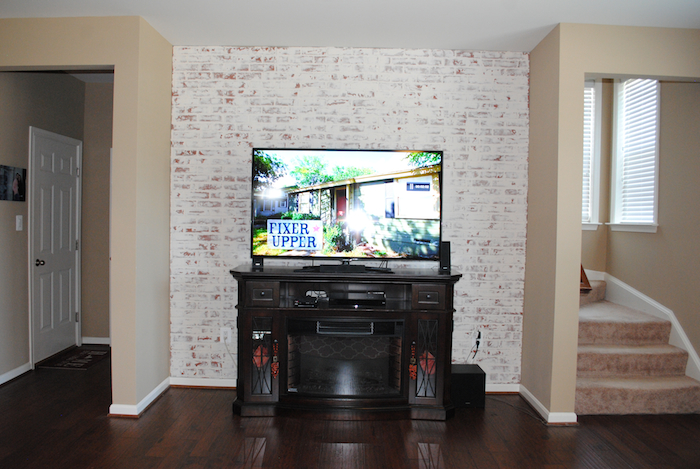
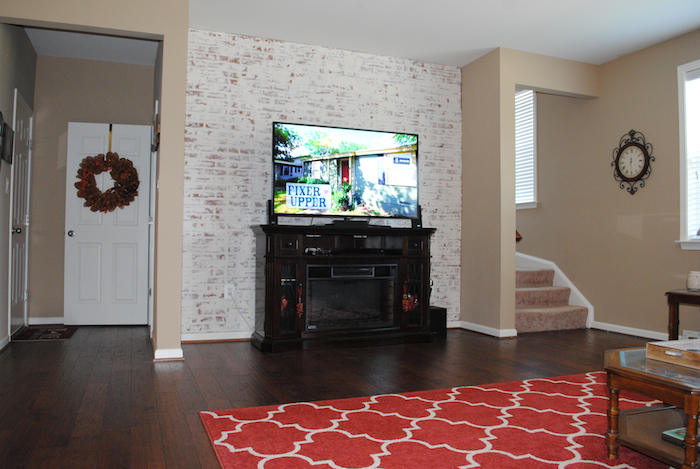
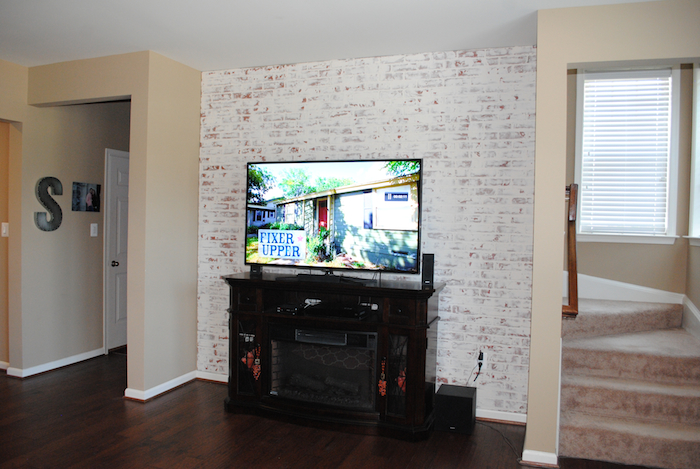
One of my good friends, Nicole, has been talking about doing this faux brick wall forever and it’s finally done!! If you remember my post from Kathy with Our Amore Blog a few weeks ago, this is her fabulous niece she was referring to who introduced us. Nicole is such a planner and tested all sorts of methods of distressing this brick before she dove on in, and all the trial and error paid off because it’s looks awesome.

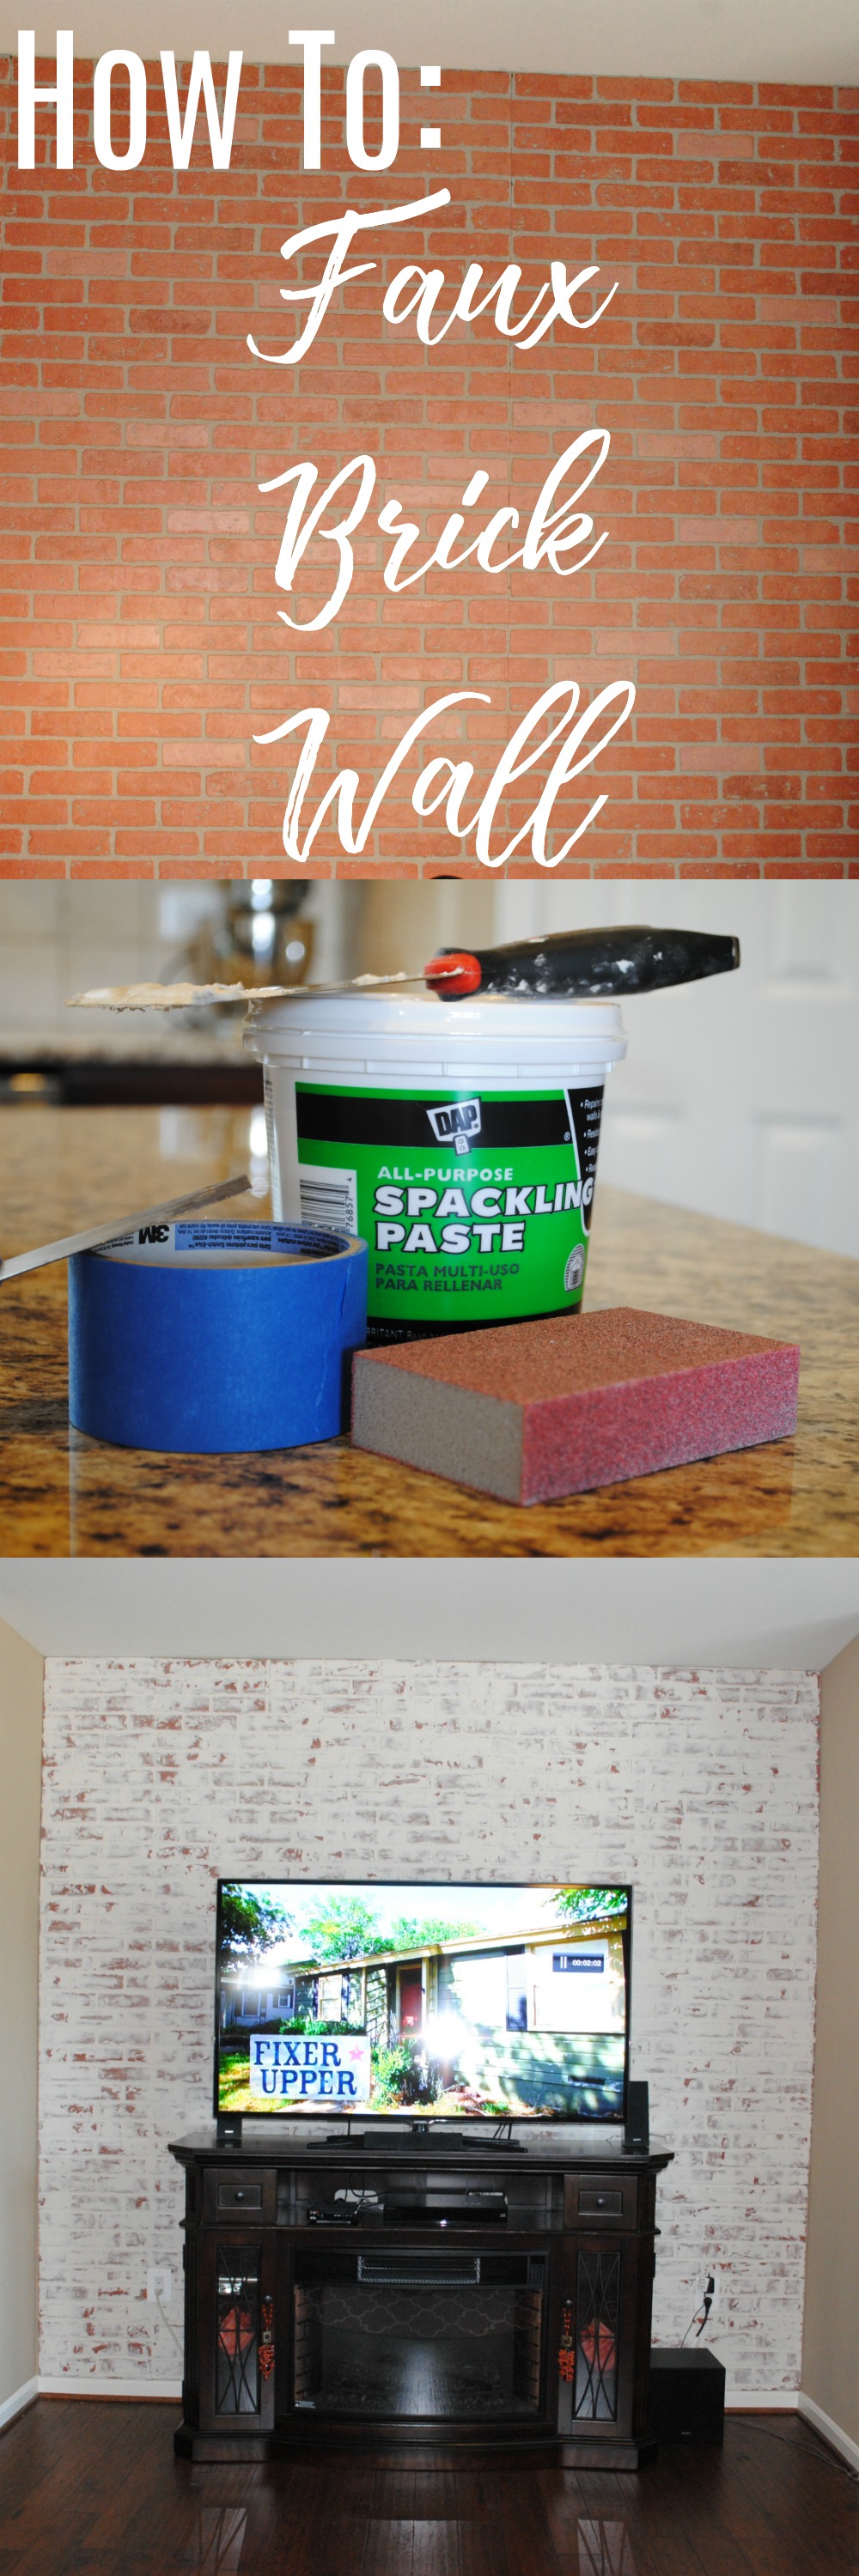
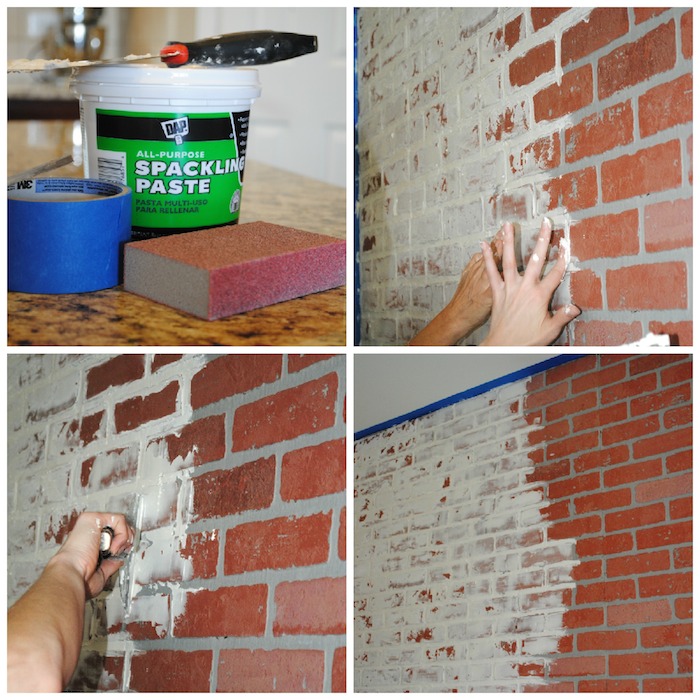
Supplies:

  • Faux Brick Panels (Nicole bought hers at Home Depot and had them cut to her measurements) – about $25 per panel
  • Nail Gun and nails
  • Dremel or sharp exacto-knife for cutting holes for outlets
  • Spackle (brand below – She used almost 4 of these canisters, so may be cheaper buying a bigger once depending on your wall size)
  • Putty Knife
  • Painters Tape to protect walls
  • Sandpaper

Installation:

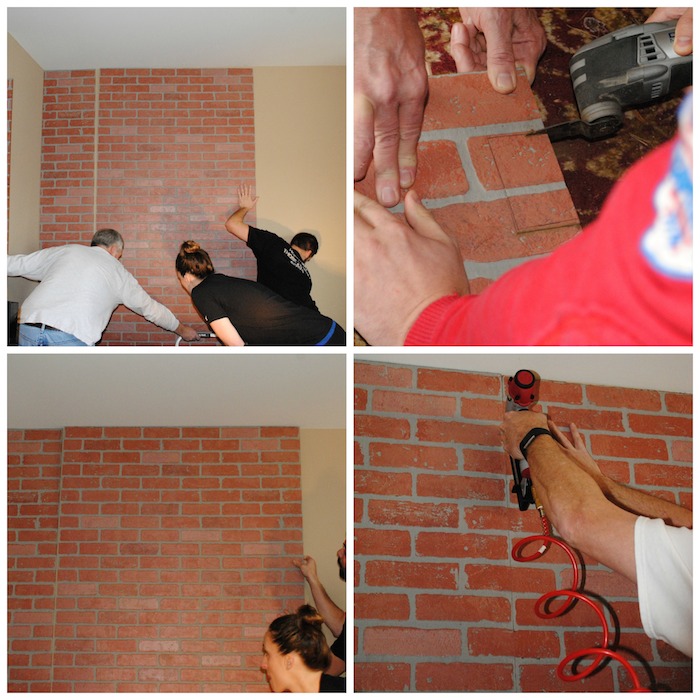
  1. Measure your walls and get the precise cuts you need for your wall
  2. Plan how pattern will line up
  3. Cut panels (Home Depot will do this for you if you have your measurements, highly recommended since this stuff is hard to cut straight and is a HUGE time saver)
  4. Use a razor or dremal to cut holes for outlets
  5. Use nail gun once positioned to secure to wall * Tip – Work in at least a pair to help position and secure to wall. The panels are a little ackward and can shift easily in the installation process. Working alone will be frustrating and a huge time sink.
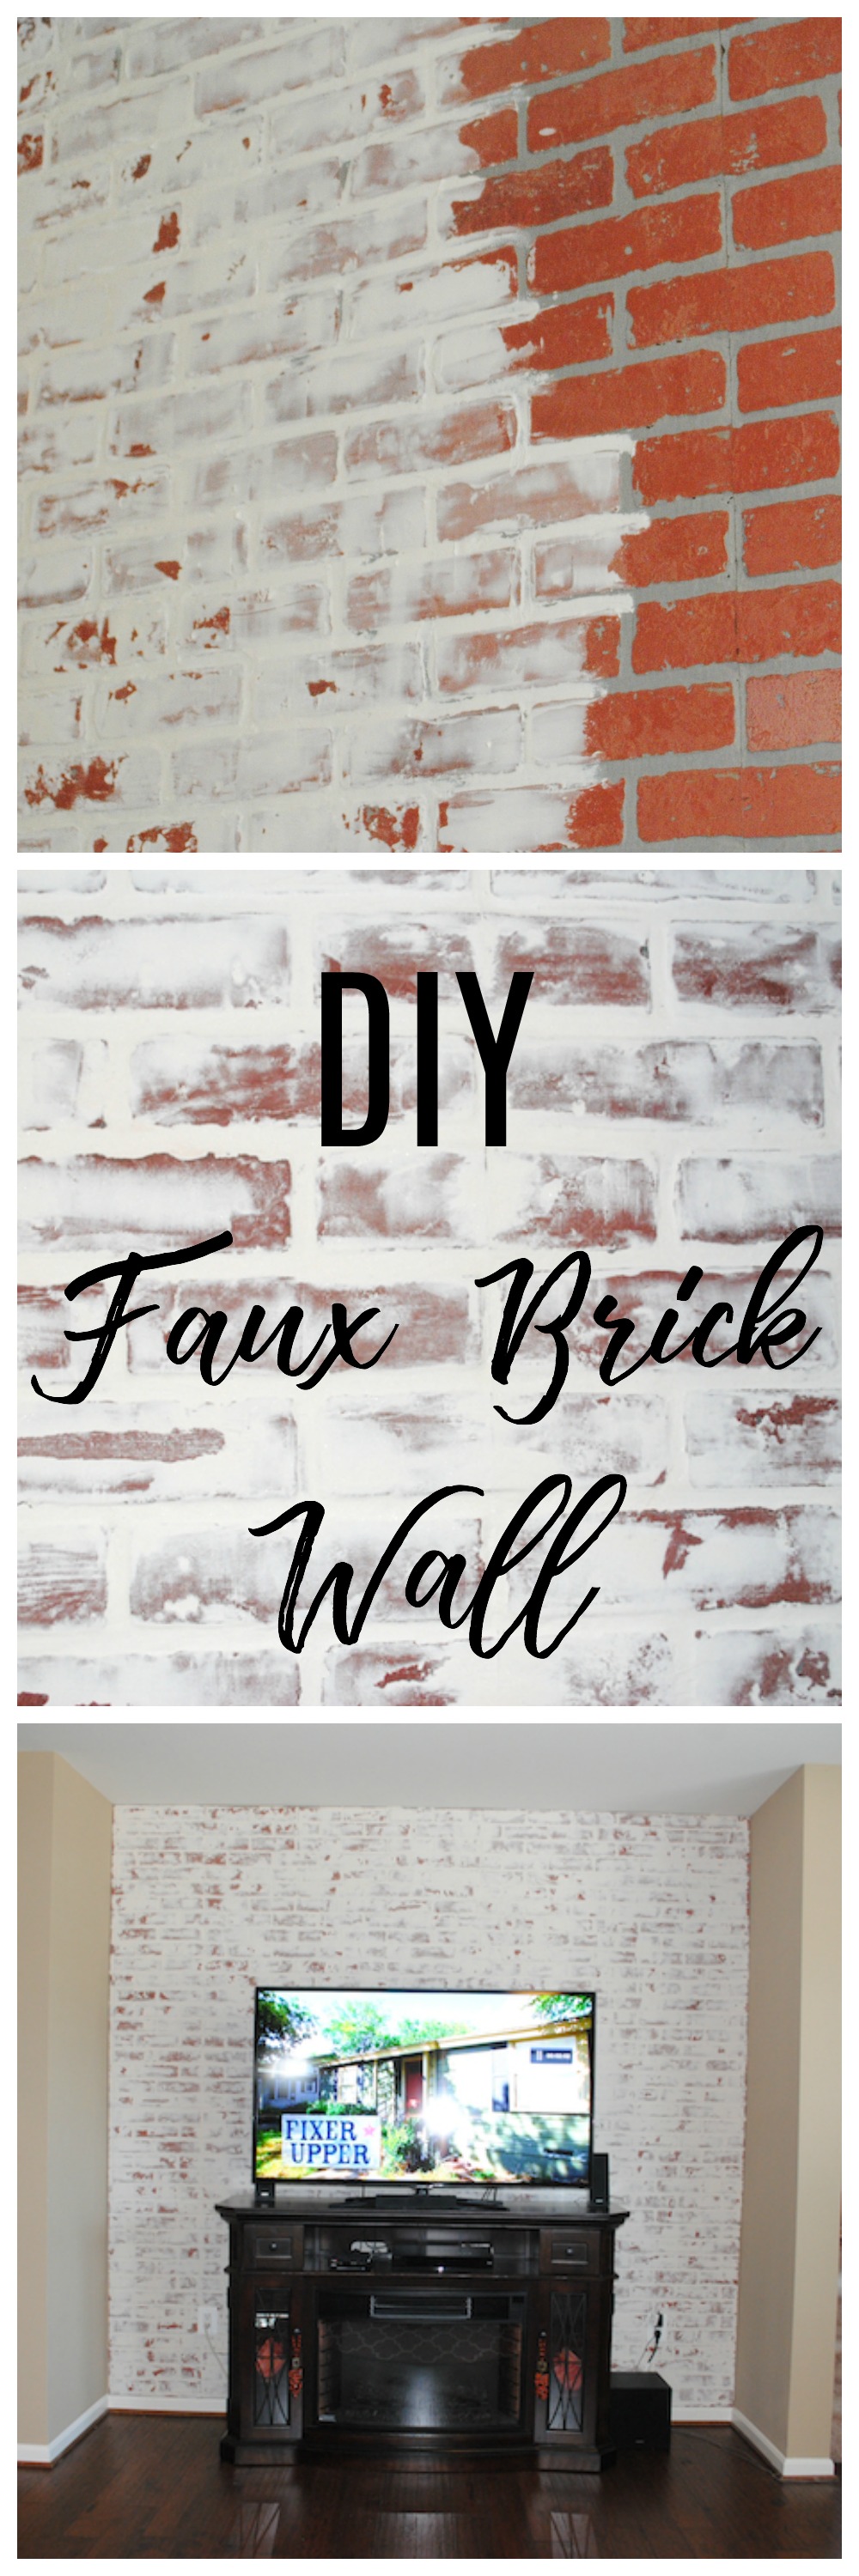
White “German Smear” Technique:

  1. Scoop the spackle on to the end of the spreading knife
  2. Smear the spackle on to the wall (how thick or thin you leave it is up to you)
  3. After you have done a small section, using your finger, smear out some of the excess spackle from the “grout” of the brick
  4. Continue this process until your wall is covered
  5. As the spackle begins to dry, wet your fingers to and lightly trace the “grout”.  We found that this helped smooth it out. *Tip- If possible, work in a pair like Nicole in her mom did. One person smears large amounts with putty knife while other person comes in behind to add/smear with wet fingertips. It dries fast so it will lessen the amount of time of alternating bewteen fingers and putty knife.
  6. Let the wall completely dry
  7. After the wall is dry, you can use your sandpaper to distress it (how much you sand off is personal preference)
Of course you can leave the brick color if you would like, but the white distressing is perfect for Nicole’s Tuscan vibe and all decor. It also makes this accent wall pop and help makes the room look bigger. She is looking for some accent pieces for the sides of the fireplace…any ideas?
Monday, May 22, 2017

Lucketts Spring Market Recap 2017

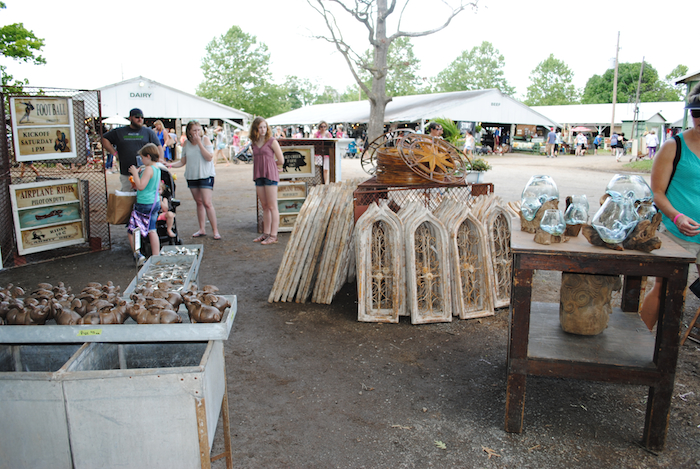
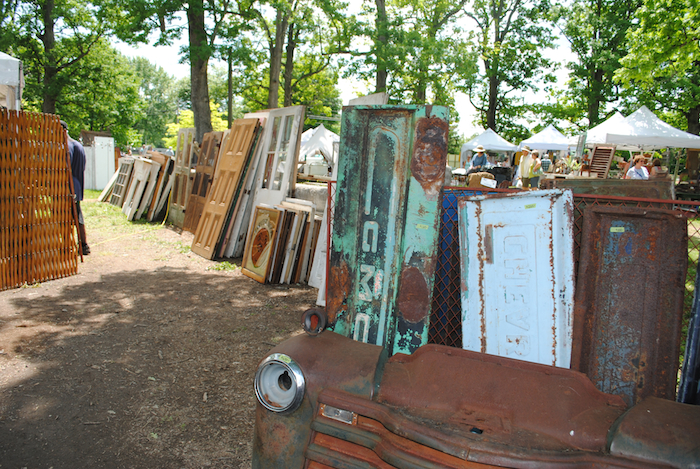
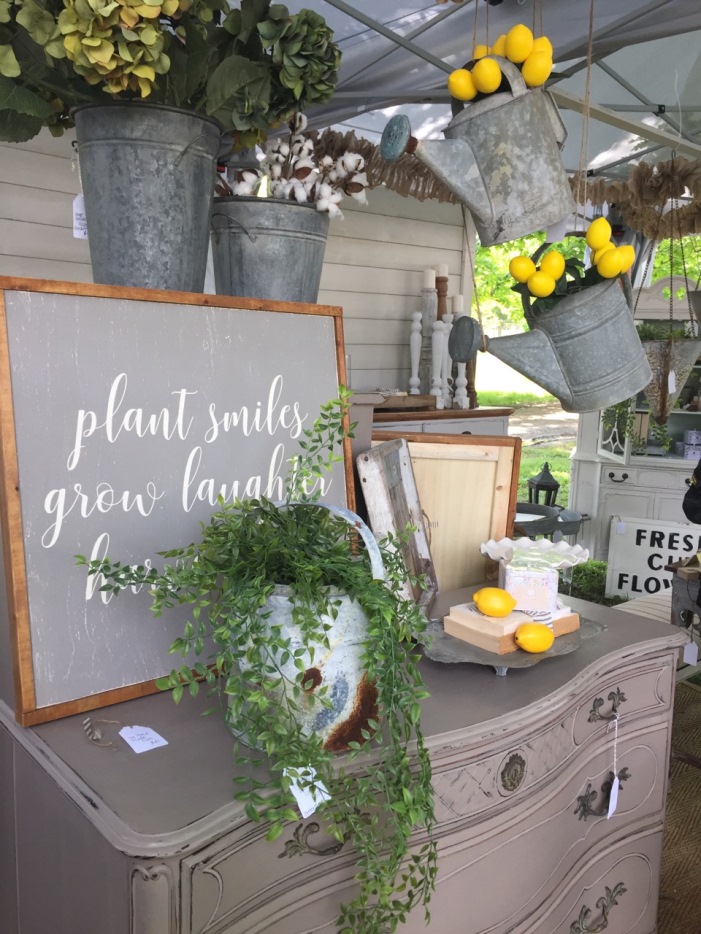
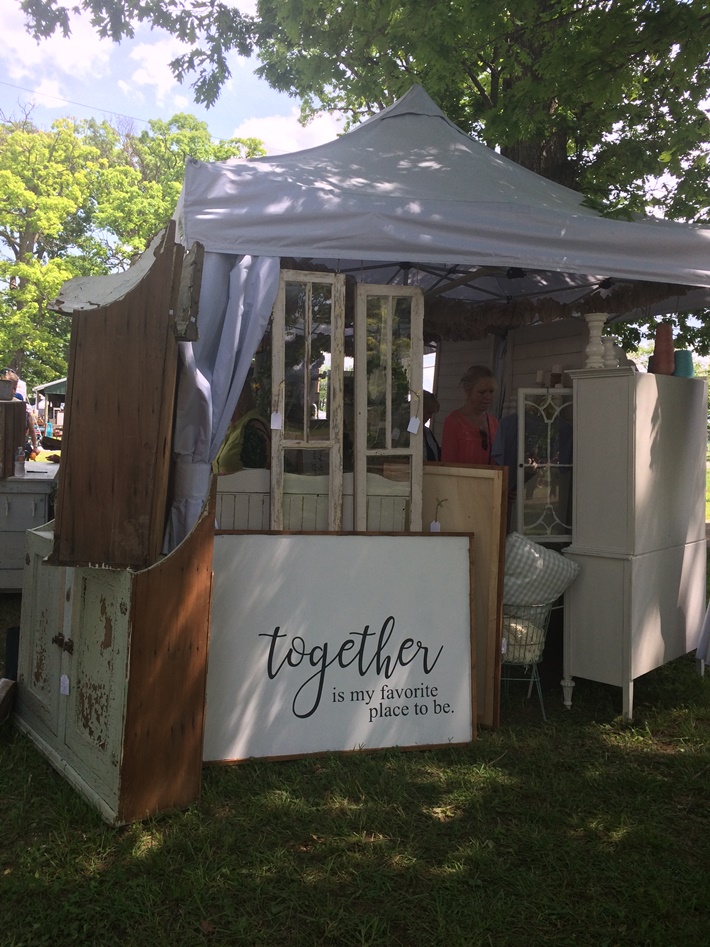
Happy Monday! This is my second year attending the Lucketts Spring Market and it provides such wonderful inspiration! If you haven’t experienced the market yet, the 3-day event hosts over 200 of the best “vintage hip” vendors featuring painted furniture, antiques, architectural salvage, vintage gems, hand painted signs, and handmade items. This year was the first year they held it outside of the actual store’s grounds so it was a different vibe then my first experience, but still amazing. It was a hot then rainy Friday afternoon, which made the crowds less than my previous attendance on a beautiful Saturday. The fairground vibe wasn’t as cramped but as provided a weave that you had to remember where certain vendors were which was my only downfall compared to the easily navigated aisles.

I’m a total vintage junky so all the old doors, windows, furniture, light fixtures were definitely the highlight for me. All the refinished furniture and painting demonstrations were inspiring, but also made me realize that you can make something on your own without the store prices if you’re willing to put in the hard work. The farmhouse vibe is TOTALLY in and people were absolutely following the Joanna Gaines movement. I mean for obvious reasons…her style is impeccable! Rose and Grace Market had some fabulous farmhouse items and the cutest shirts.

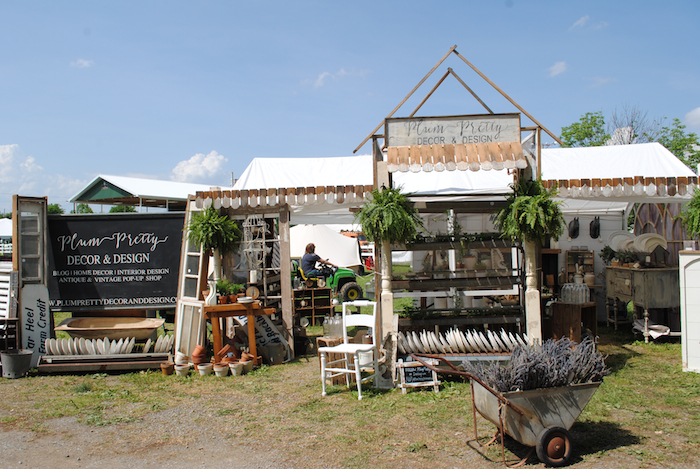
Plum Pretty Design and Decor had an amazing pop-up booth as well. I adore her logo and her Instagram page full of farmhouse loveliness.

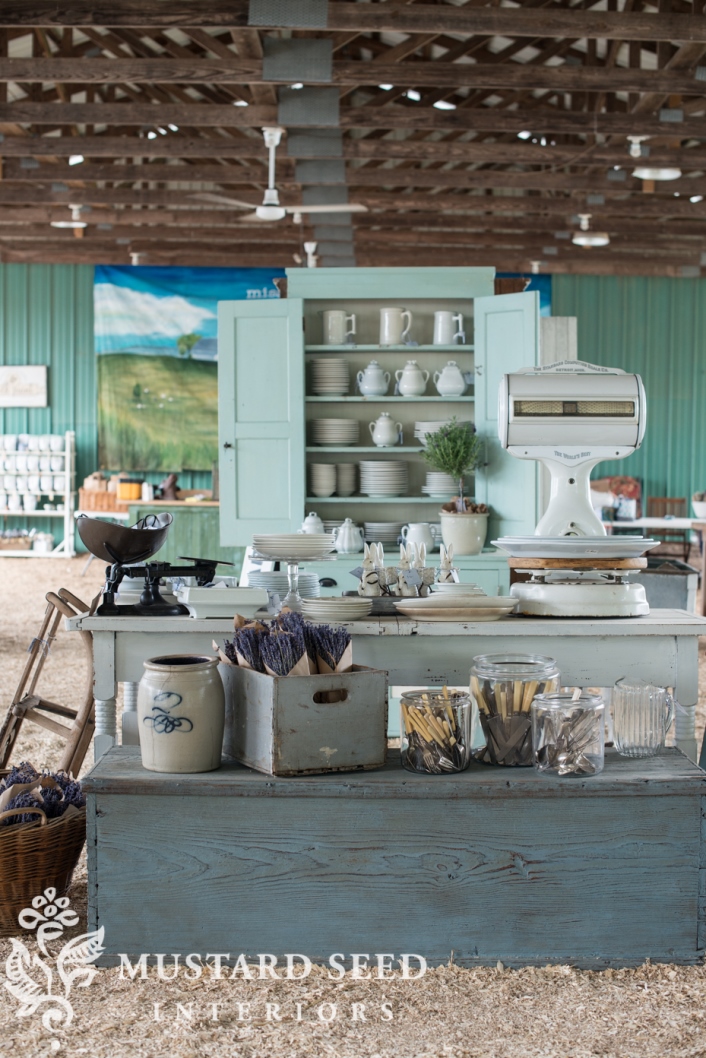
I was amazed by the Miss Mustard Seed following as her barn booth was almost all sold by the first day of the market. Her items are fabulous and her perfectly staged booth was something out of a story book!! I also cannot wait to try some of her products.

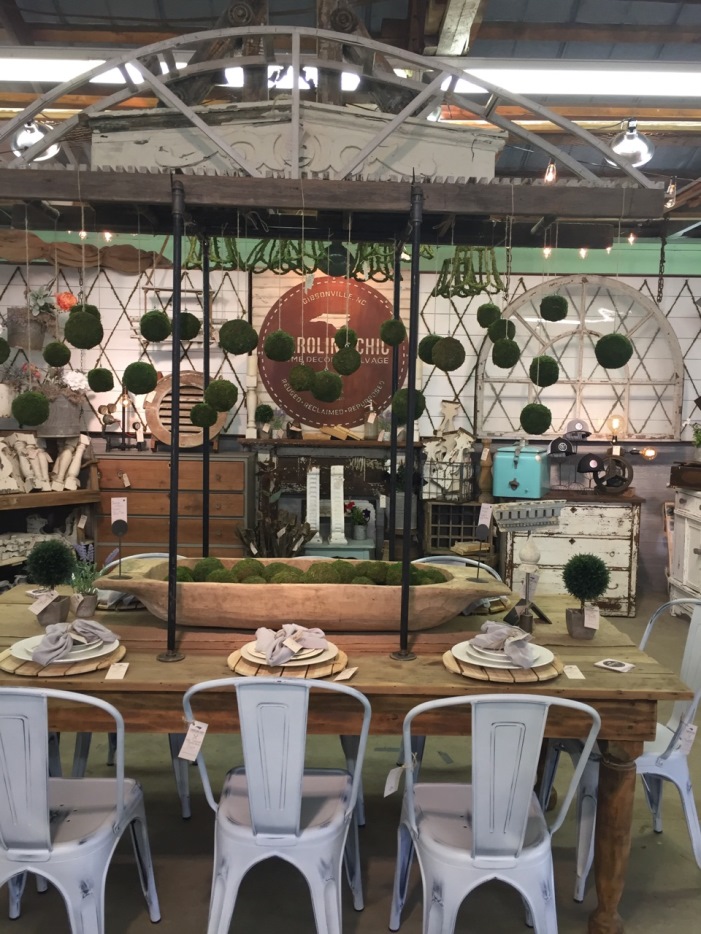
Loved Carolina Chic Home Decor and Salvage as well! They had these HUGE amazing corbels.

Lucketts also featured beer and wine vendors, live music, food trucks, workshops, and a children’s section this year which was perfect for entertaining little Miss Hartley while mama shopped!

Until next year Lucketts! Thanks for all the wonderful creativeness and one-of-a-kind finds!


Monday, May 1, 2017

Tips for Spring Cleaning

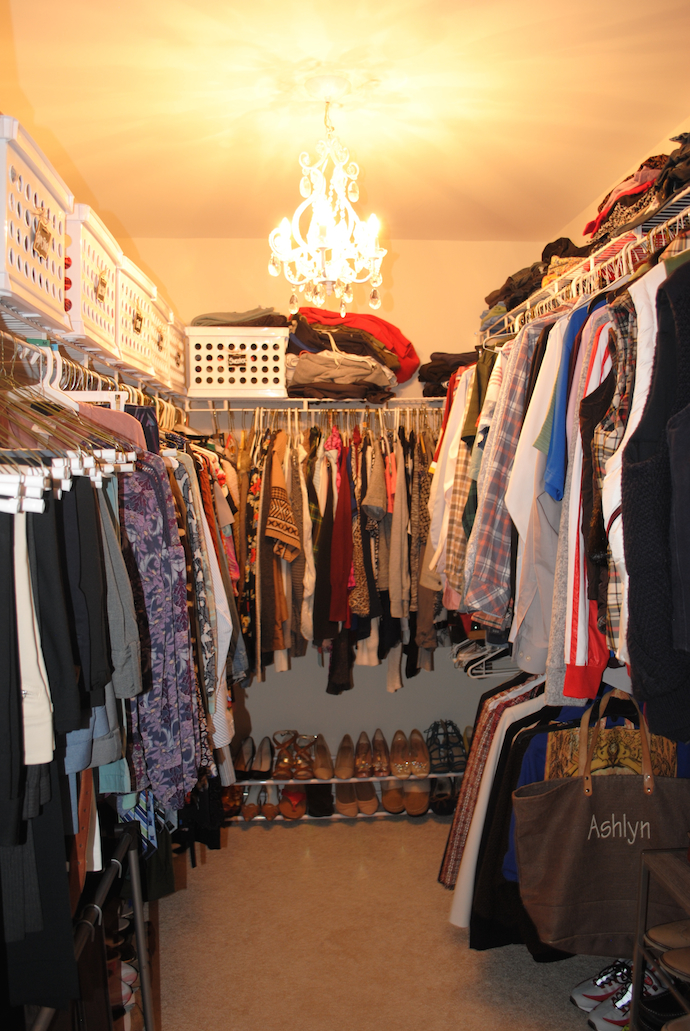
With the nasty rain last weekend I took the opportunity to completely overhaul of our master bedroom closet. This was one part of our new house we definitely compromised on, because for a single family home it’s on the smaller side. And for people that love clothes, we have had to be practical and inventive on space options. I was so embarrassed with the dysfunction and overflowing of clothes, a spring cleaning was definitely needed! So with Willie away at a bachelor party and the rainy weather keeping us in, Hartley watched me take almost every SINGLE piece of or clothing out of the closet in order to orangize into piles and re-order the hanging items for more practicality.

In some ways this was a present for Willie and selfishly for my sanity because almost all the loose items were his. The pants I neatly folded and put into stacks of jeans, “specialty pants”, and shorts. All the hanging stuff was easy to shift around and getting rid of all the extra hangers and plastic dry cleaning wrap helped significantly. I put the long dresses in the far back which opened room for the laundry basket and better shoe grabbing. For scarfs and belts I just looped over a hanger and made them easily accessible towards the front of the closet.

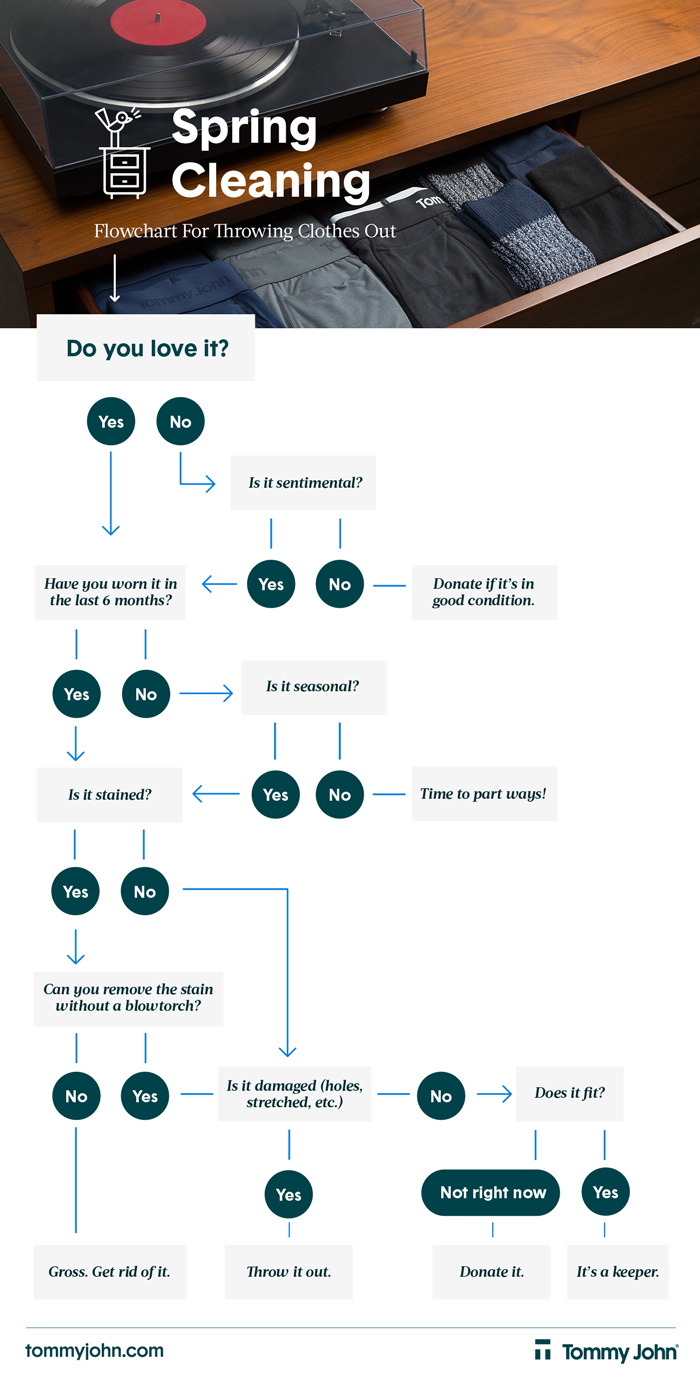
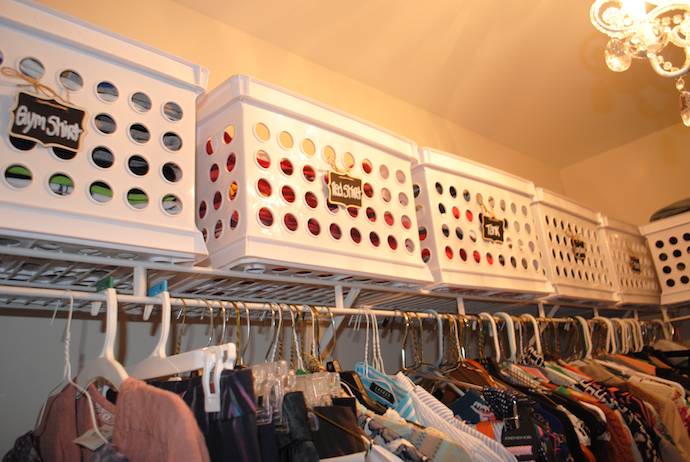
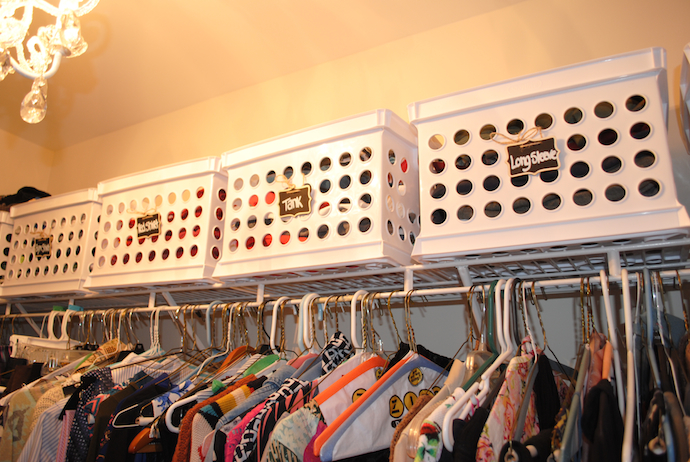
Then for the monumental task of Willie’s shirts…I made a thrift pile, questionable pile (those clothes that I hated, but for some reason thought Willie would kill me if I threw them out), and then a t-shirt pile, gym shirt pile, tank top pile, long sleeve pile, sweater pile, and a red shirt pile. Yes…a red shirt pile?!? This reference guide for spring cleaning from Tommy John was SUPER helpful when deciding on both mine and his items. I know as a frugal person it can be especially hard to throw away clothes and shoes because all your thinking of is the money it cost you and if you had to replace it, more money comes out of your pocket. So setting an intention and using the flowchart was my lifesaver. Sometimes quality over quantity is the answer, and something like a well-made pair of underwear can go a long way to help declutter.

I also knew if I put his shirts back up in neat stacks, he would destroy them in…oh about 1 day. So I went on the hunt for some cute storage options, but why are bins/crates/baskets so darn expensive?!? I settled on these white Target crates that were only $3.49 each, but they were a good size and cohesive, and honestly as long as it does its job, who is going to really judge I didn’t by the adorable $12 wire baskets I really wanted. I made them more fancy by using these adorable chalkboards signs I found and just used a chalk marker pen to write labels for each crate.

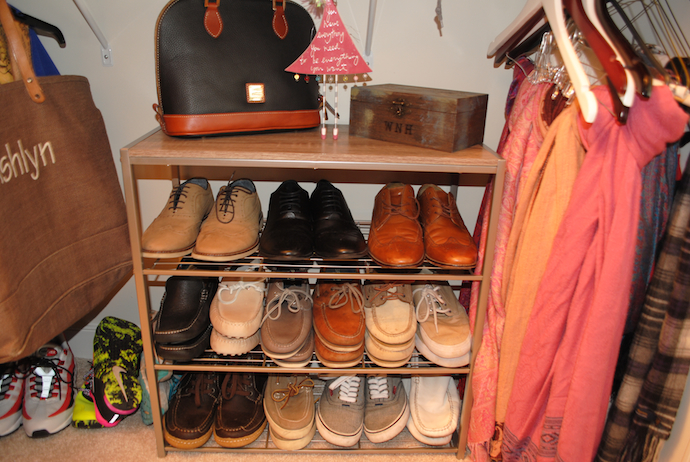
I also found a great Target shoe rack for Willie’s shoes. Which I proudly put together all by myself on Saturday night when the baby fell asleep. It’s been a LONG time since I’ve had to read directions! Ohhhh and just one little last piece…this stunning chandelier for a little closet bling.

Good luck with your spring cleaning! I’m happy that we get to take 3 full bags of clothes to the donation center. Always a nice feeling to de-clutter and give back to the community.

Thursday, April 20, 2017

Dream Living Room Inspiration

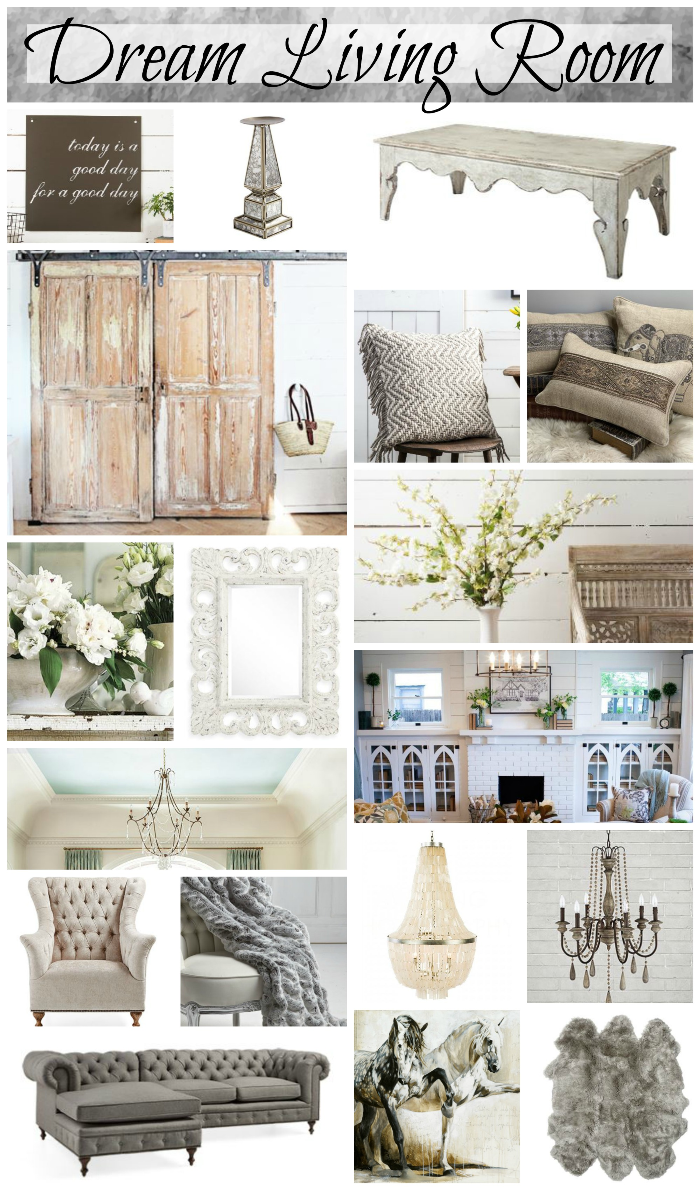
Ok guys, this is my first design inspiration mood board post! I was so excited when Arhaus reached out to me for a their Dream Living Room project. Creating a beautiful room with ANY pieces I want…ummmm heck yes!

So what inspired me?

First off, tufted furniture…vintage glam at it’s finest. I would include a beautiful tufted sectional sofa complimented with gorgeous accent chairs. If you are looking for more accent chair tips and tricks this post from Joss and Main is great! A faux fur throw, rug, and stunning pillows would finish off seating to welcome family and friends with comfort and style.

I would love to have antique sliding barn doors or custom built-ins (my favorite Joanna Gaines moment were these chapel-isc built-ins) and have a rustic antique coffee table with adorable scalloped details.

For the walls I would do white shiplap or a light grey paint. Then for a pop of color and unexpectedness amongst the neutral palette, I would paint the ceiling a light blue with thick beautiful white crown molding around the room. The contrast would be stunning!

For some drama I would either pick an extravagant chandelier or a more modest farmhouse style chandelier to center the room. Can I just drool over both these options for a second…deep sigh…ok wiped my mouth.

For wall art, I would include this metal sign and a horse painting canvas. If you know me at all, horses are EVERYWHERE in my home. It’s a part of me and what makes my home mine. I am also a sucker for hand-carved mirrors like the one above. It’s the perfect statement piece for a shabby chic living room.

Finishing off my room would be metallic candle sticks and white vases filled with tons of white flowers.

What do you think? What would you include in your dream living room? For more design inspiration, check out Arhaus Instagram!

Photo credits: Arhaus, Magnolia Market, HGTV, Aidan Grey, Google Images