Thursday, April 6, 2017

Spring is Here!

Happy Thrift Thursday!

Who doesn’t love a spring morning? The crispness of the air, smells of trees and flowers blooming, and the sound of the birds rejoicing that it is finally warm. Last weekend we embraced the spring kick-off with a full revamp of our front porch area. I have wanted a new front door color since we bought the house in July. I went back and forth between doing a bright red, pale yellow or black. I finally settled on black because I thought it was a good neutral that worked well with the white house and black accents we already had. I painted the door with a bristle brush on the first layer, but realized that a foam brush was probably better. The black color shows everything, so trying to go with the grain while defensing a sneaky cat, rambunctious dog, and a curious toddler was a little challenging to say the least, but it turned out good and had no black paint spills (major success). Then it was off to the new wall lanterns. Ohhhhh these lanterns. I took a few years off Willie over these things because it was just one of those weekends were you have to go back-and-forth to the store a 100 times to get anything done. But…how amazing are they?!?! I thought they were going to be a bit large, but they are just fabulous statement pieces. We are going to replace the ones mounted on either side of the garage for extra drama. Then the new front door hardware. Again something that should normally be a quick change, wasn’t. So that remains on our living room floor until Willie’s blood pressure returns to normal.
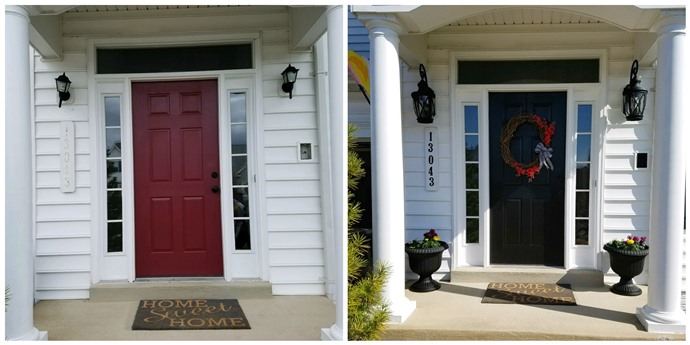
I finished our front porch revamp by painting the white brick with a clearance $5 gallon of white brick paint which is super easy and made a huge change. I also spray painted the gold house numbers and doorbell to black. Then I used the $11 pots and got a bag of river rock to fill the bottom so they were more sturdy and filled with soil and an assortment of flowers. The same pots in the heavy clay were $45 each, so for half I got two plastic pots to use. For the spring wreath, I just used my grapevine wreath with two long floral stems and added a black and white bow to compliment the new door color. Attempting a 6 loop bow for the first time watching YouTube, was an experience 😉 Finally I weeded and mulched the front beds with Hartley wheelbarrow rides included. It was a loonnngg weekend, but I’m loving the spring overhaul and makes me excited of all the spring events to come!

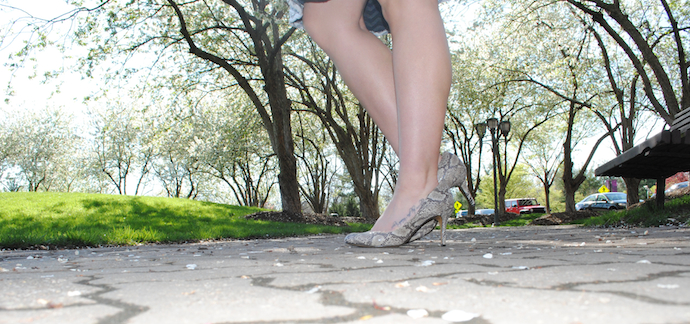
Anyways…to the dress and shoes. The perfect spring look. A super soft lightweight stretch dress with fabulous heels. This dress was brand new from the thrift store for $7.99 and is Hawthron brand bought through Stitch Fix (I only know this because of the tags). The snakeskin Vince Camuto heels (similar) were brand new condition for $8.99. My amazing Chicos jacket is the same one I wore in this post which was only $5 from the thrift store. Luckily I have a fabulous friend help me snap some of these photos because my self-timer practice was not working. Spring in Washington DC is just stunning!
Happy Spring!

Thursday, March 23, 2017

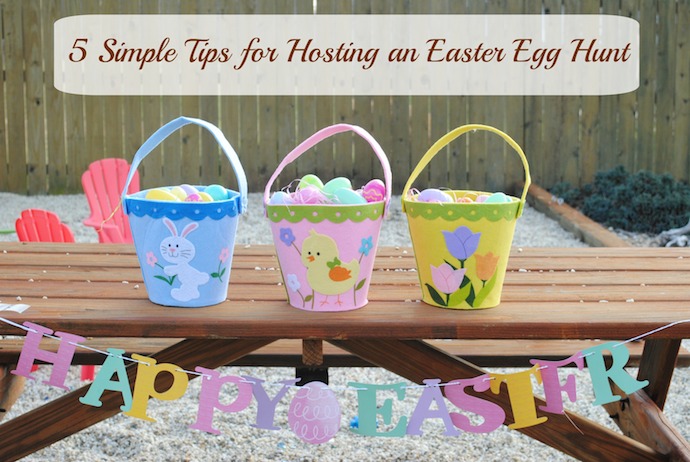
5 Simple Tips for Hosting an Easter Egg Hunt

This shop has been compensated by Collective Bias, Inc. and its advertiser. All opinions are mine alone. #SpringItOn #NestleKitchen #CollectiveBias

As a busy working mother, finding the time to embrace social events is hard when I consider my on-the-go lifestyle. I always have a to-do list playing over and over in my head that I just can never RELAX, let alone HOST an event. However, for 2017 I set the intention to enjoy the simple moments, and slow down once in a while to just hang out with family and friends. What’s better than finding time for fun, food-centered moments with our loved ones! Hosting a Simple Easter Egg Hunt using Nestlé products was the perfect way to embrace the fullness of the spring season and outdoor activities while making a party easy to do. Here are 5 Simple Tips for Hosting an Easter Egg Hunt at your house:

#1: Electronic Invite

Whichever method you choose, doing this not only saves you hours of invite design decision (why is decision making so hard!), but also paper waste. It is also a super convenient way to get RSVP notifications and a summary of responses that is easily accessible when you are on-the-go. When you are setting a time, think of a time that doesn’t require you to provide loads of food (lunch or dinner time), this will help in minimizing the workload for you. I choose 3-5pm because it’s the perfect in-between time that I don’t feel like people expect to load their plates, so you just need a few food options.

#2: Simple Menu

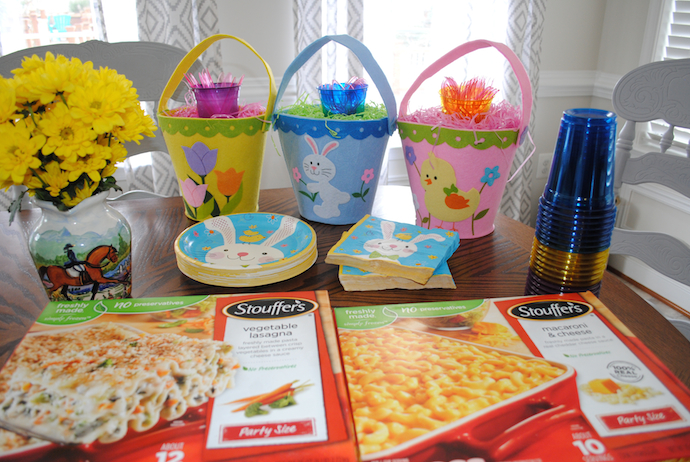
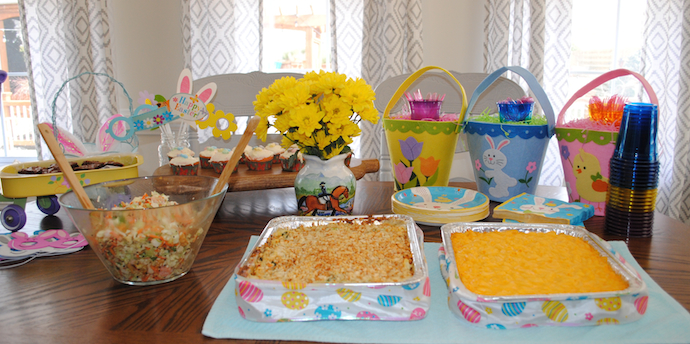
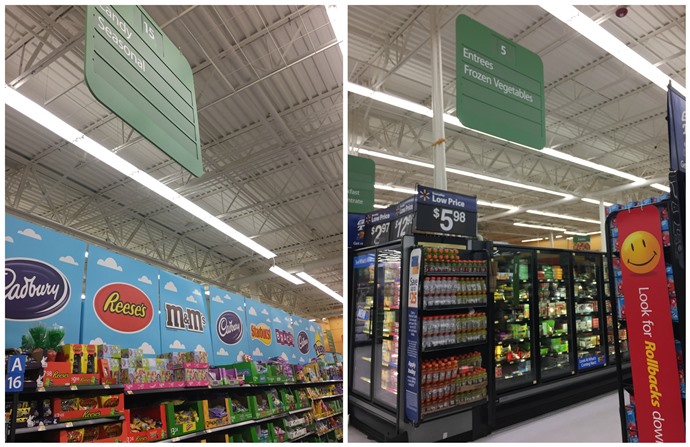
Letting someone else do the cooking is definitely the easiest way to go. No need to fuss in the kitchen! I used two fabulous Stouffer’s frozen party size entrees that I found at Walmart. First off, what kid doesn’t like Mac & Cheese? The Stouffer’s Mac & Cheese is made with ingredients just like the ones you use at home with freshly-made pasta in a 100% real cheddar cheese sauce. The Vegetable Lasagna is freshly made whole grain lasagna layered with a colorful medley of carrots, spinach, broccoli, and onions in a parmesan and romano cheese sauce. Both are perfect meatless options to serve your family and friends during the Lenten season. It is also super convenient if you dress-up  the tin baking pan with ribbon and at the end, just throw the entire disposable pan out. Less dishes are the best dishes! I also used an Asian salad mix with cooked shripm to create and easy salad.

I also made semi-homemade dessert. Using boxed brownies is the best thing ever…they just taste too delicious not to. The cupcakes I did boxed cake mix and icing, but dressed them up by making a strawberry jam and cream cheese frosting filling. I finished them off using the SweeTARTS Chicks, Ducks & Bunnies that are perfect for decorating and filling candy dishes! Made with no artificial flavors, SweeTARTS delivers the original flavor combination of delightfully sweet and delicately tart in the coolest springtime shapes. For more Nestlé inspiration and ways to use these cute treats as decoration on cakes, cookies and other delicious goodies, check out their Pinterest and Social Hub pages.

#3: Easy Décor

I just used $1 plates, napkins, and cutlery. I found some great baskets and eggs at the thrift store, which made 100 eggs super affordable. Also use items from around the house. Use baskets, serving trays, or anything that will spruce up your table. Get a great vase and add a pop of color with some spring flowers as well.

#4: Quick Egg Fillers

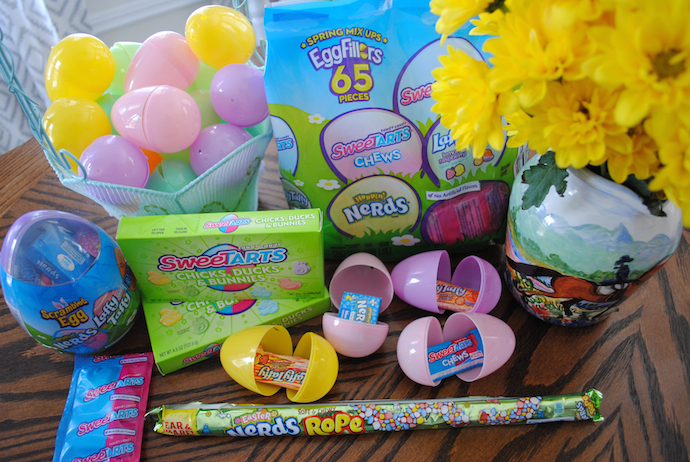
I used the Nestlé Easter candy which currently has a great Ibotta offer through Walmart. I also added a few empty ones, bouncy balls, Easter necklaces, chocolate, and eggs with nickels, dimes, quarters or $1 coins. I think having a good variety made every child happy with their find! You can also fill these all through the week so it’s not a huge lift the day of the party. Just start piling them all in a large bag so they are ready to be hidden.

#5: Set Boundaries, Hide Properly, Have Enough, and Recycle

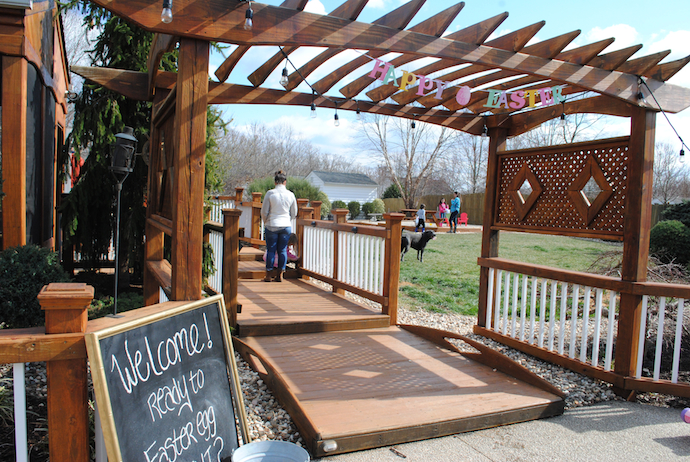
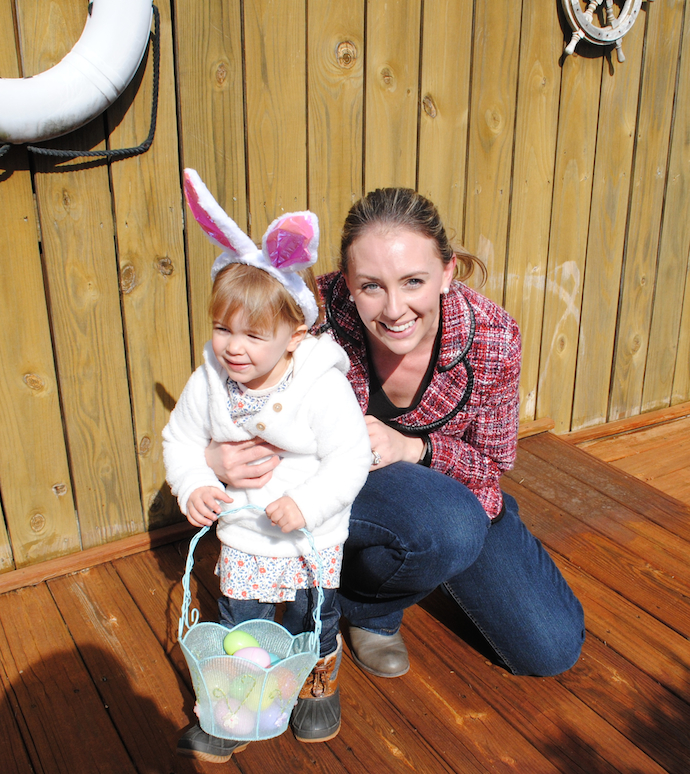
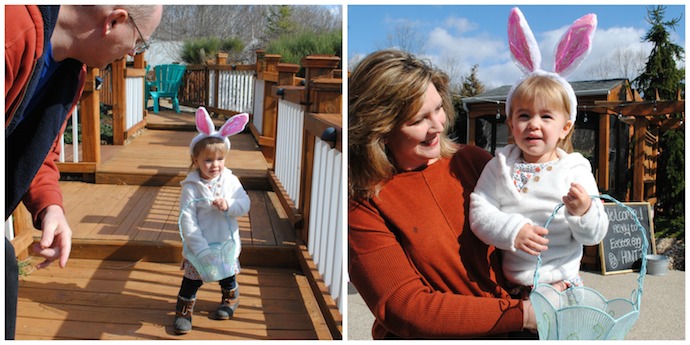
We used our fenced backyard as our boundary for the kids. It was a little muddy, but having large amounts of patio and decking we were able to find enough spots to hide. We also had mostly toddlers, which let us make the hiding spots easier. If you have older kids coming, be creative and age appropriate. We tried to have about 15 eggs per child. It was enough to feel like they won good prizes, but not overwhelming or they felt like their basket couldn’t hold enough.  Oh and the best part…you are now a pro at hosting an Easter Egg Hunt, save all those fabulous plastic eggs and make it an annual event!

Nestlé makes it easier than ever to maximize the goodness of spring and the fun of Easter celebrations. Hope that even with your busy life, this inspires you to create more spring moments that matter. Have a great Easter!

Here are the locations in Walmart to find these fabulous products!

Monday, February 27, 2017

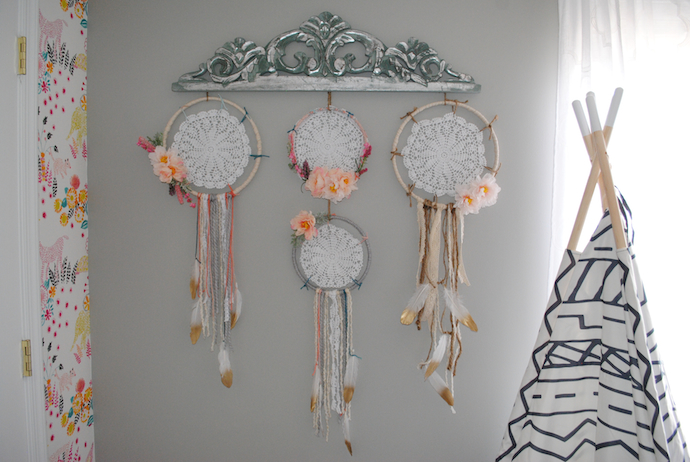
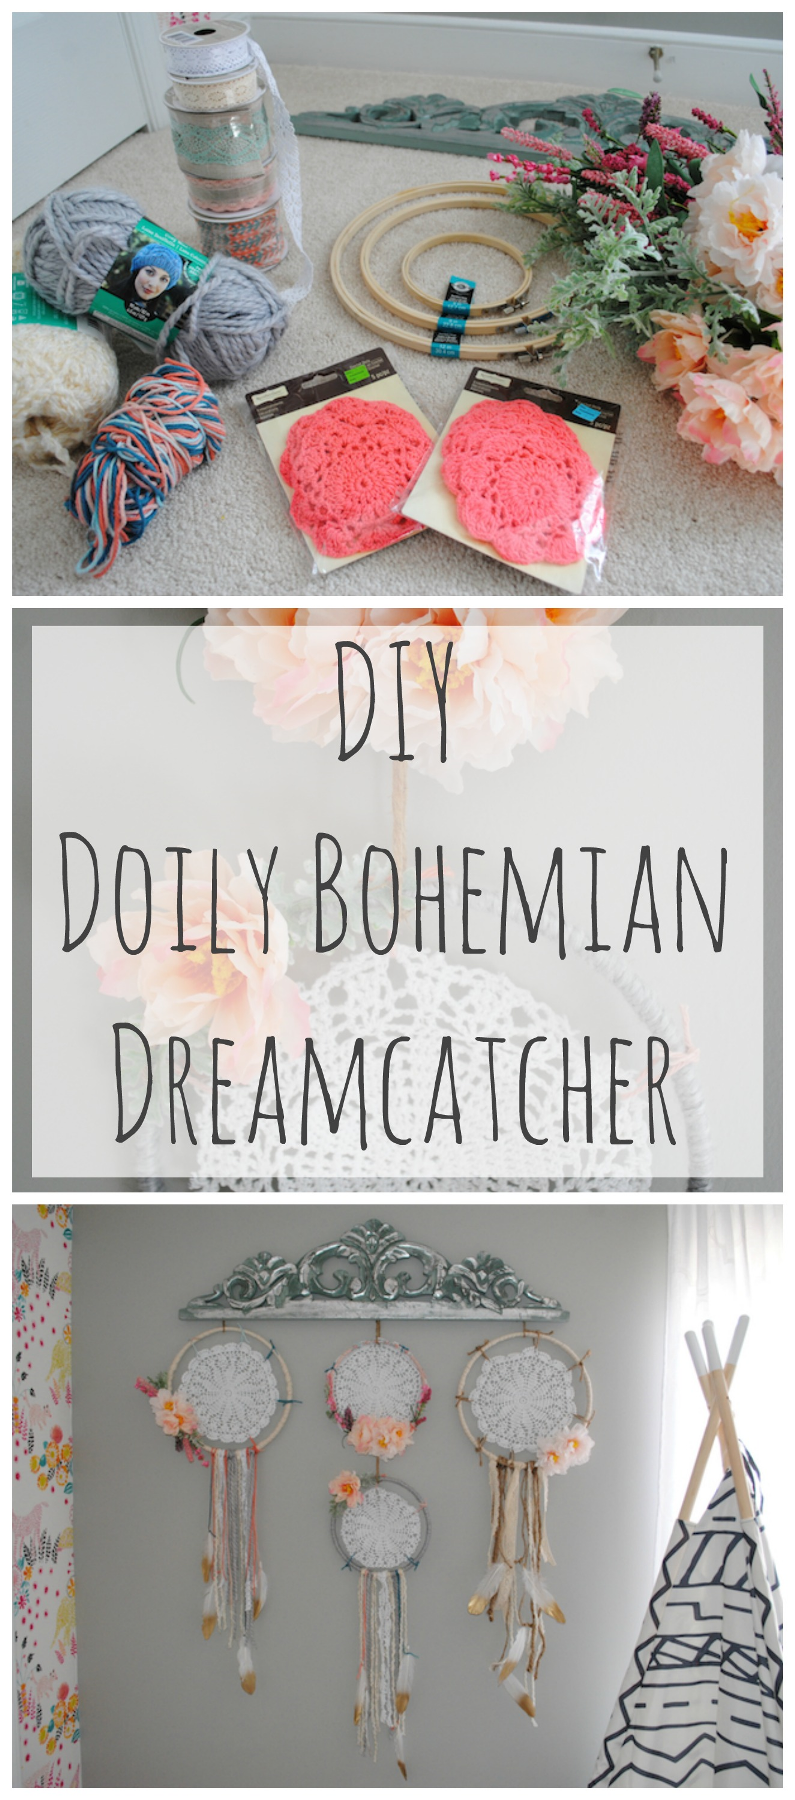
DIY Doily Bohemian Dreamcatcher

Hope everyone had a fabulous Valentine’s Day! I took Hartley to get her nails painted for the very first time and she LOVED it. She got one hand pink and one hand red with sparkles on-top (of course). If you’ve been following my blog for a while I am superstitious and have to have my nails painted OPI Big Apple Red for Valentine’s Day, since my first date with Willie (13 years ago, oh my gosh) he picked me up from the nail salon and I had that color and we’ve been going strong since. Hartley was so proud and showed EVERYONE her nails at dinner, ahhh she melts my heart.

I’m ecstatic for this dreamcather project to be done because it means I’m that much closer to finishing Hartley’s big girl room! I’ve been procrastinating finishing her room because she is so good in her crib that I kind of want to leave her in there forever (can I?). And as a mom, I feel like leaving the crib is a HUGE milestone, that I may tear up for a bit.  This was the last major piece I wanted to finish before putting everything on the walls. Thanks to Pinterest I had some fabulous inspiration and gathered numerous ideas from different bloggers to create my unique take on the DIY Doily Bohemian Dream Catcher.

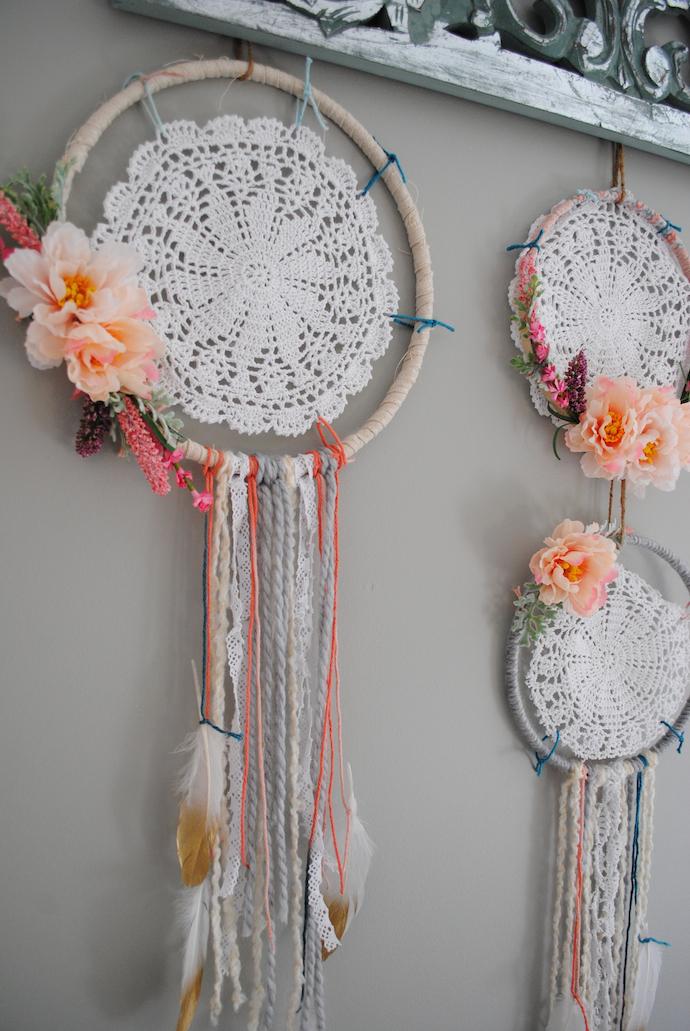
For mine, I incorporated store-bought doilies (you can use vintage ones if you can find at an antique market or thrift store, I even thought of using my grandmother’s handmade ones, but thought lightning would strike me if I did that!), flowers, lace, ribbon, and feathers (I re-used the feathers from my Thanksgiving tablescape). I also saw lots of people using wood as their top hanging piece, but I found this beautiful molding at the At Home store that I thought would make a better topper for the boho/vintage look I was going for. You also don’t need this piece if you are just creating a single dreamcathcer. Just follow the tutorial and stop when connecting the multiple embroidery hoops.

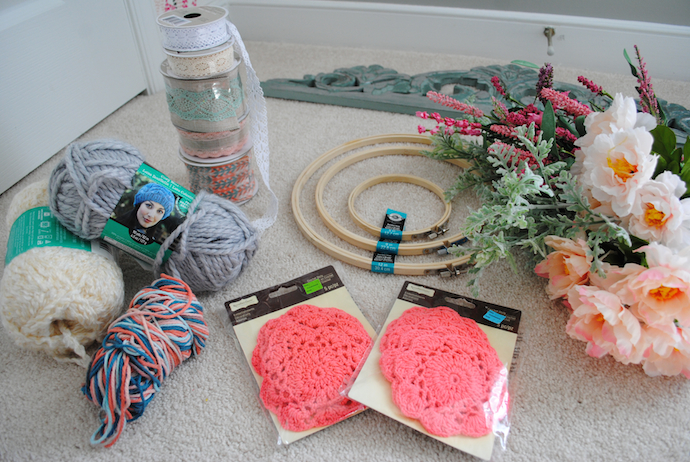
Here is what you will need:

  1. Wood/Molding Topper – mine was a little pricy at $24.99, but you can slash this cost using wood or twine
  2. Embroidery Hoops(I bought 2″ for the pink doilies but didn’t end up using, so for what I created I used 9-Inch and 12-Inch)
  3. Doilies (I found the 2” pink ones on clearance at Michaels for $2.99 for 4pk (I didn’t end up using these but have mini ones for a gift or something) and then ordered the 4pc- 9 Inch White Doilies ones for $12 – I have seen these at the thrift but I did not have luck on my recent trips)
  4. Torn fabric to wrap around hoop (you can use ribbon but that would get expensive, try using an old drop cloth, pillowcase, linen shirt or tablecloth) – I used a mix of cut ribbon and a dropcloth by cutting thin long pieces
  5. Yarn (thin for attaching doilies and thicker version for hanging pieces)
  6. Ribbon (go straight to the $1.99 bin of ribbon first) – Michaels has a fabulous selection
  7. Hot Glue Gun and Glue
  8. Artificial Flowers (optional)
  9. Feathers (optional)

Total Cost was about $65 (like I mentioned I went ALL OUT on mine, but you can make a version of this much cheaper but excluding items and/or using a different hanging method)

How to create:

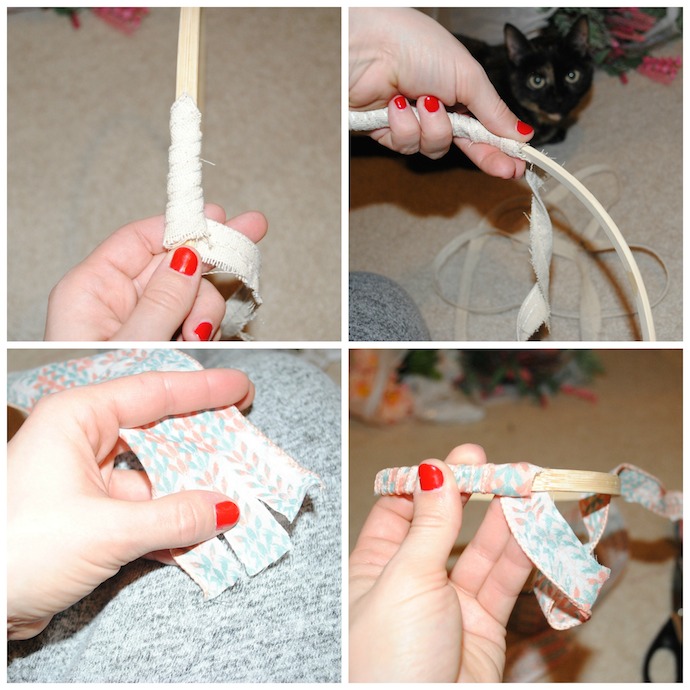
  1. Start with wrapping all the embroidery loops with the torn fabric , glue the start and try using long enough pieces to make it fully around the loop, then glue the end.
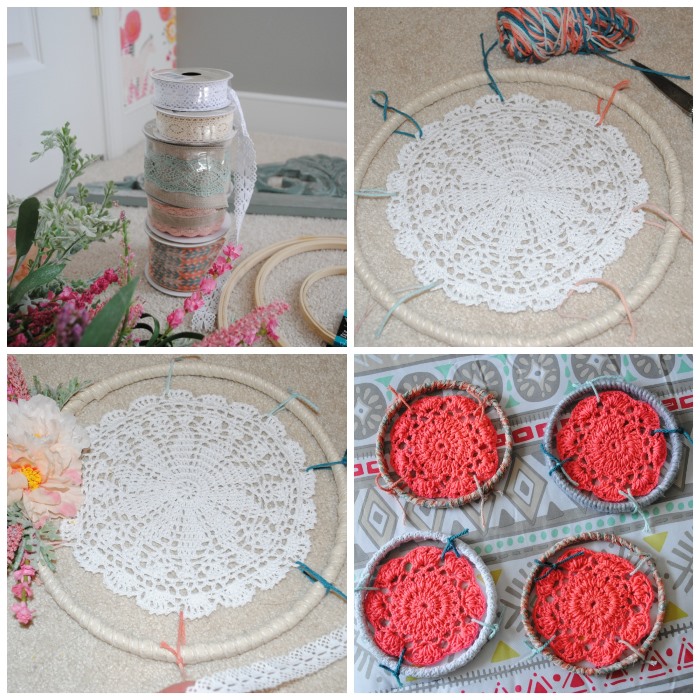
  2. Once fully wrapped, start connecting the doilies using a thinner yarn on the edges. Just loop the yarn through the doily hole and knot on the edge. For the lower hanging dreamcatcher on the 9″ loop, I cut of .5″ around the edge to make it smaller then the one on-top of it.
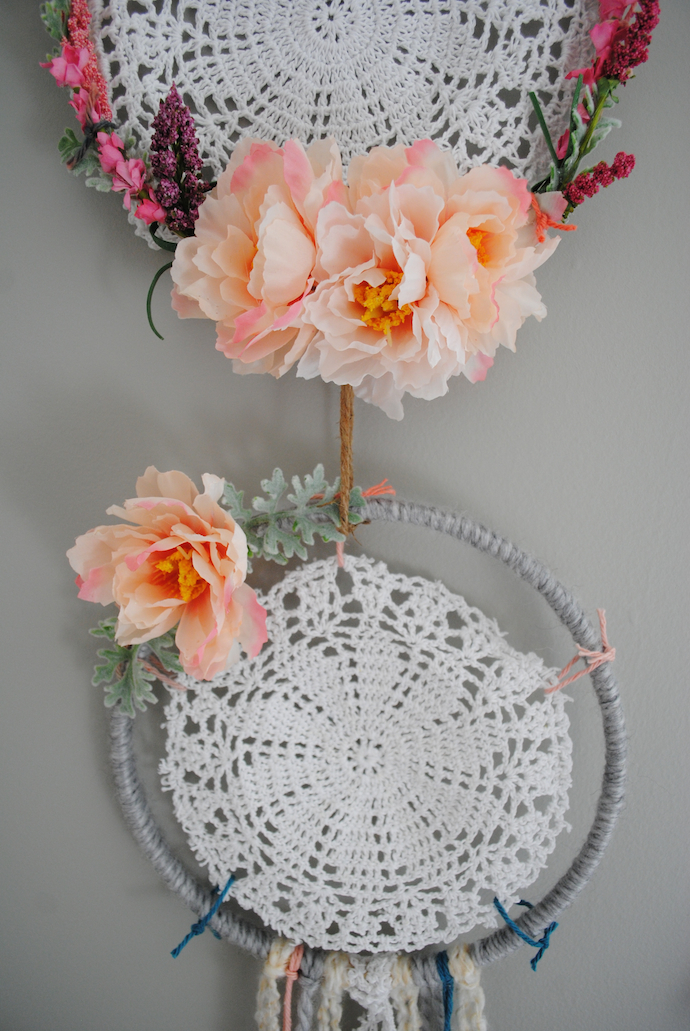
  3. If you are doing a multiple version like I was, map out your placement before you add the embellishments. You will not want to add hanging embellishments for those that are connected at the top. For those that have the ability to get hanging ribbon, and lace…start adding by simply cutting a long enough piece to fold in half (not perfect) and attach by a loop-pull-through over the hoop on the bottom. Add the feathers by just using the ends of the twine or yarn to make tight knots. Add flowers by disconneting the stem and cutting off the hard green piece (you will know what this is once you have them) and attach to the loop with hot glue.
  4. Once all the dreamcatchers are completed, finish by connecting the individual ones to connect to one another in the design template you created. I was orginally going to use the small hot pink ones, but didn’t like them, so I just had to connect one.
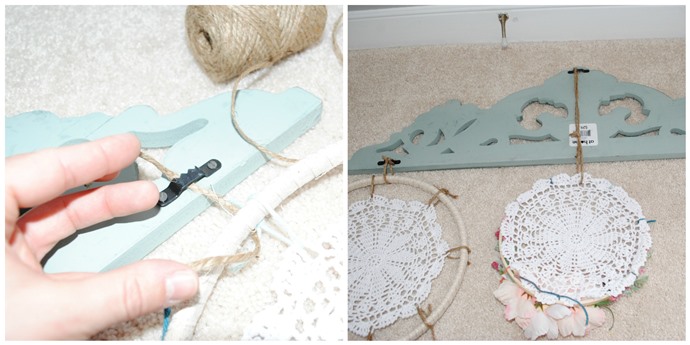
  5. Finally connect the dreamcathers to your molding, I lucked out because there was already hangers on the back so I just connected the the three top dreamcathers with twine and knotting around the hangers, but you can wrap around, add nail hangers, or glue on.

Finally make your nail hole on the wall and voila! A beautiful boho chic dreamcather any girl would love. I love the way this turned out and super excited for her room to be done since it’s been such a pouring of love and sweat to make her room just as perfect as she is (cheesy…I know). Hope you enjoy creating one of your very own!

<

Tuesday, February 21, 2017

DIY Gallery Wall Inspiration

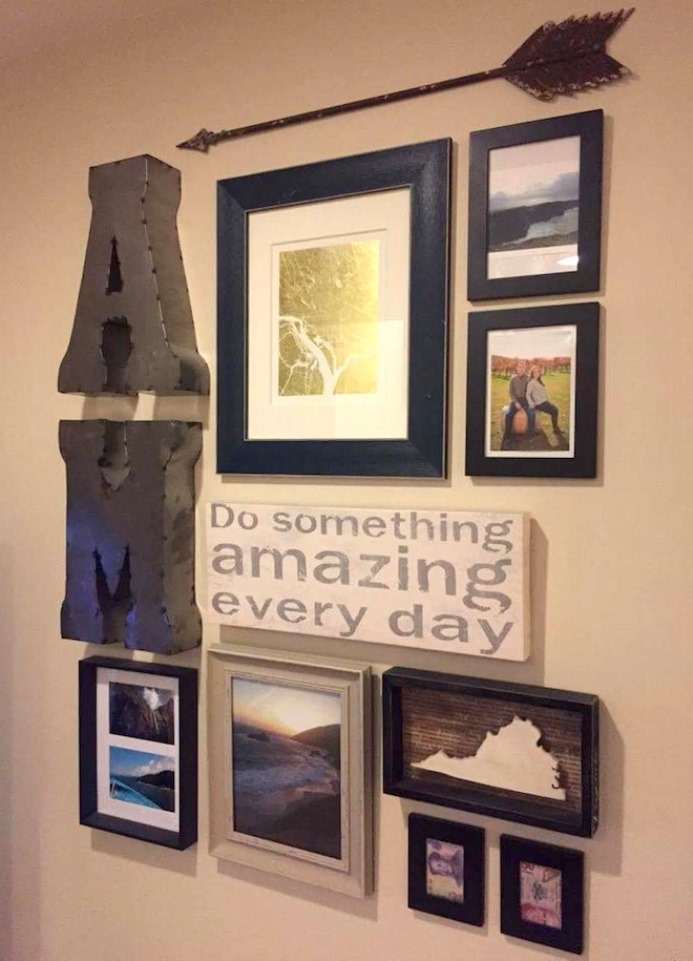
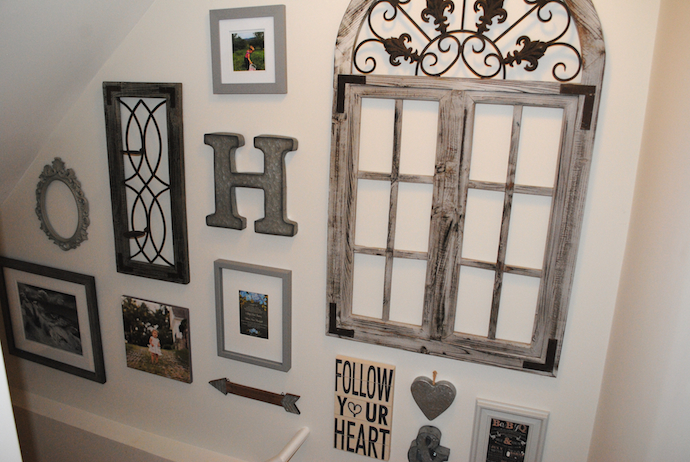
I’m OBSESSED with gallery walls right now and lucky for me I have some fabulous friends that have caught onto the trend and made some amazing displays themselves! Here are some of my favorite DIY Gallery Walls that my creative friends have made! Excuse the lighting in some of these photos…staircases seem to be a great spot for gallery walls, but not so great for natural light photos!

Coastal Hues

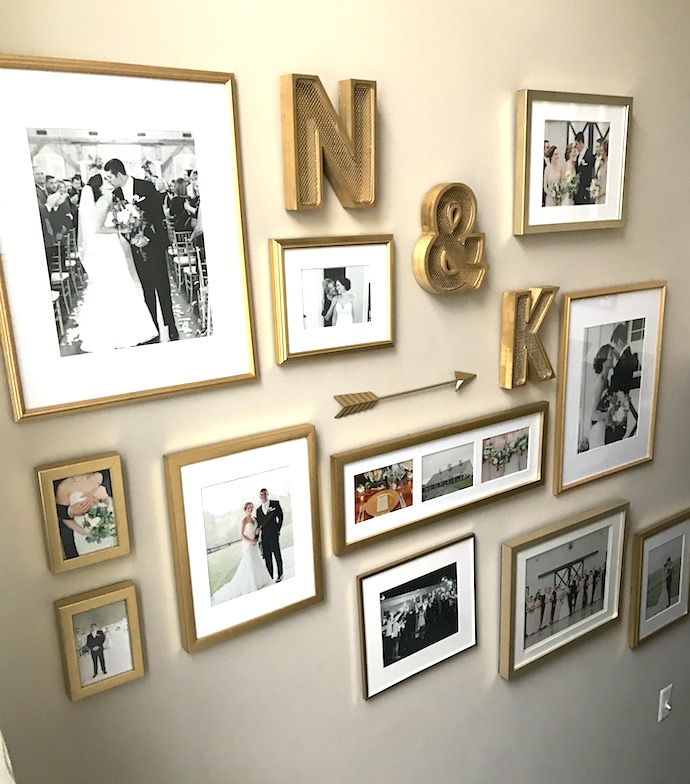
Gold All The Way

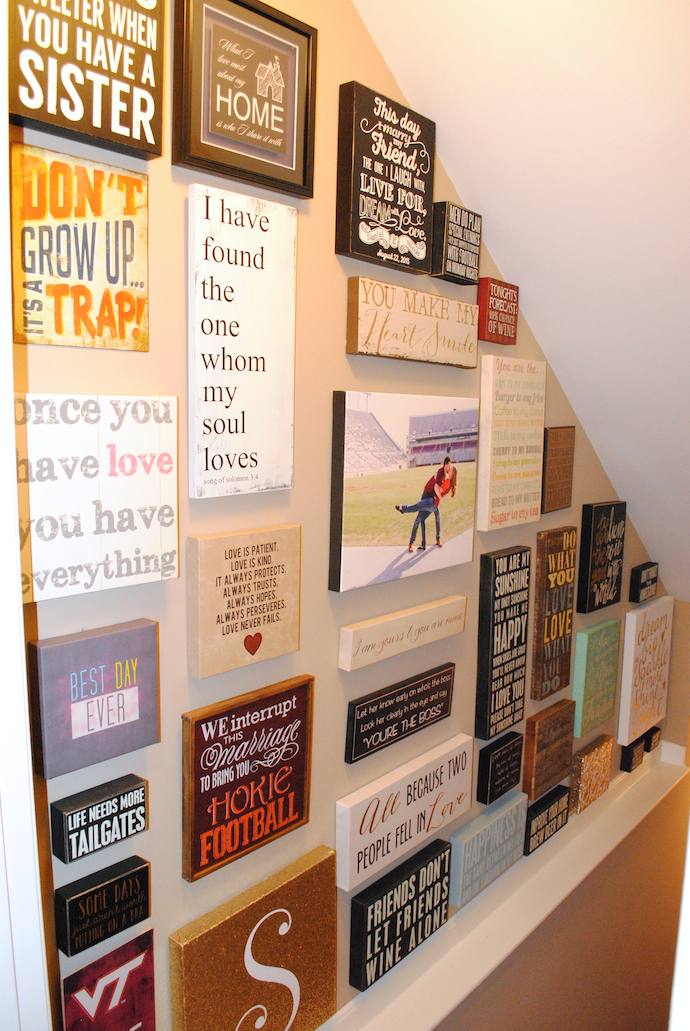
Wall of Quotes

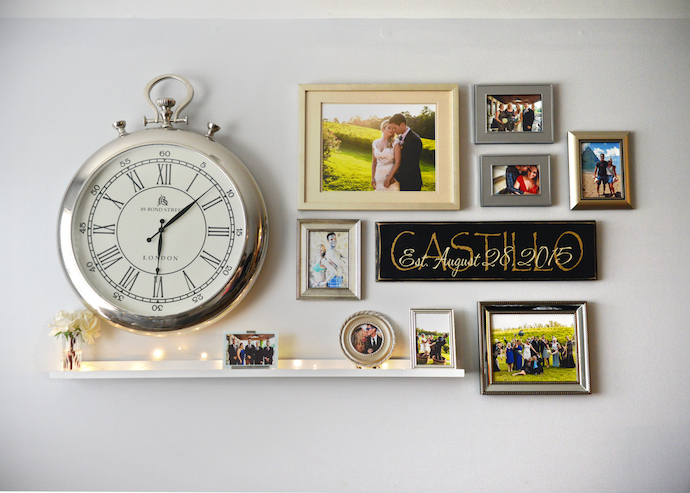
Vintage Romance

Wedding & Honeymoon Highlights

Adventure Together


Rustic Glam

Gallery of Initial

My gallery wall tips:

Make it personal –

  • Should be a reflection of you and your family
  • Time to incorporate canvas or framed photos (wedding, newborn, family vacation), monograms, quotes, DIY project

Mixing scale –

  • Use all different sizes and shapes
  • Find a few anchor pieces that will serve as main focal points
  • Once you determine your focal pieces, start building your wall around them

Layout –

  • There was a mix of approach for this, some carefully laid out each piece and created a mock wall with paper and tape, and others just completely winged it
  • If you are comfortable with what you have in your head, go for it, otherwise take the time to lay it out before nailing
  • Don’t worry about spacing or making everything line up

My final tip – the painters tape trick for hanging items needing more than one nail…GAME CHANGER

  • If your photo is larger it will probably need a nail on each side, for easy measuring for nails simply apply blue painters tape across the back of the photo, poke holes in the center where the nails should go, remove the tape from the back and place on your wall where you would like to hang, finally nail where you made the holes and remove tape and place photo up…viola!

Have you created a gallery wall? What was your inspiration? Have some photos you would like to share? Email me (address in About section)!

I’m working on a mancave/sports gallery wall, so be sure to keep your eye out for that on my Instagram page!