Tuesday, October 11, 2016

Small Bathroom Remodel on a Budget

I love bathroom remodels, but they aren’t always possible
when you have to stick to a budget. I’ve learned that you don’t have to gut
your entire bathroom to make it fabulous! A little TLC and working with the
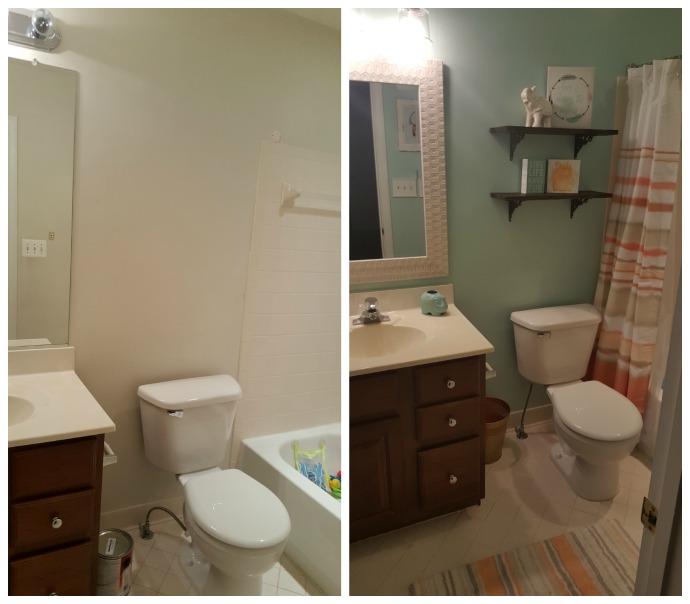
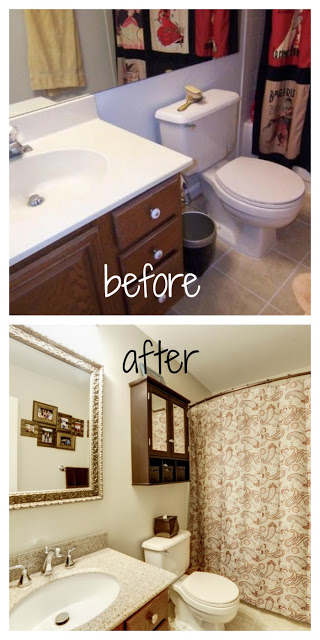
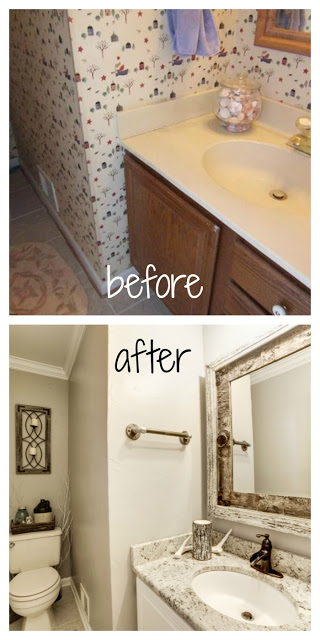
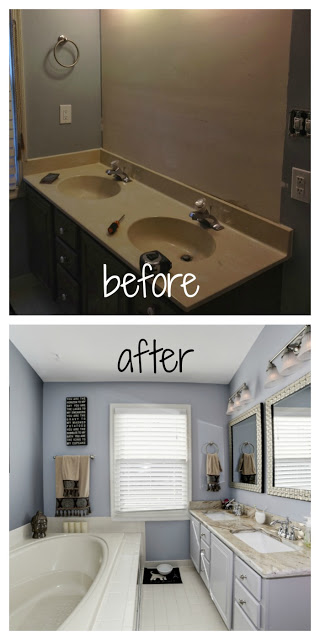
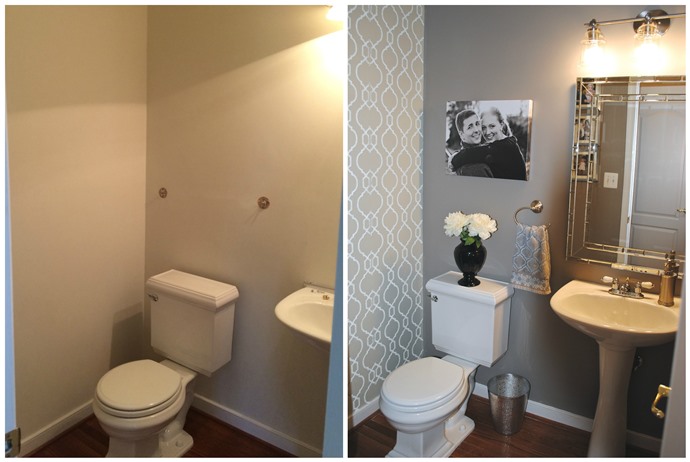
existing framework with some polishing can transform a bathroom. Both of these bathrooms in my new house were soooooo
boring. They were the first rooms I tackled in the new house because I knew
they would be a quick remodel with limited funding required. They both turned
out fabulous that I can barely remember what I started with. So, here are my
best tips to remodel your small bathroom on a budget.
 

#1: Examine the existing tile/vanity/hardware

If your foundation is ok, this will save you a TON. The tile
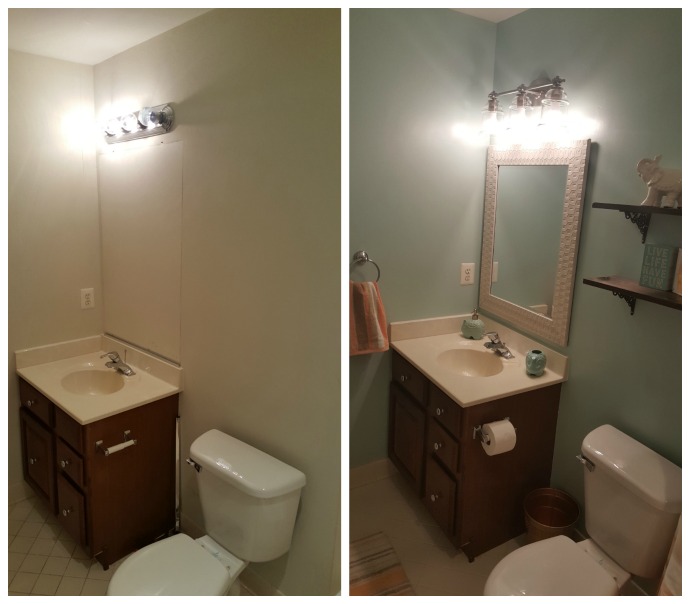
on my daughter’s bathroom was disgusting and the grout was almost black against the
stark white tile, but there were no major cracks or deficiencies. It just took a
little elbow grease with bleach and baking soda to make them look
brand new again! The vanity cabinet, although not my color of choice, the wood
was good so I left it (for now…may change with a new vanity top). You can paint vanity cabinets with minimal cost by using a good primer
and a semi-gloss latex paint. I did this in my old house, and it turned out
beautifully! In the main floor bathroom it had a pedestal sink and hardwoods, so no need to change those big ticket items. I did remove and patch the holes from a towel rack above the toilet. I replaced the large towel rack with more appropriate sized hand towel holder.

#2: Paint or Wallpaper

Obvious I know, but adding some color or wall interest is
HUGE! For my daughter’s bathroom I used Sherwin Williams Watery and the main floor paint is Sherwin Williams Pewter Tankyard.  The wallpaper accent wall I choose in the main floor bath was a little
pricy at $150 (with supplies), but doing the labor myself saved me so much and
with the small space to make a statement, it was so worth it. In bathrooms you
have so much accent wall ability – think about a wood wall, stripes, chevron,
stencils, metallic paint, decals, bead board, wainscoting, or faux brick (I’m giving this
one a try somewhere in my house).

#3: New fixtures

Not only thinking about changing the vanity/cabinet
hardware, think about changing the faucet, towel/toilet paper holders, shower head, mirror, and lighting
fixture. Pick and choose what you think will make the biggest impact. On both
these bathrooms I did the lighting (same piece because we loved it) and
the mirror. In my opinion, these are GAME CHANGERS in a bathroom. For the main floor bathroom I also removed the brass towel and toilet rack hardware and replaced with new brushed nickel hardware. My goal down
the line is to change the countertops, sink and faucet in my daughter’s
bathroom – but for now, it’s a start. I mean anywhere I can add marble or
granite…I’m going to 🙂


#4: Add décor

In my daughter’s room I was inspired by the beautiful paint
color I choose to go with a boho chic theme. I found a rug, shower curtain,
towels and amazing quote art from HomeGoods that went perfectly with the color
scheme and were on budget.  I added two
custom Etsy prints with frames from HomeGoods. To save some money I also created DIY shelving units using wood and brackets I found.

In the main floor bathroom, I knew
I wanted to stay with a metallic theme from the wallpaper and I remembered I
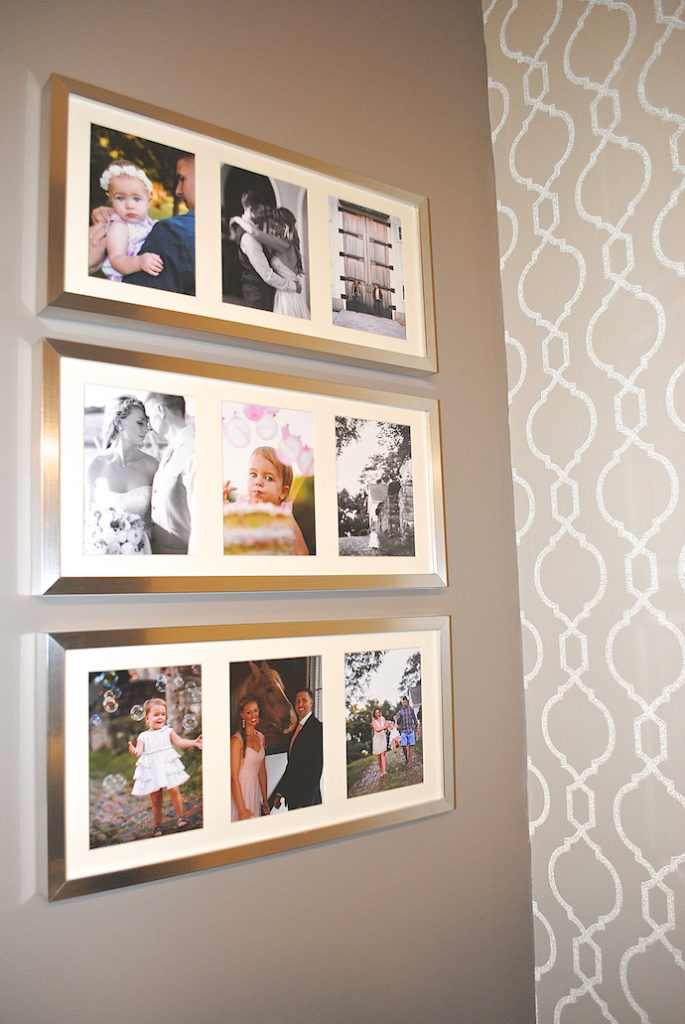
had bought 3 Ikea frames (similar)at a yard sale for $1…yes ALL 3 for $1…so I rummaged
in our packed boxes and found them!! Anytime you see frames
or art you love on sale, buy them. If you don’t end up using them think of
using them as gifts and inserting personalized photos for an engagement,
wedding, graduation, etc.

#5: Go in phases

You don’t have to do everyhting at once. Start with the basics and then save up for the dream renovation or adding new pieces.
Wednesday, September 14, 2016

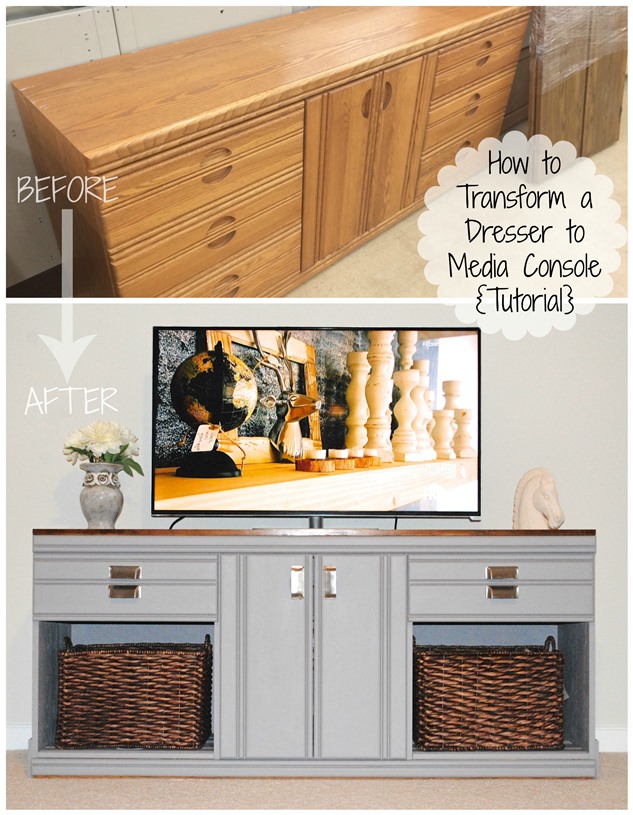
How to transform a dresser to Media Console {Tutorial}

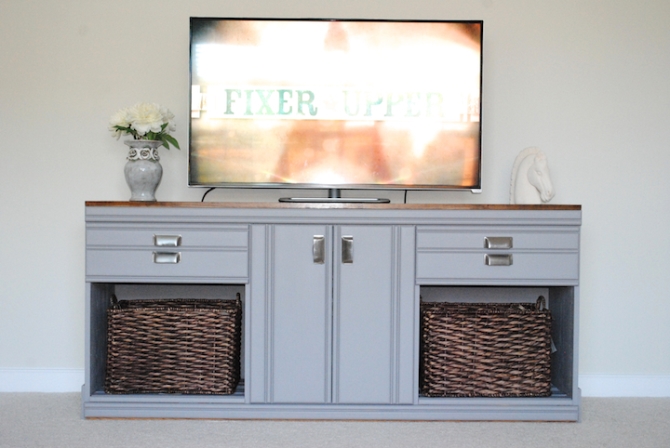
Another fabulous find from Habitat for Humanity! Our farmhouse media console turned out perfect! We looked for a few months debating on what type of media console we wanted and with most manufactured sets costing well over $500 we started adventuring to the Habitat on a weekly basis to try to find the perfect dresser to convert…and by luck we did! Although it isn’t very ornate, the selling point for this dresser was it’s perfect size (70 inches long exactly). We needed the size because we have a very long wall in our family room and with the hopes for a TV upgrade in the next year, we wanted to have the balance that would work with a bigger TV.

I’m super proud of the transformation and these quotes made me so much more excited to have something in my house that I repurposed while also supporting a great cause:

“Shopping at Habitat For Humanity ReStore does even more than assist Habitat’s mission of eliminating poverty housing! Your purchases grant a second life to items and prolong the life of our landfills by reducing waste.”
“At Habitat for Humanity, we build. We build because we believe that everyone, everywhere, should have a healthy, affordable place to call home. More than building homes, we build communities, we build hope and we build the opportunity for families to help themselves. Your donation will help families break the cycle of poverty and build long-term financial security. With an affordable, stable home, families have more to spend on food, medicine, child care, education and other essentials. Your support can help us do more in all the many ways that Habitat builds.”

What we used and cost:
Cost of Dresser = $42.40 (with tax)
Total Materials Cost = $119.51
*The material cost will go down significantly if you want to paint the top or your dresser has a real wood top that you can sand down and re-stain. Ours was not, which made us buy lumber and create a stained rustic farmhouse top to tie in our other furniture.

    • (2) 1-2-6 select pine = $7.24
    • (1) 1-4-6 select pine = $6.96
    • (2) 1-6-6 select pine = $23.52
    • Valspar Chalky Finish Paint (color – Cathedral Stone), Quart = $29.99 (lasted the whole project) *again they warned not going with the “tinatable colors” but the paint color ended up exactly like the swatch so I was pleased
2 Wicker Baskets Cost (HomeGoods) = $40Total Media Console Cost = $201.91 (3 days of drying and labor time)

How we did it:

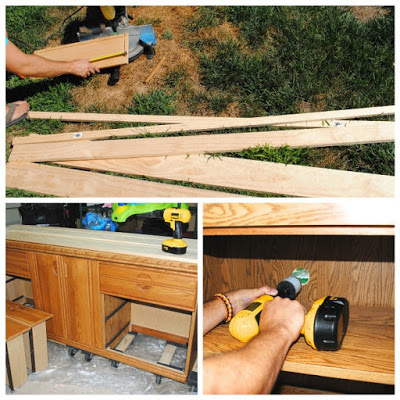
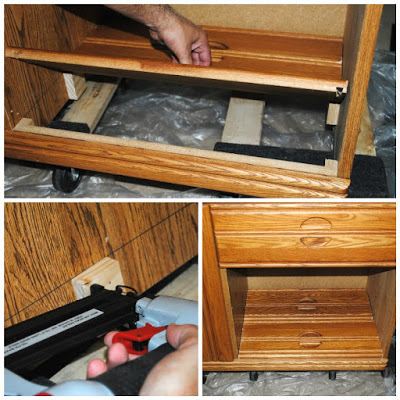
    1. Removed the 2 bottom drawers and drawer rail sliders on each end
    2. Dissembled drawer fronts from base and used to build the bottom of each side so baskets could sit inside
    3. Cut the holes in the center area for the wires using a 2” hole saw
    4. Used the wood from the dissembled drawers to cut a small block as the anchor for the drawer fronts to sit on – attached with nail gun
    5. Once the base was secured, the drawer doors were cut to size to fit perfectly on the bottom and were attached with a nail gun
    6. Used the wood from the disassembled drawer sides on each side of the dresser to add a little character and cover up some damage it had from transportation (cut to width)
  1. Used the cabinet drawer template to pre-drill the holes for our new hardware
  2. Wiped the entire dresser down with a damp rag and let dry for 20 minutes
  3. Painted the entire dresser (minus the top as we added the wood pieces) with one coat of paint and let dry overnight
  4. While the dresser was drying, we cut all our lumber for the new farmhouse top to fit the length of 70” and roughly sanded both ends
  5. Applied one coat of stain to all of the wood and let dry overnight
  6. 24 hours later, apply one more coat of paint to dresser and one more coat of stain to wood
  7. 24 hours later, check for missed areas on paint and apply one more spot coat if needed to dresser. I also ended up applying 3 coats of stain to my pine wood. The 3rd coat of stain was in the AM and when I didn’t like the way the stain took to 2 of the larger pieces I dry brushed the Valspar paint on in a very rustic manner to cover the botched stain. I actually like this method and glad I did it even if the stain came out, it gives it so much character!
  8. Liberlly applied Valspar wax sealant with a paint brush to the painted dresser
  9. Once everything is dry, we arranged the wood on the top and secured with the nail gun and attached the new drawer hardware
  10. Finally, we placed the baskets in to complete the rustic farmhouse look
  11. In order to keep the cable box hidden behind the doors, you can buy an Infrared Receiver Extender Cable which will allow transmission from the remote to the box…heck yes, no ugly box!
  12. All done!
Thursday, July 28, 2016

Our First Home

It’s a little bittersweet to say we have SOLD our first home.
I bought this home as a young 23 year old and never expected that 5 years later this would be the home that welcomed us home after an engagement, marriage, and our first child. This home was an effort of love and devotion that taught Willie and I so much about each other and I will always cherish the special moments we had living there. This home really craved the foundation of our marriage of building a beautiful home and family together and I hope it brings as much joy to the next family.
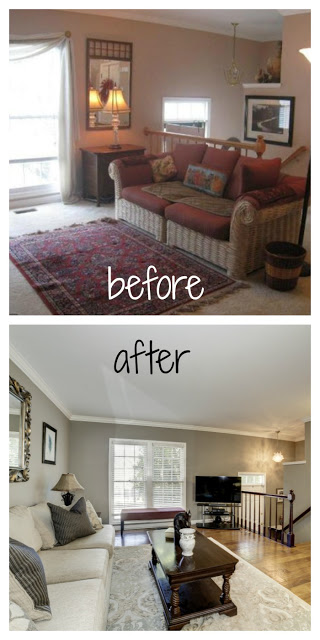
I’m so excited to start our next chapter and can’t wait to share some fabulous before and after photos from our new house, but for now, here are some of my favorite before/after shots of our amazing first home. Each picture I’ve made little comments of what we did to transform the space.
Entry:
paint, light fixture, banister stain, flooring
Kitchen:
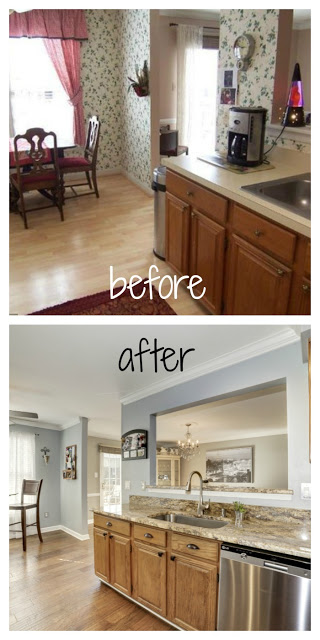
wallpaper removal, paint, crown molding, light fixture, flooring,
appliances, grantie, stone backsplash
Kitchen/Breakfast Nook:
wallpaper removal, paint, crown molding, light fixture, flooring,
appliances, granite, stone backsplash

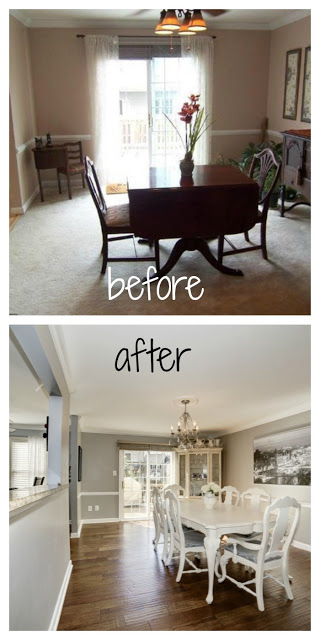
Dining Room:
paint, light fixture, flooring,
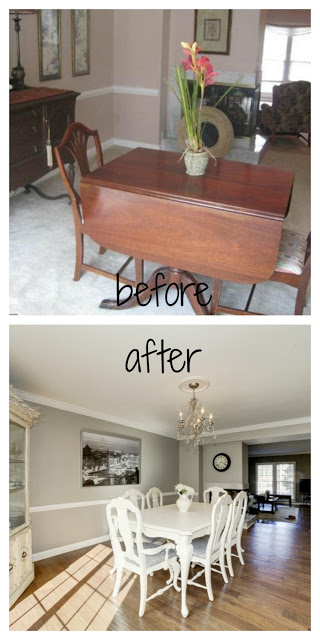
Dining Room (other view):
this is my beautiful chalk painted dining table

Guest Bath:
paint, light fixture, mirror, storage shelf, granite, new faucet, new vanity hardware

Main Floor Bath:
wallpaper removal, paint, crown molding, light fixture, mirror, granite,
new faucet, new vanity hardware, painted vanity, industrial pipe accents

Master Bathroom: 
paint, mirrors, granite, new faucet, new vanity hardware, painted vanity
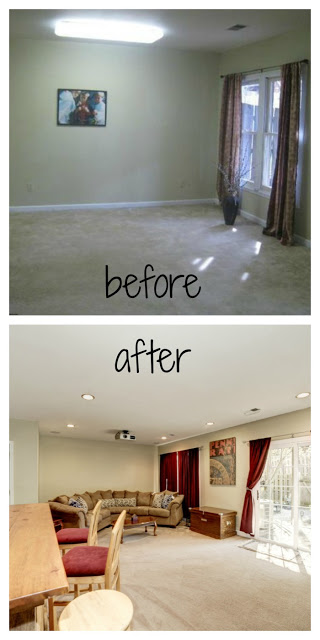
Basement:
paint, recessed lighting, new carpet, theather equipment

Sunday, February 21, 2016

Shabby Chic Re-finished Dining Set

2017 Update: Exciting new table version up on the blog here!

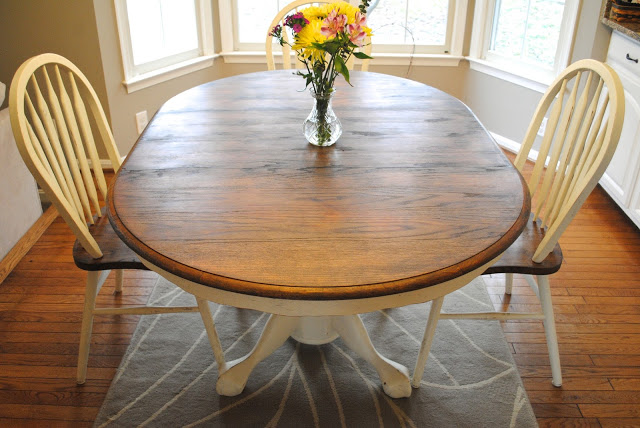
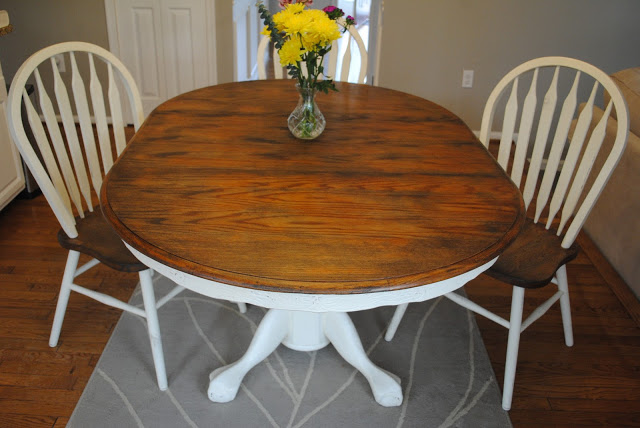
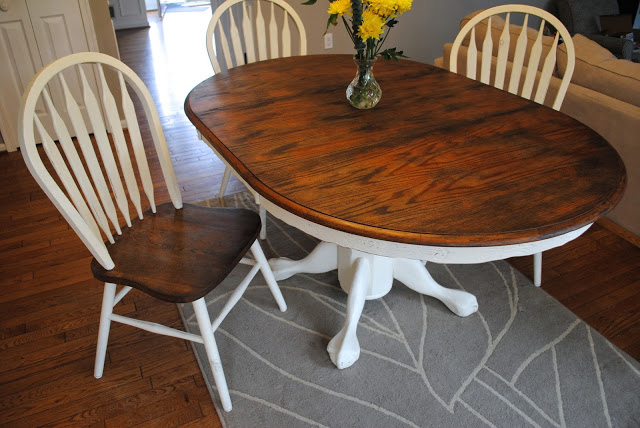
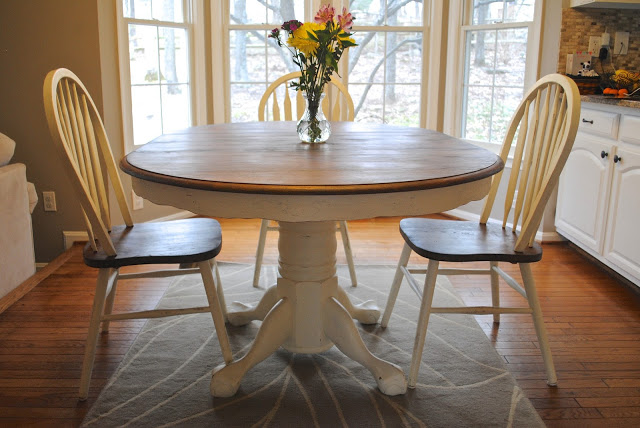
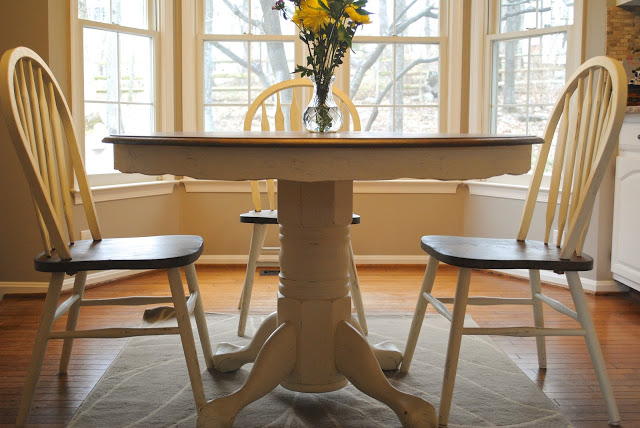
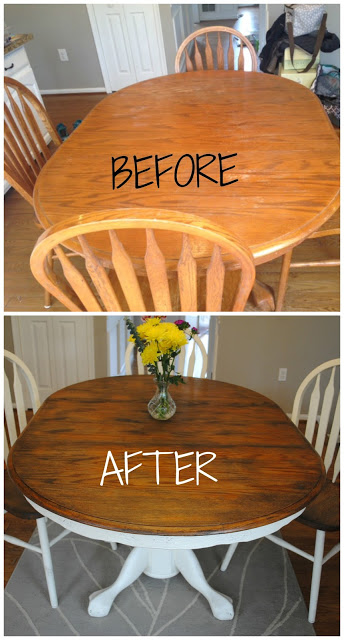
So I can’t take any credit for this masterpiece unless moral support counts 🙂 Remember the amazing whitewash brick post at my friend’s new house, well she has done a TON of projects to amp-up her decor in a budget friendly way by utilizing items she already had and giving them a complete makeover. This gorgeous wood table was her grandparents and spent years waiting for her to have space to display it. I am pretty obsessed with the claw foot detail and how she decided to keep the stunning wood on the top and on the seats.

How she accomplished this…

She started with sanding all the areas she was leaving wood just enough to get the top protective layer off. After a damp rag wipe off she was ready to stain. On the wood parts she used a dark walnut wood stain and finished with a matte finish polyurethane. The white paint is Annie Sloan ‘Old White’ color. After it dried, she lightly sanded the painted surfaces giving it a distressed antique look.

We had so much fun Friday night around this table and I can’t wait for more girls night in the future laughing around this beautiful inherited treasure.

BEFORE:


AFTER: