Monday, June 5, 2017

DIY Faux Brick Wall Tutorial

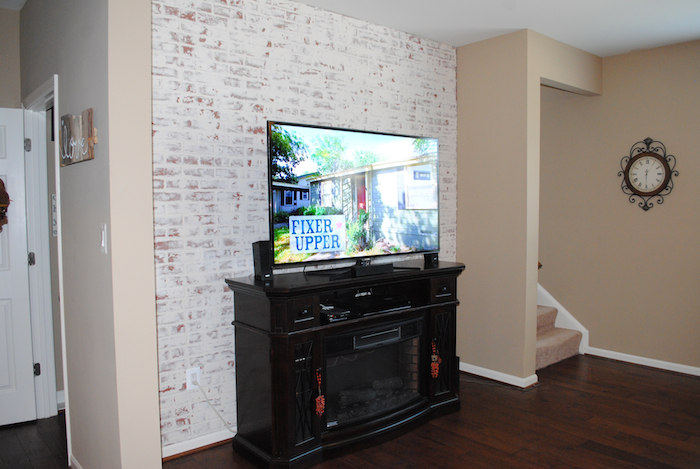
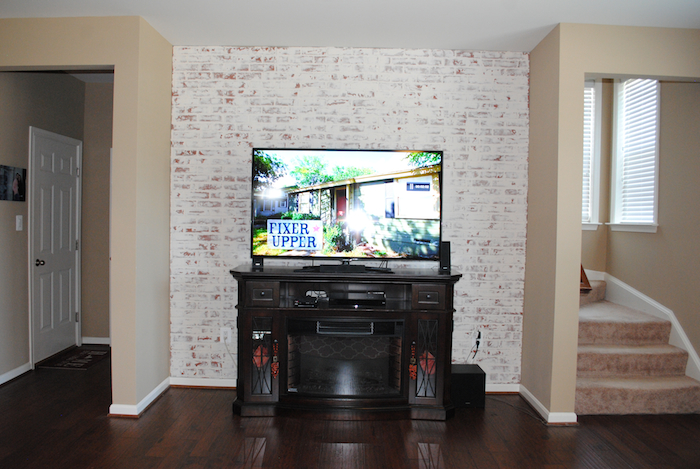
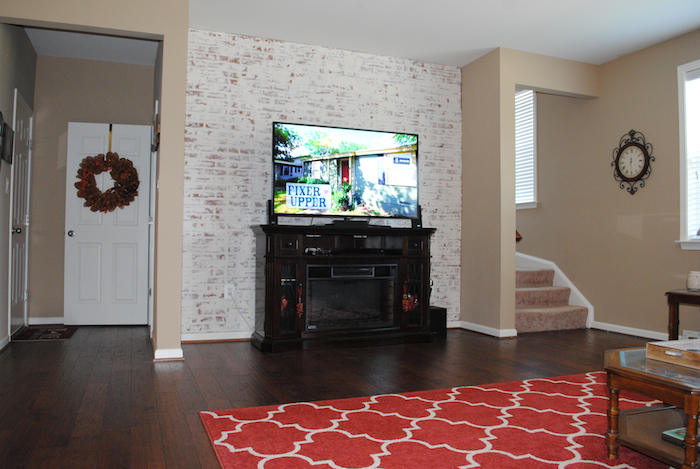
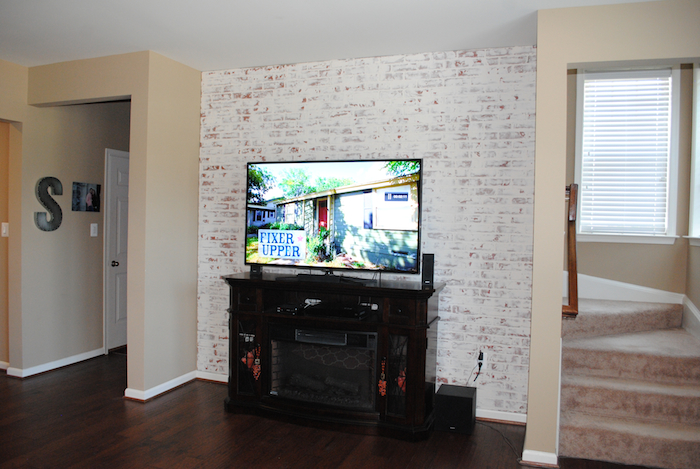
One of my good friends, Nicole, has been talking about doing this faux brick wall forever and it’s finally done!! If you remember my post from Kathy with Our Amore Blog a few weeks ago, this is her fabulous niece she was referring to who introduced us. Nicole is such a planner and tested all sorts of methods of distressing this brick before she dove on in, and all the trial and error paid off because it’s looks awesome.

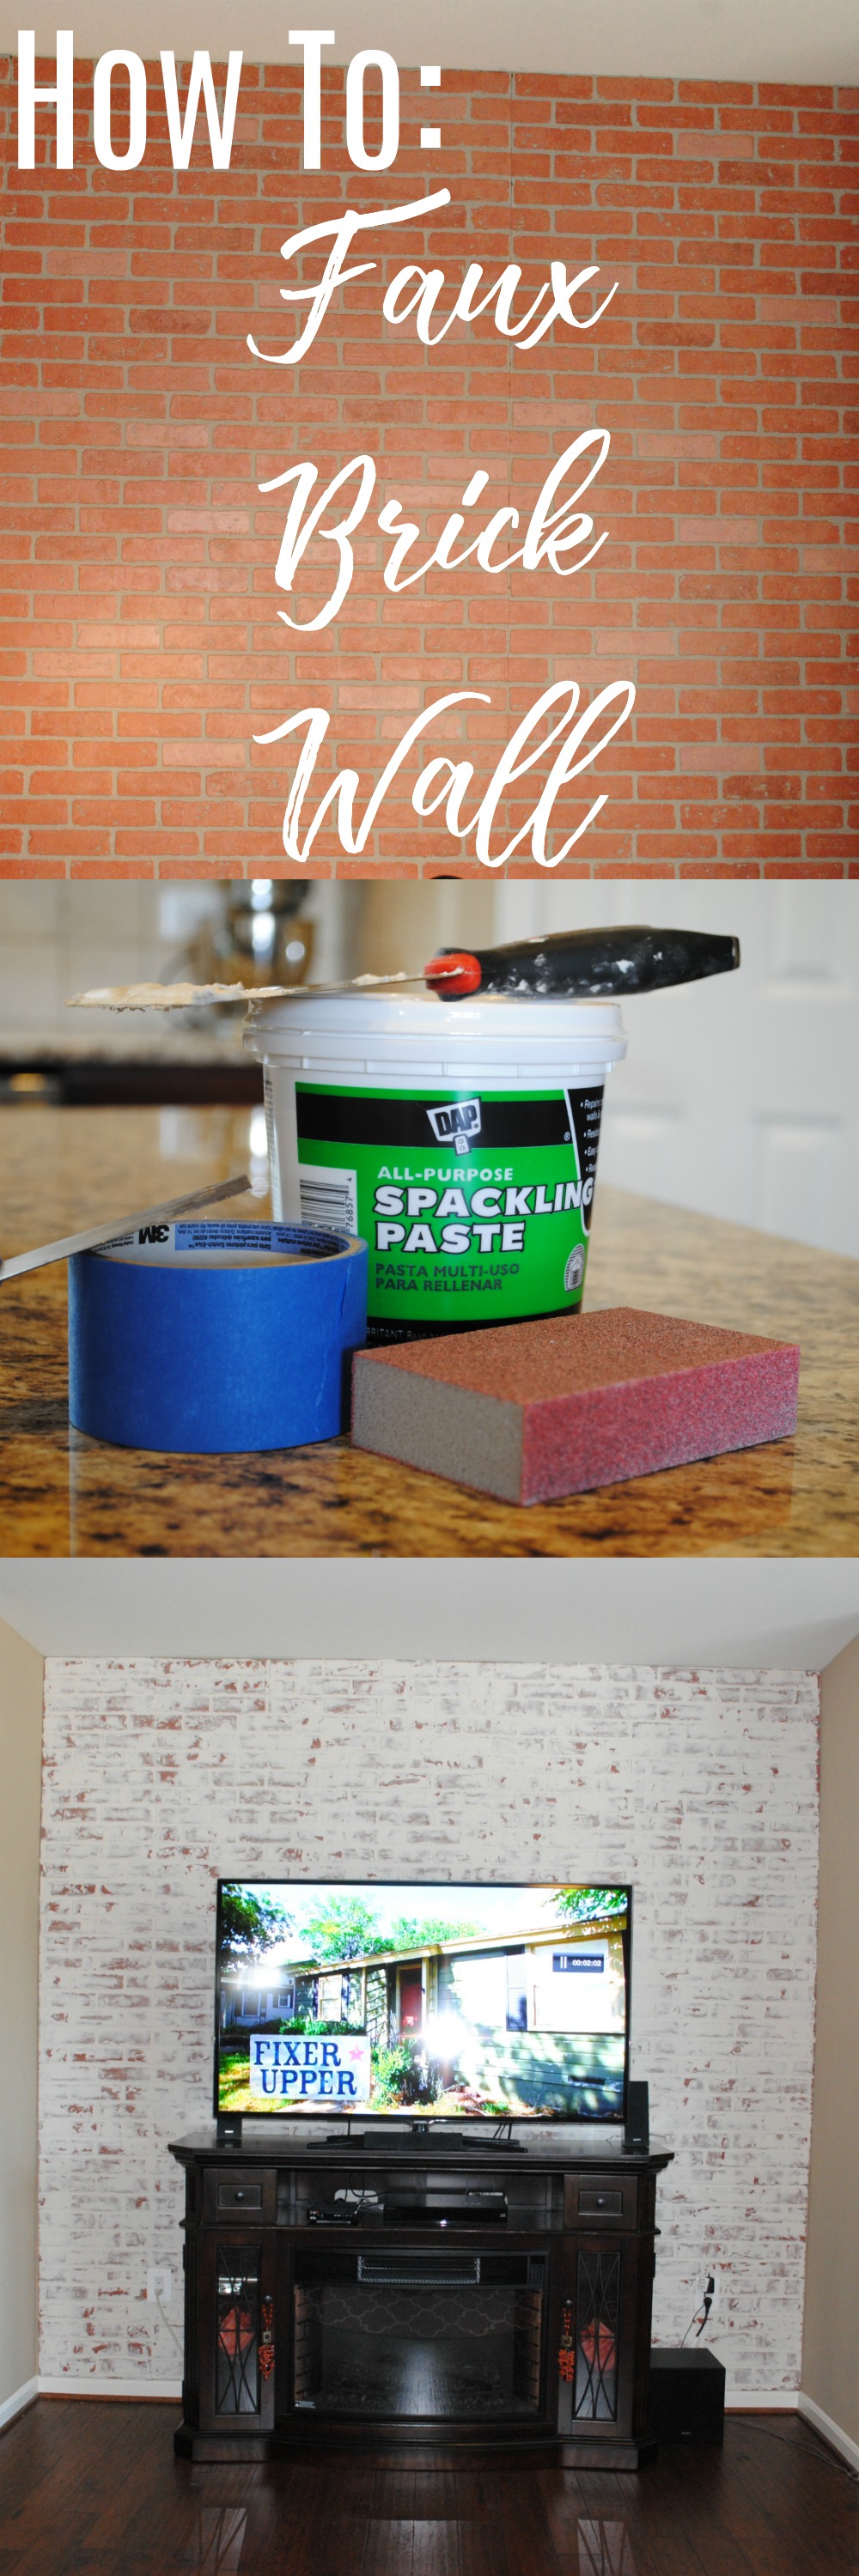
Supplies:

  • Faux Brick Panels (Nicole bought hers at Home Depot and had them cut to her measurements) – about $25 per panel
  • Nail Gun and nails
  • Dremel or sharp exacto-knife for cutting holes for outlets
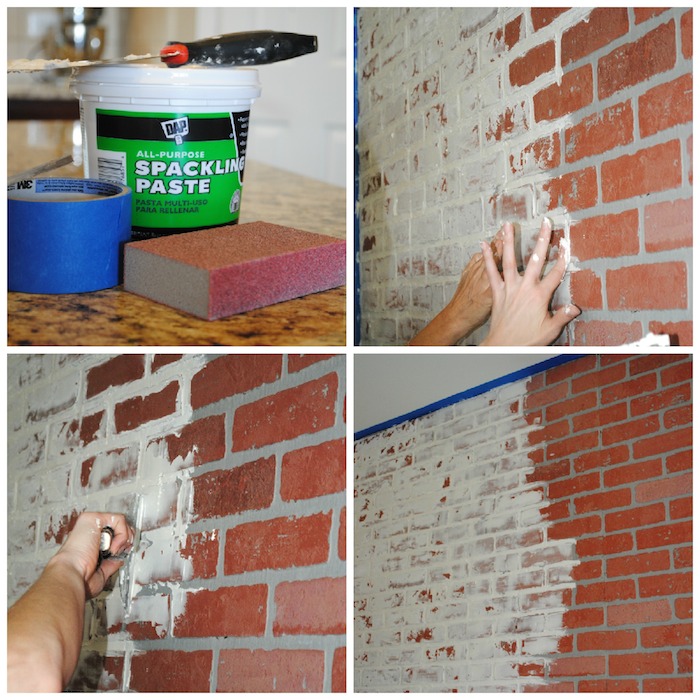
  • Spackle (brand below – She used almost 4 of these canisters, so may be cheaper buying a bigger once depending on your wall size)
  • Putty Knife
  • Painters Tape to protect walls
  • Sandpaper

Installation:

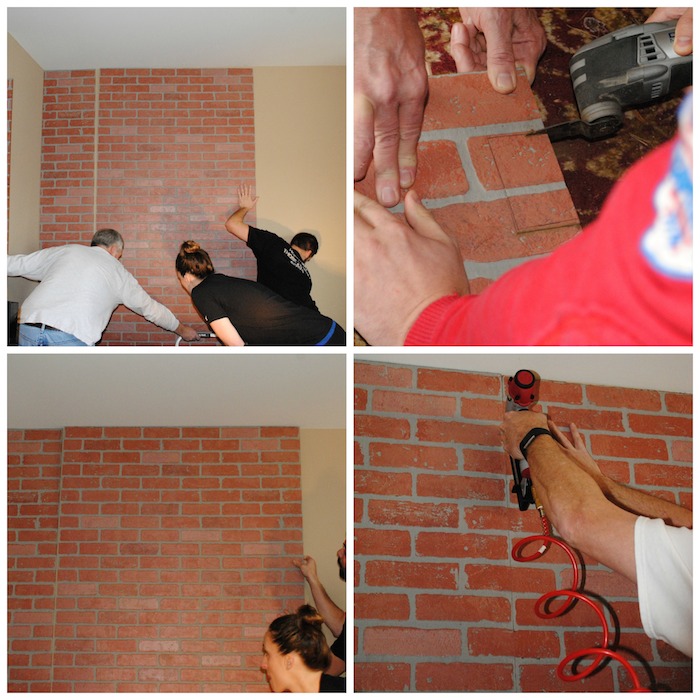
  1. Measure your walls and get the precise cuts you need for your wall
  2. Plan how pattern will line up
  3. Cut panels (Home Depot will do this for you if you have your measurements, highly recommended since this stuff is hard to cut straight and is a HUGE time saver)
  4. Use a razor or dremal to cut holes for outlets
  5. Use nail gun once positioned to secure to wall * Tip – Work in at least a pair to help position and secure to wall. The panels are a little ackward and can shift easily in the installation process. Working alone will be frustrating and a huge time sink.
White “German Smear” Technique:

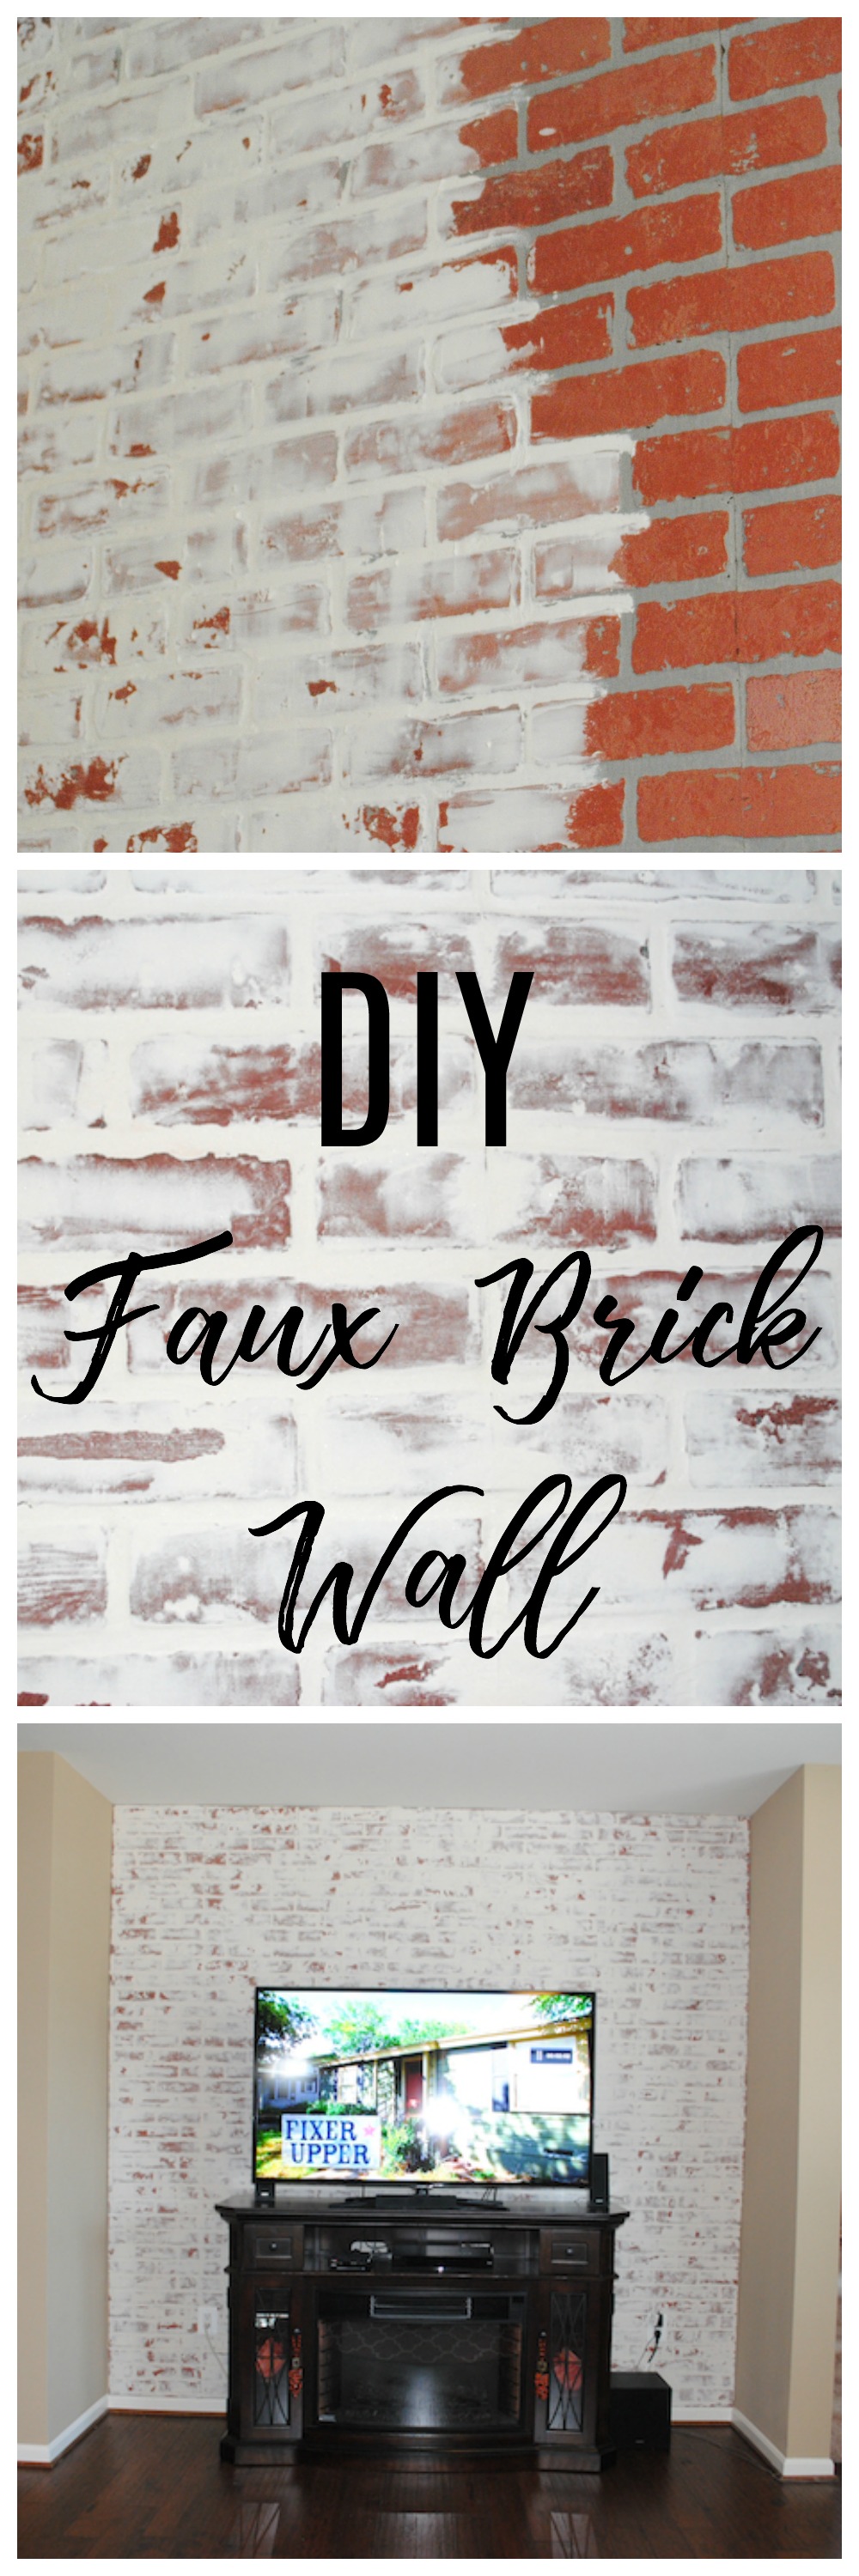
  1. Scoop the spackle on to the end of the spreading knife
  2. Smear the spackle on to the wall (how thick or thin you leave it is up to you)
  3. After you have done a small section, using your finger, smear out some of the excess spackle from the “grout” of the brick
  4. Continue this process until your wall is covered
  5. As the spackle begins to dry, wet your fingers to and lightly trace the “grout”.  We found that this helped smooth it out. *Tip- If possible, work in a pair like Nicole in her mom did. One person smears large amounts with putty knife while other person comes in behind to add/smear with wet fingertips. It dries fast so it will lessen the amount of time of alternating bewteen fingers and putty knife.
  6. Let the wall completely dry
  7. After the wall is dry, you can use your sandpaper to distress it (how much you sand off is personal preference)
Of course you can leave the brick color if you would like, but the white distressing is perfect for Nicole’s Tuscan vibe and all decor. It also makes this accent wall pop and help makes the room look bigger. She is looking for some accent pieces for the sides of the fireplace…any ideas?
Monday, February 27, 2017

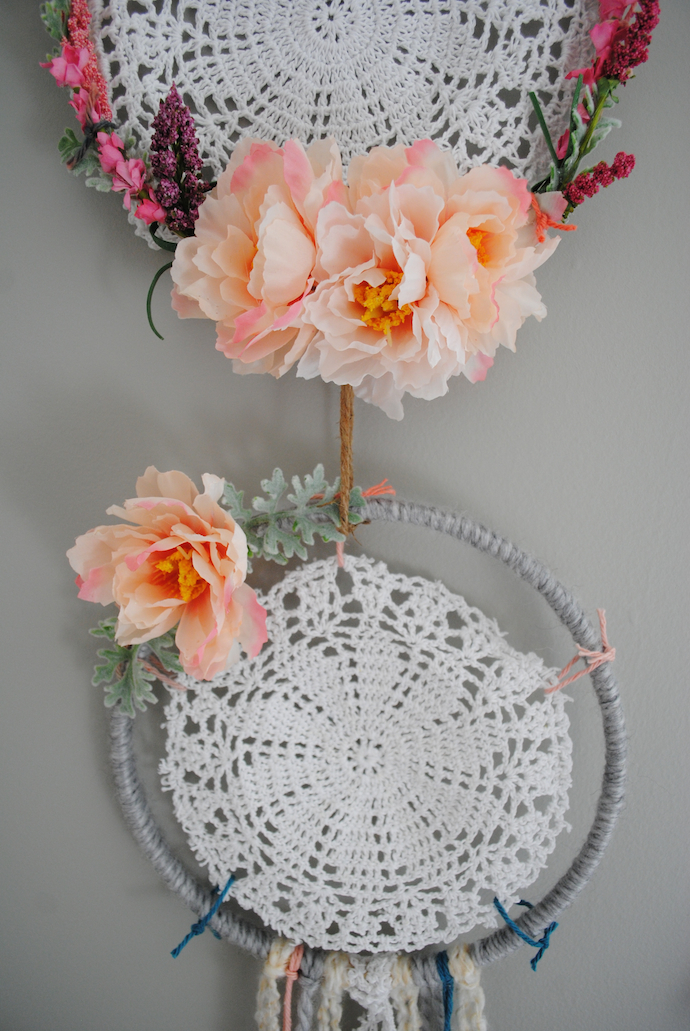
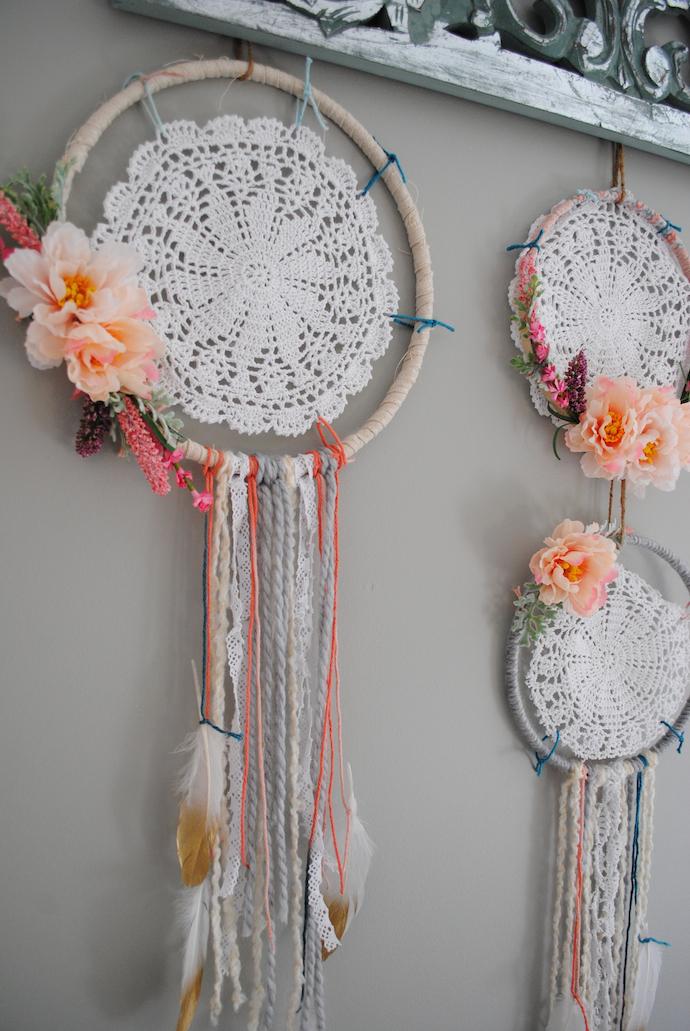
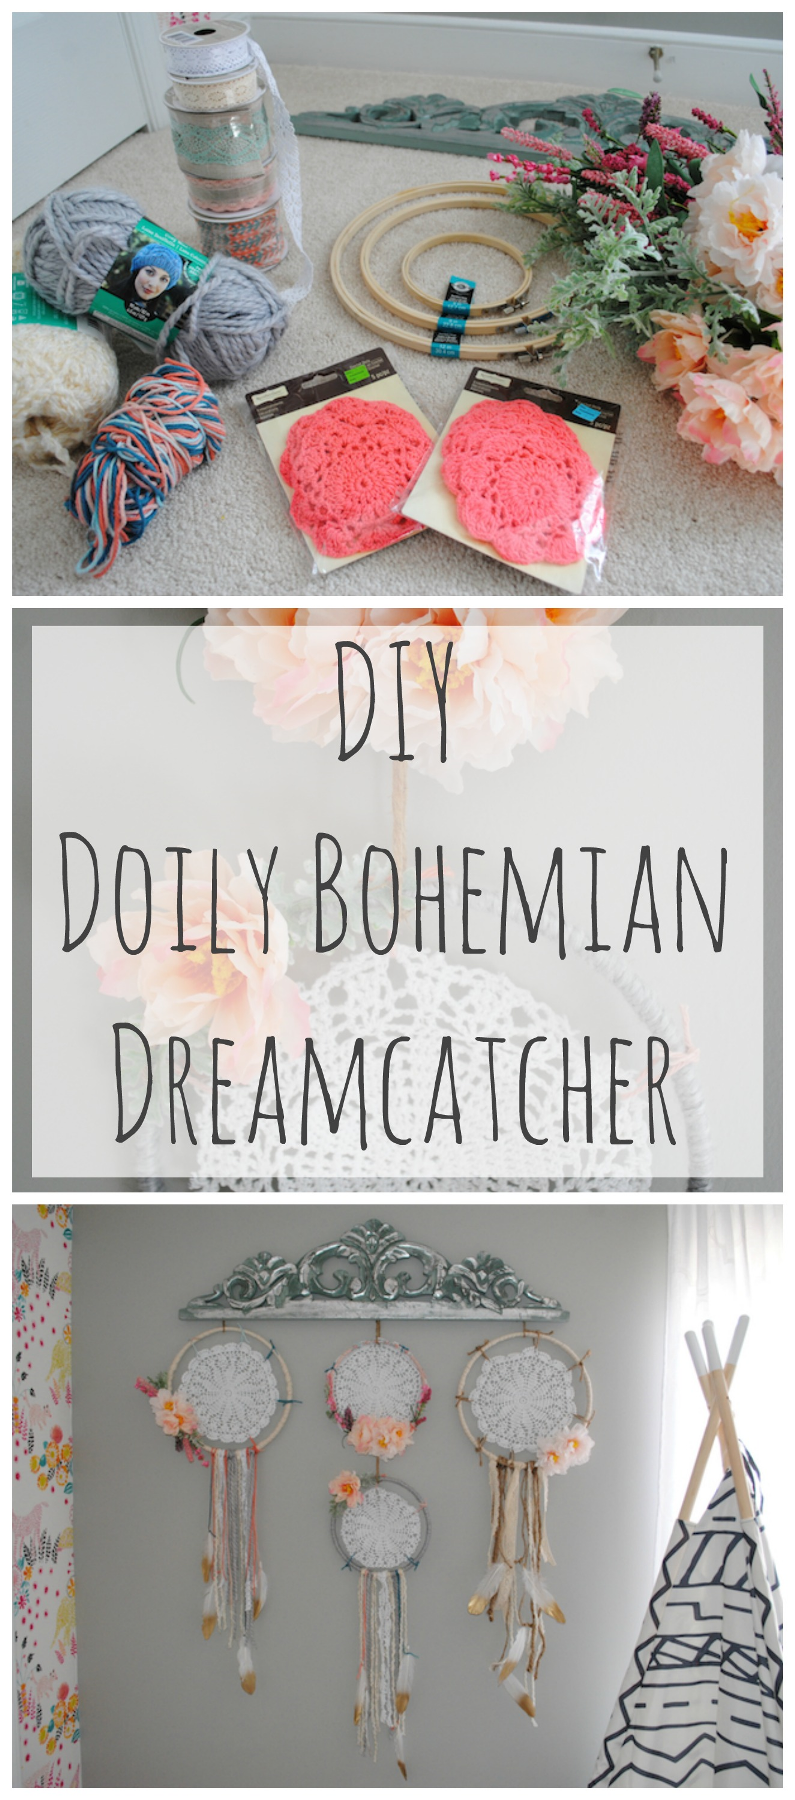
DIY Doily Bohemian Dreamcatcher

Hope everyone had a fabulous Valentine’s Day! I took Hartley to get her nails painted for the very first time and she LOVED it. She got one hand pink and one hand red with sparkles on-top (of course). If you’ve been following my blog for a while I am superstitious and have to have my nails painted OPI Big Apple Red for Valentine’s Day, since my first date with Willie (13 years ago, oh my gosh) he picked me up from the nail salon and I had that color and we’ve been going strong since. Hartley was so proud and showed EVERYONE her nails at dinner, ahhh she melts my heart.

I’m ecstatic for this dreamcather project to be done because it means I’m that much closer to finishing Hartley’s big girl room! I’ve been procrastinating finishing her room because she is so good in her crib that I kind of want to leave her in there forever (can I?). And as a mom, I feel like leaving the crib is a HUGE milestone, that I may tear up for a bit.  This was the last major piece I wanted to finish before putting everything on the walls. Thanks to Pinterest I had some fabulous inspiration and gathered numerous ideas from different bloggers to create my unique take on the DIY Doily Bohemian Dream Catcher.

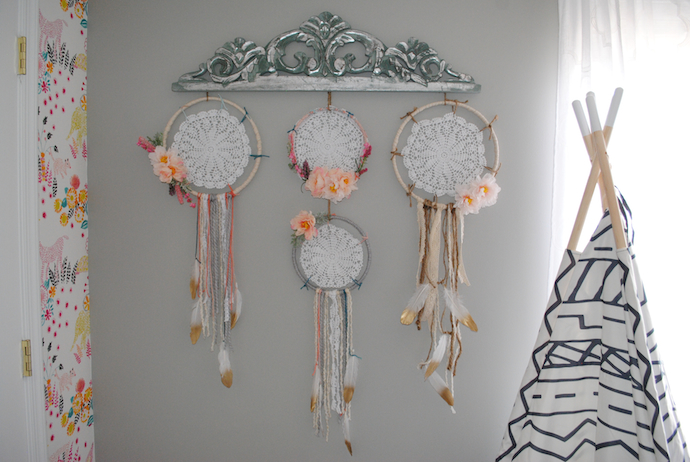
For mine, I incorporated store-bought doilies (you can use vintage ones if you can find at an antique market or thrift store, I even thought of using my grandmother’s handmade ones, but thought lightning would strike me if I did that!), flowers, lace, ribbon, and feathers (I re-used the feathers from my Thanksgiving tablescape). I also saw lots of people using wood as their top hanging piece, but I found this beautiful molding at the At Home store that I thought would make a better topper for the boho/vintage look I was going for. You also don’t need this piece if you are just creating a single dreamcathcer. Just follow the tutorial and stop when connecting the multiple embroidery hoops.

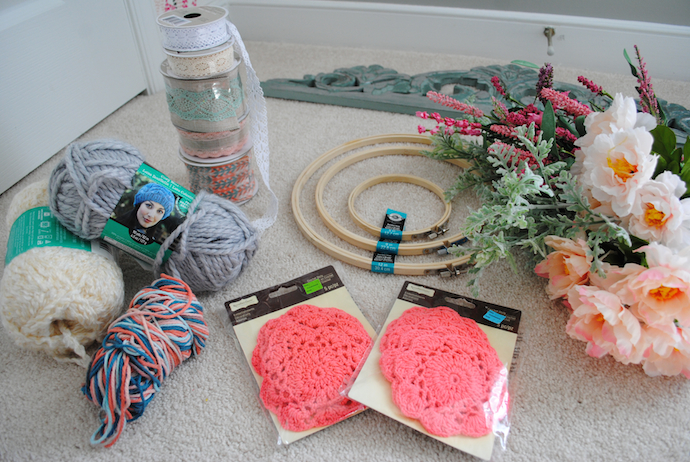
Here is what you will need:

  1. Wood/Molding Topper – mine was a little pricy at $24.99, but you can slash this cost using wood or twine
  2. Embroidery Hoops(I bought 2″ for the pink doilies but didn’t end up using, so for what I created I used 9-Inch and 12-Inch)
  3. Doilies (I found the 2” pink ones on clearance at Michaels for $2.99 for 4pk (I didn’t end up using these but have mini ones for a gift or something) and then ordered the 4pc- 9 Inch White Doilies ones for $12 – I have seen these at the thrift but I did not have luck on my recent trips)
  4. Torn fabric to wrap around hoop (you can use ribbon but that would get expensive, try using an old drop cloth, pillowcase, linen shirt or tablecloth) – I used a mix of cut ribbon and a dropcloth by cutting thin long pieces
  5. Yarn (thin for attaching doilies and thicker version for hanging pieces)
  6. Ribbon (go straight to the $1.99 bin of ribbon first) – Michaels has a fabulous selection
  7. Hot Glue Gun and Glue
  8. Artificial Flowers (optional)
  9. Feathers (optional)

Total Cost was about $65 (like I mentioned I went ALL OUT on mine, but you can make a version of this much cheaper but excluding items and/or using a different hanging method)

How to create:

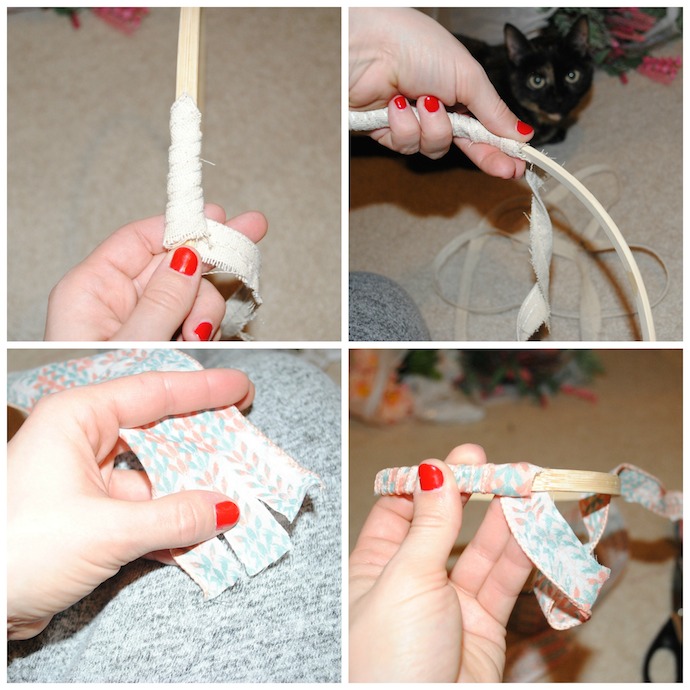
  1. Start with wrapping all the embroidery loops with the torn fabric , glue the start and try using long enough pieces to make it fully around the loop, then glue the end.
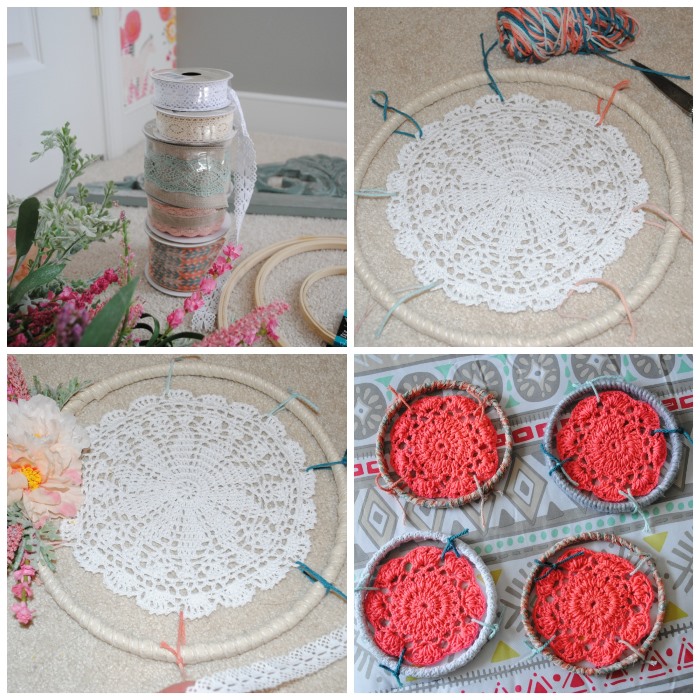
  2. Once fully wrapped, start connecting the doilies using a thinner yarn on the edges. Just loop the yarn through the doily hole and knot on the edge. For the lower hanging dreamcatcher on the 9″ loop, I cut of .5″ around the edge to make it smaller then the one on-top of it.
  3. If you are doing a multiple version like I was, map out your placement before you add the embellishments. You will not want to add hanging embellishments for those that are connected at the top. For those that have the ability to get hanging ribbon, and lace…start adding by simply cutting a long enough piece to fold in half (not perfect) and attach by a loop-pull-through over the hoop on the bottom. Add the feathers by just using the ends of the twine or yarn to make tight knots. Add flowers by disconneting the stem and cutting off the hard green piece (you will know what this is once you have them) and attach to the loop with hot glue.
  4. Once all the dreamcatchers are completed, finish by connecting the individual ones to connect to one another in the design template you created. I was orginally going to use the small hot pink ones, but didn’t like them, so I just had to connect one.
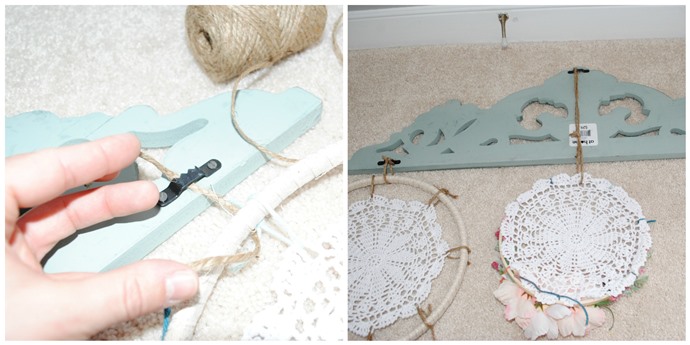
  5. Finally connect the dreamcathers to your molding, I lucked out because there was already hangers on the back so I just connected the the three top dreamcathers with twine and knotting around the hangers, but you can wrap around, add nail hangers, or glue on.

Finally make your nail hole on the wall and voila! A beautiful boho chic dreamcather any girl would love. I love the way this turned out and super excited for her room to be done since it’s been such a pouring of love and sweat to make her room just as perfect as she is (cheesy…I know). Hope you enjoy creating one of your very own!

<

Tuesday, February 21, 2017

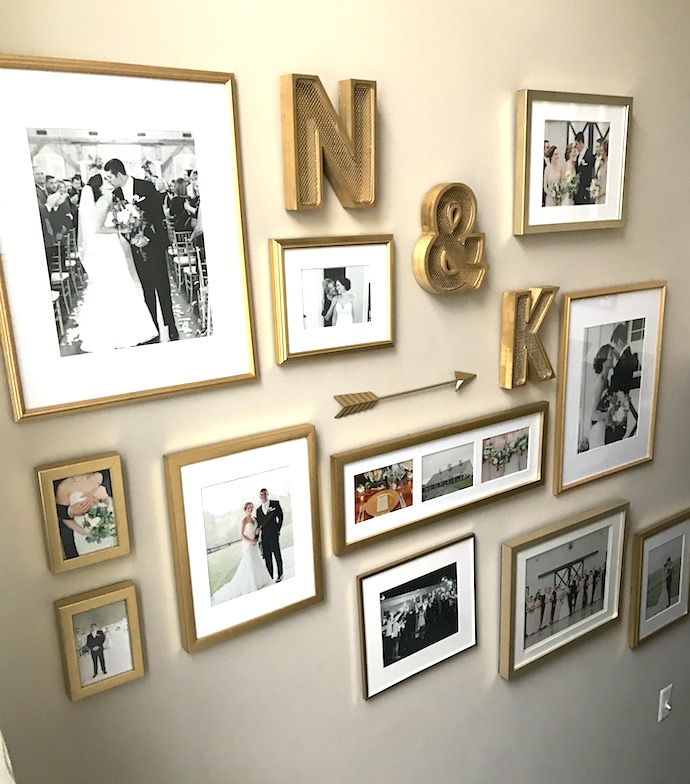
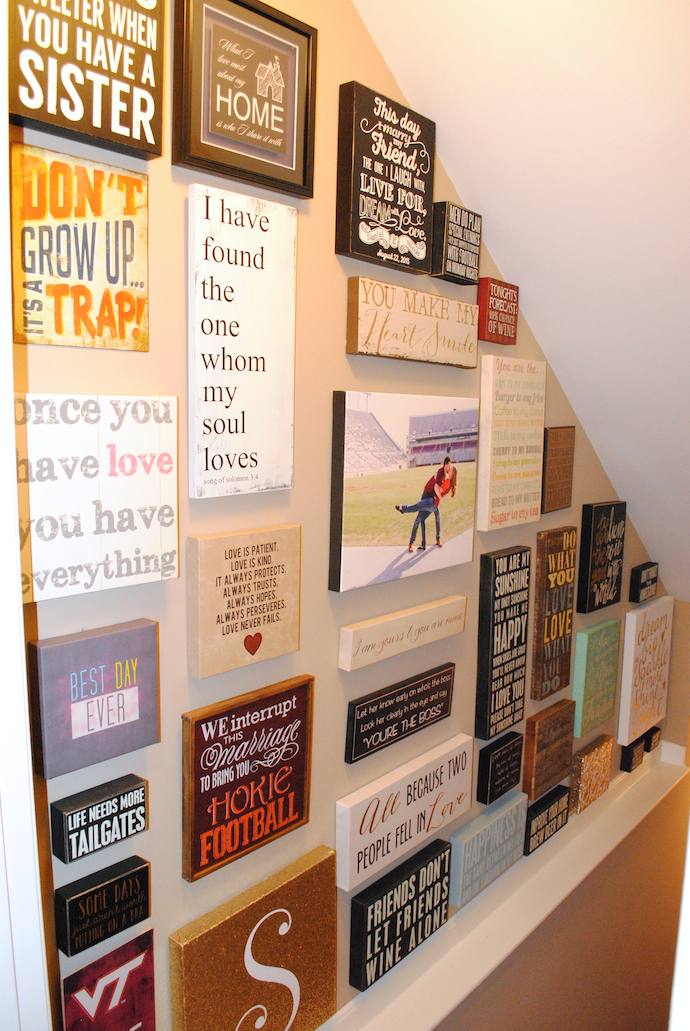
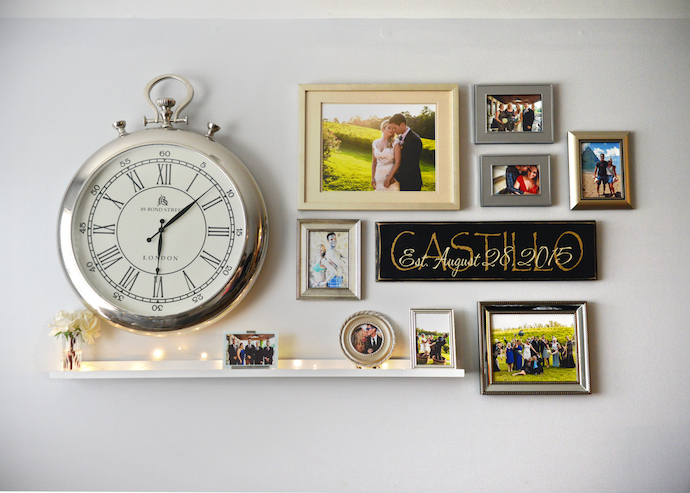
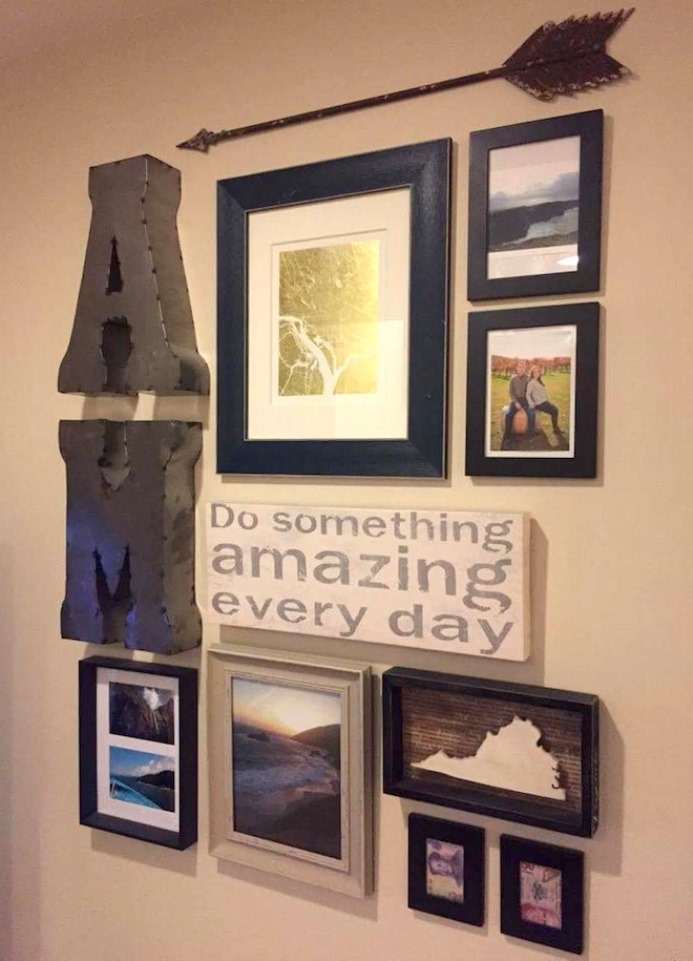
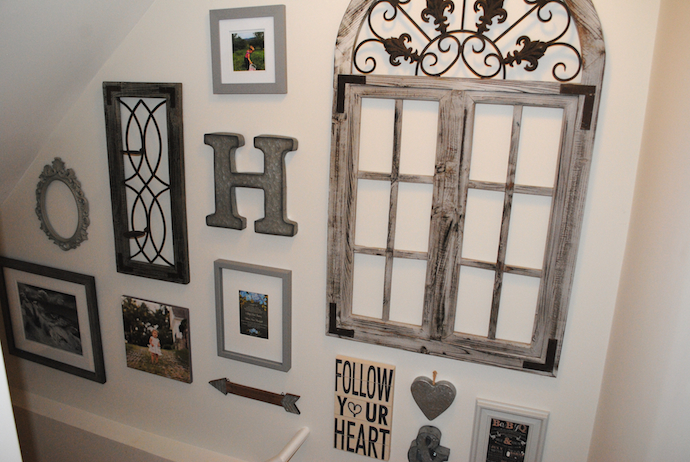
DIY Gallery Wall Inspiration

I’m OBSESSED with gallery walls right now and lucky for me I have some fabulous friends that have caught onto the trend and made some amazing displays themselves! Here are some of my favorite DIY Gallery Walls that my creative friends have made! Excuse the lighting in some of these photos…staircases seem to be a great spot for gallery walls, but not so great for natural light photos!

Coastal Hues

Gold All The Way

Wall of Quotes

Vintage Romance

Wedding & Honeymoon Highlights

Adventure Together


Rustic Glam

Gallery of Initial

My gallery wall tips:

Make it personal –

  • Should be a reflection of you and your family
  • Time to incorporate canvas or framed photos (wedding, newborn, family vacation), monograms, quotes, DIY project

Mixing scale –

  • Use all different sizes and shapes
  • Find a few anchor pieces that will serve as main focal points
  • Once you determine your focal pieces, start building your wall around them

Layout –

  • There was a mix of approach for this, some carefully laid out each piece and created a mock wall with paper and tape, and others just completely winged it
  • If you are comfortable with what you have in your head, go for it, otherwise take the time to lay it out before nailing
  • Don’t worry about spacing or making everything line up

My final tip – the painters tape trick for hanging items needing more than one nail…GAME CHANGER

  • If your photo is larger it will probably need a nail on each side, for easy measuring for nails simply apply blue painters tape across the back of the photo, poke holes in the center where the nails should go, remove the tape from the back and place on your wall where you would like to hang, finally nail where you made the holes and remove tape and place photo up…viola!

Have you created a gallery wall? What was your inspiration? Have some photos you would like to share? Email me (address in About section)!

I’m working on a mancave/sports gallery wall, so be sure to keep your eye out for that on my Instagram page!

Tuesday, January 10, 2017

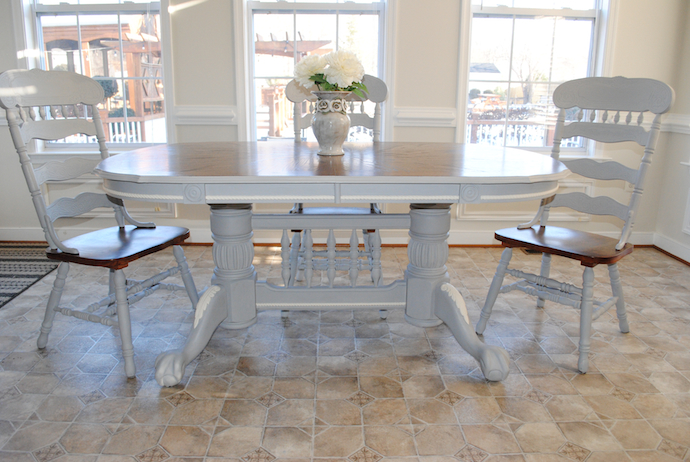
DIY French Country Dining Table

I cannot believe it’s 2017! 2016 was a HUGE year for me. Settling into new work requirements, working on expanding my blog, and the biggest change was selling our first home and buying a new one which was a HUGE process. Having 5 months in our new home, I’m finally getting things into place and able to feel like I can make it my style. I’ve gotten two bathrooms completed, created a media console, cleaned out and mulched the entire yard, in the process of creating an adorable “big girl” room for Hartley (ekkk I cannot wait to share), and finding this beautiful claw footed table to refinish. For years I’ve dreamt of finding a table like this and was super jealous when one of my beasties inherited one and refinished it into a stunning piece in her home. But just one lucky trip to the Habitat for Humanity I found one for myself. It was love at first site. There was no way I was going to leave the store without this table being mine. Can you believe the table was only $60 and the 3 chairs were $20 a piece = $120 for an antique dining set!
 
I will say this table took me a lot longer than I had hoped. With social calendars, work travel and getting ready for the holidays I found the only time to work on it was after getting Hartley to bed. So a few very late nights, frustration, and guilting Willie into helping…it’s FINALLY done!
The Steps:
  1. Sanding table top and chair seats
  2. Staining table top and chair seats
  3. Matte Poly table top and chair seats (2 coats)
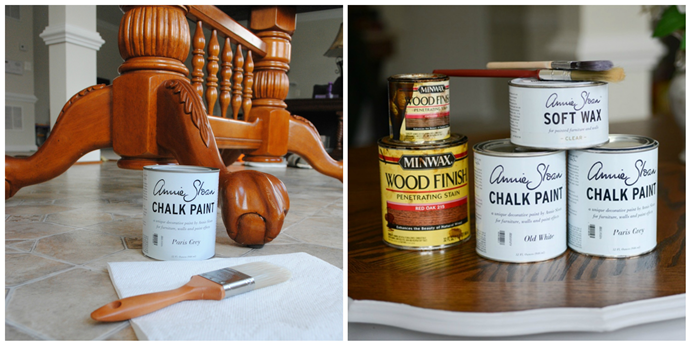
  4. Chalk Paint (Annie Solan Paris Grey) table and chairs (2 coats)
  5. Chalk Paint (Annie Solan Old White) table accents (2 coats)

What I used:

  1. Orbit Sander
  2. For orbirtal sander I started with 120-Grit Sandpaper then did a overpass with 220 Grit Sandpaper
  3. Sanding Sponge 120-Grit, Fine for around the chair spindles
  4. Annie Sloan Chalk Paint in Paris Grey and Old White
  5. Annie Sloan Wax
  6. Regular Paint Brushes for paint
  7. Trim Brush and Art Brushes for the detail
  8. Painters Tape
  9. MiniWax Stain (I mixed Expresso and Red Oak)
  10. Staining Rags
  11. Satin Polyurethane
  12. Foam Brush for Poly

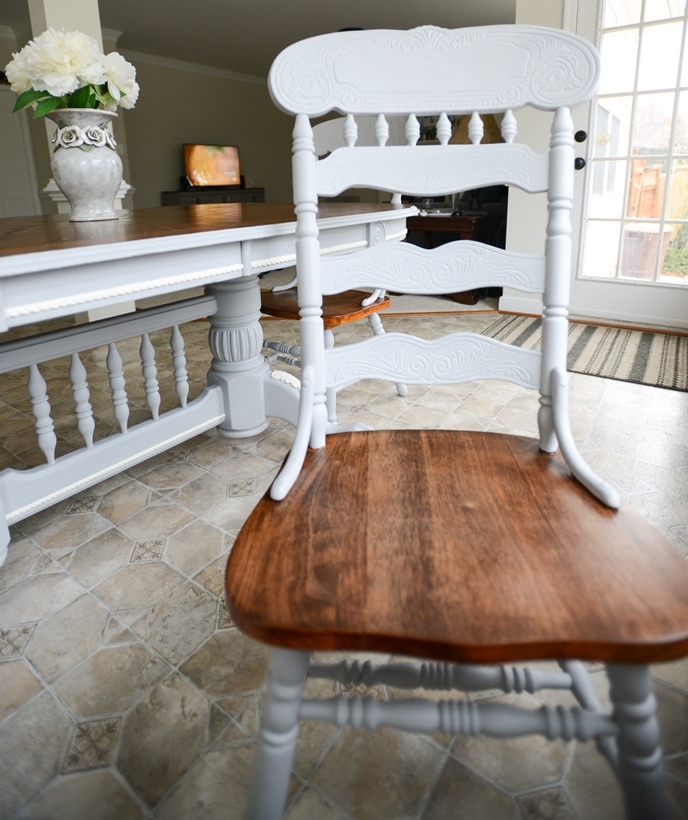
The details are just fabulous! For adding the white detail paint I used small art brushes, tape, and a trim brush. I tried covering all the areas I wanted white even if it meant going into the grey a little because the final step was to use an angled trim brush and carfully follow the lines with the grey paint to cover and white overflow on the detail sections.

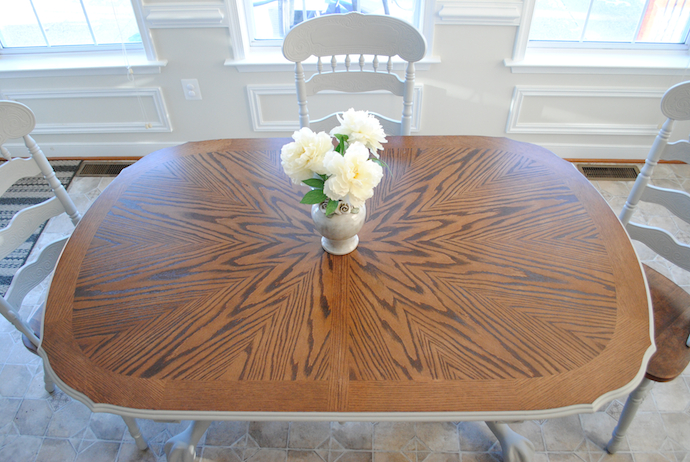
I am in LOVE with the end results and the stained top pattern is STUNNING!
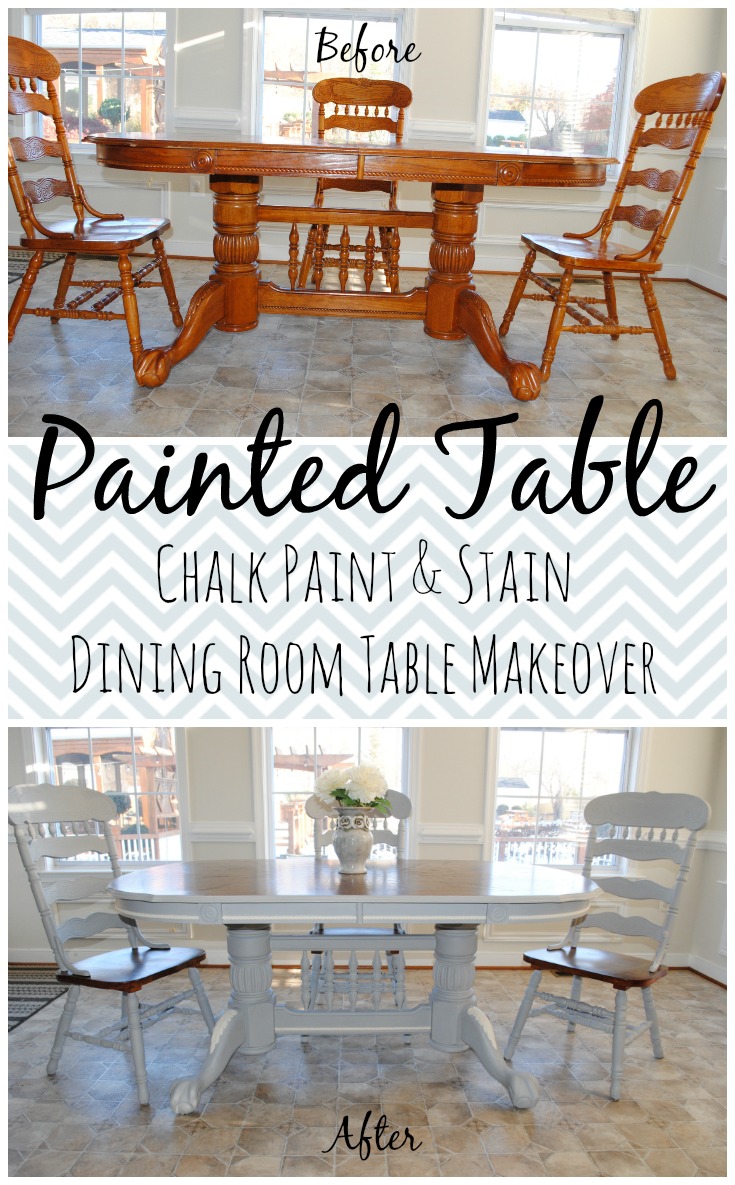
Before and After: