Tuesday, May 9, 2017

Easy Farmhouse Style TV Stand Makeover

Kathy is one of my best friend’s aunt who has started a fabulous blog centered around the remembrance of a beloved family member.  She loves a bargain, DIY projects, and crafting. She is here on the blog today to share her Easy Farmhouse Style TV Stand Makeover. I am LOVING the transformation for under $50! You always get such inspiration from others creativeness. Hope you enjoy her project!
Hello everybody! My name is Kathy and I can usually be found writing for the Our Amore Blog. My family and I started blogging after our dear mother/nanny passed away. AMORE stands for, “A Memory of Rose Etc.…” She was such an inspiration to us with her wonderful crafting abilities and the woman could cook like you would never believe. We come from one big Italian family and thought the blog would be a great way to keep in touch with family members out of town and inspire others to do what makes them happy. I am a second grade teacher by day and an HGTV junkie by night. I must admit I am OBSESSED with Chip and Joanna Gaines show “Fixer Upper” and secretly I think my husband is too (Wink Wink). I love scouring Instagram and other blogs for ideas ranging from decorating ideas to teaching ideas. I also LOVE a good bargain and can often be found at local thrift stores and garage sales. When my sweet niece Nicole told me about Ashlyn’s blog, I knew I had to become a follower. I love her creative ideas and I am always amazed at the good deals she finds.

Tutorial:

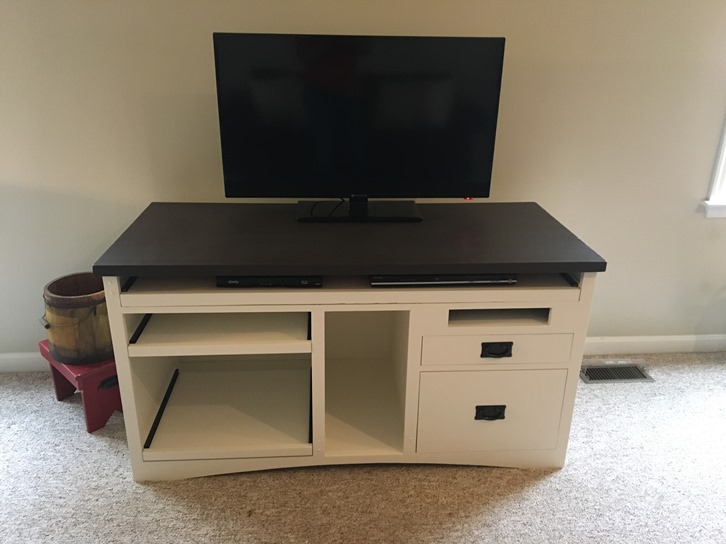
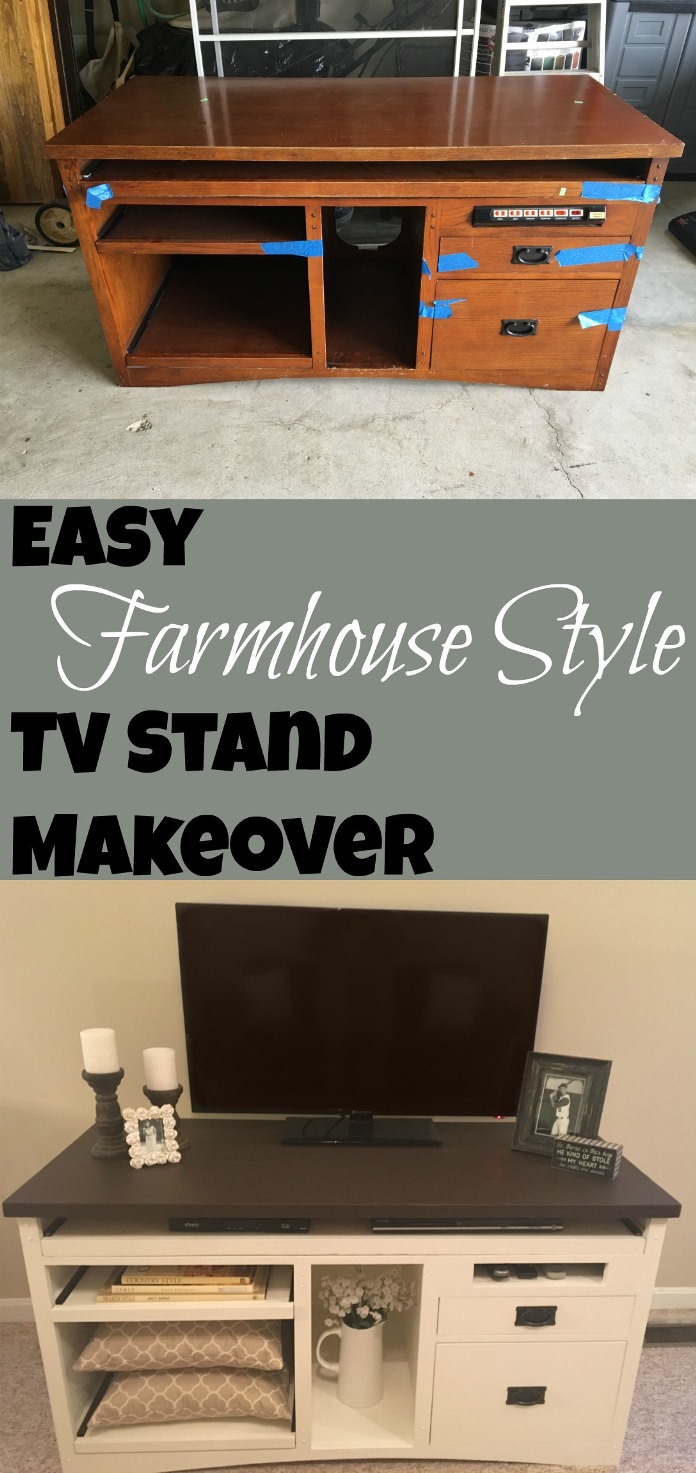
Recently I found an entertainment console at our local Goodwill. I had been wanting to get rid of our giant oak entertainment center that we had in our family room, but had no idea what I would put in the space. When I saw this console I knew it had good “bones” and when my husband said to buy it that was all it took. I don’t know about you, but when the “Mr.” says to buy something I don’t think twice! I remembered seeing Ashlyn’s post about painting her dining room table so I thought I would give it a try. We of course need a MUCH bigger television and I need to style the wall and console, but overall, I am pleased with how it turned it out and think once the space is styled it will look even better.

Step-by-Step

  1. Here is what it looked like when my husband took it out of the car. At the top right corner you can see where the old gaming systems would connect. My husband simply popped it out and left the space empty. He jokes and calls it a mail slot, but it is where I am going to put our many remotes.
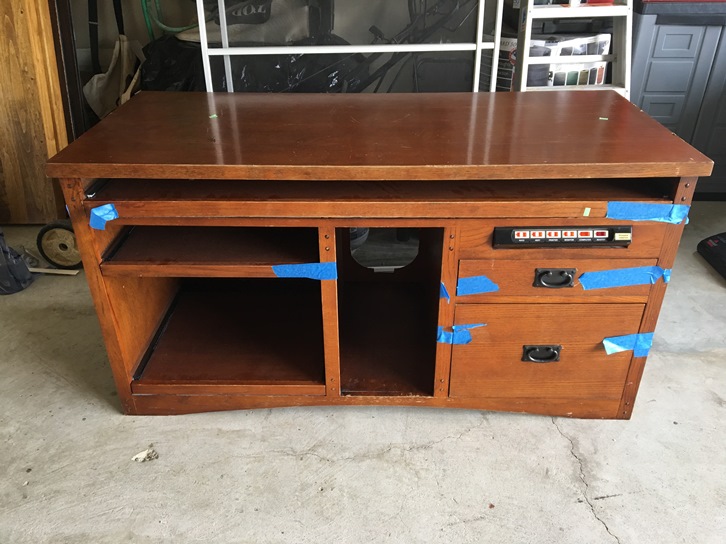
  2. The next thing we did was remove the drawers, the fronts and their hardware. Getting these things removed makes it easier to paint.
  3. We removed the back and my husband made a new back out of some old plywood.
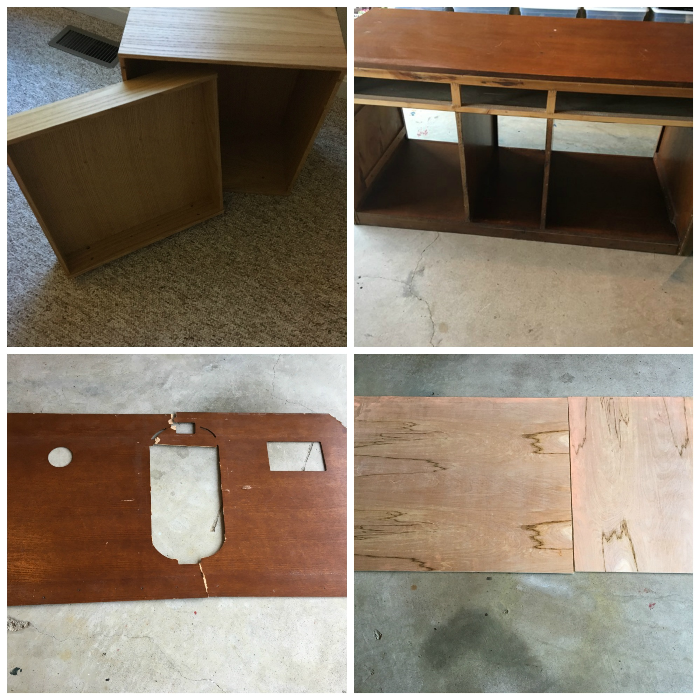
  4. He thought it needed a light sanding, but I actually think it would have been fine either way.
  5. We don’t usually paint furniture and do projects like this in our kitchen, but we were having such rainy weather, that we thought it was too humid outside.
  6. I highly recommend that before you paint any piece of furniture (unless it is bare wood that has never been painted or stained) that you prime it first. Our go to primer is by “Zinsser” and it can be found at Home Depot.
  7. After a nice coat of primer your furniture is ready to paint.
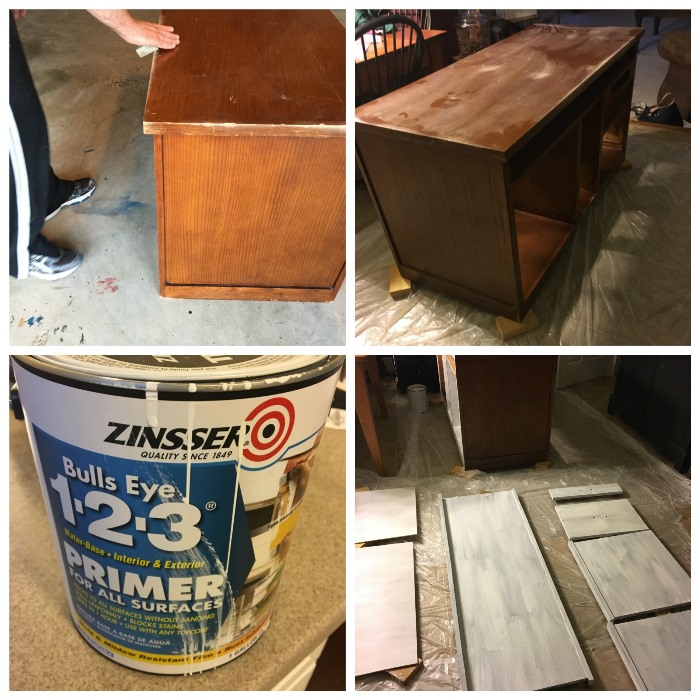
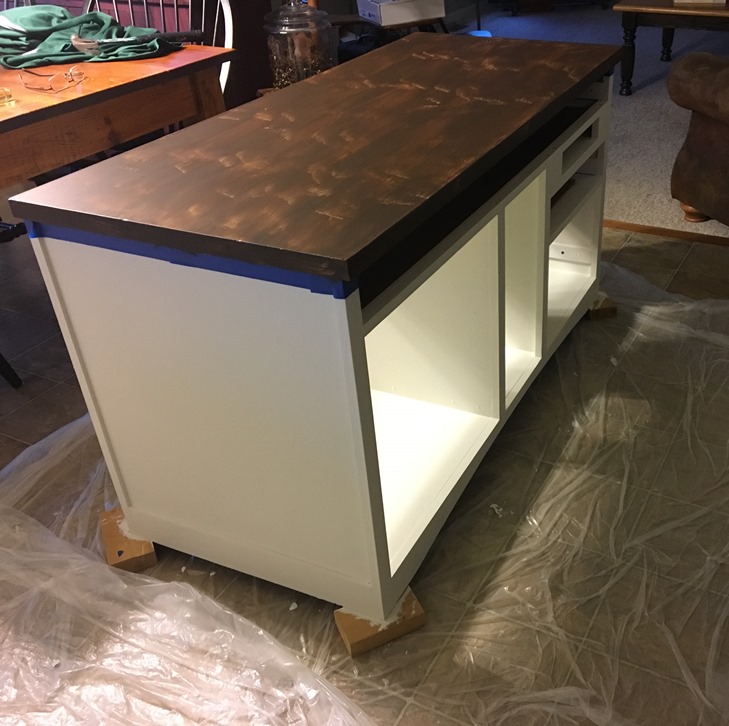
  8. Here it is painted. I used Behr paint, found at Home Depot, in Swiss Coffee for the bottom. The top in this picture only has one coat and as you can see we had to apply two coats. The top is also a Behr paint called Havana Coffee.
  9. The finished project. The total cost of this project, including the entertainment center, was under $50.00, so I think that is a WIN!!

Thanks again Ashlyn for allowing me to be a guest on your blog. You are such an inspiration to many.

Connect with Kathy!

FaceBook

Instagram

Pinterest and SHARE this post on Pinterest!
Thursday, May 4, 2017

$1 Wedding Sign

On Sunday I attended a surprise bridal shower for a sweet friend I actually met through Willie’s work. She was ecstatic and even though it was scorching hot, then poured, everyone had an amazing time and I can’t wait to celebrate with her in just one month!

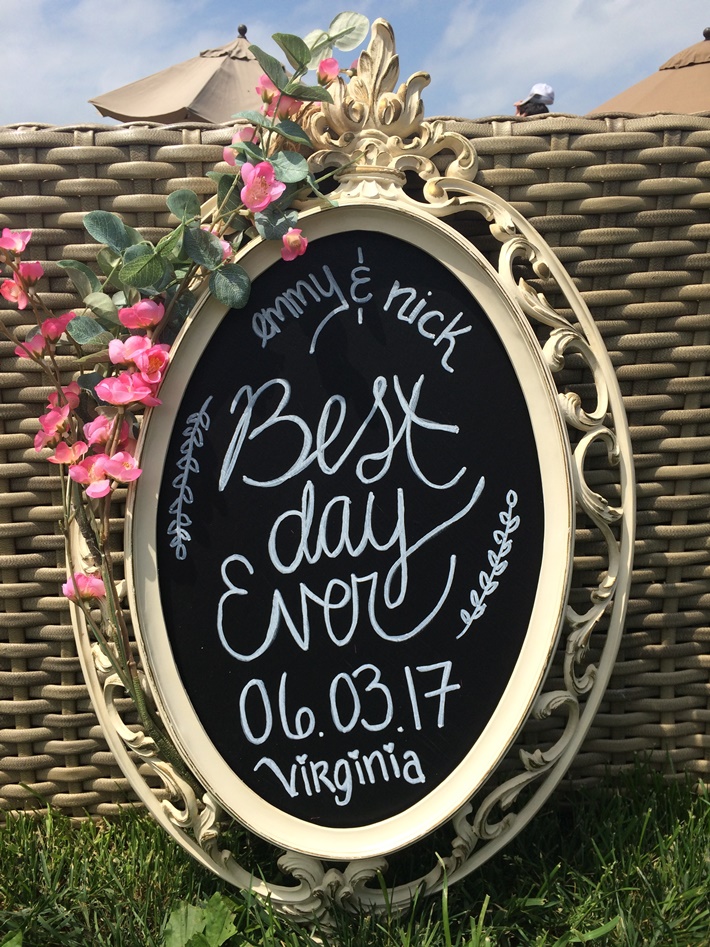
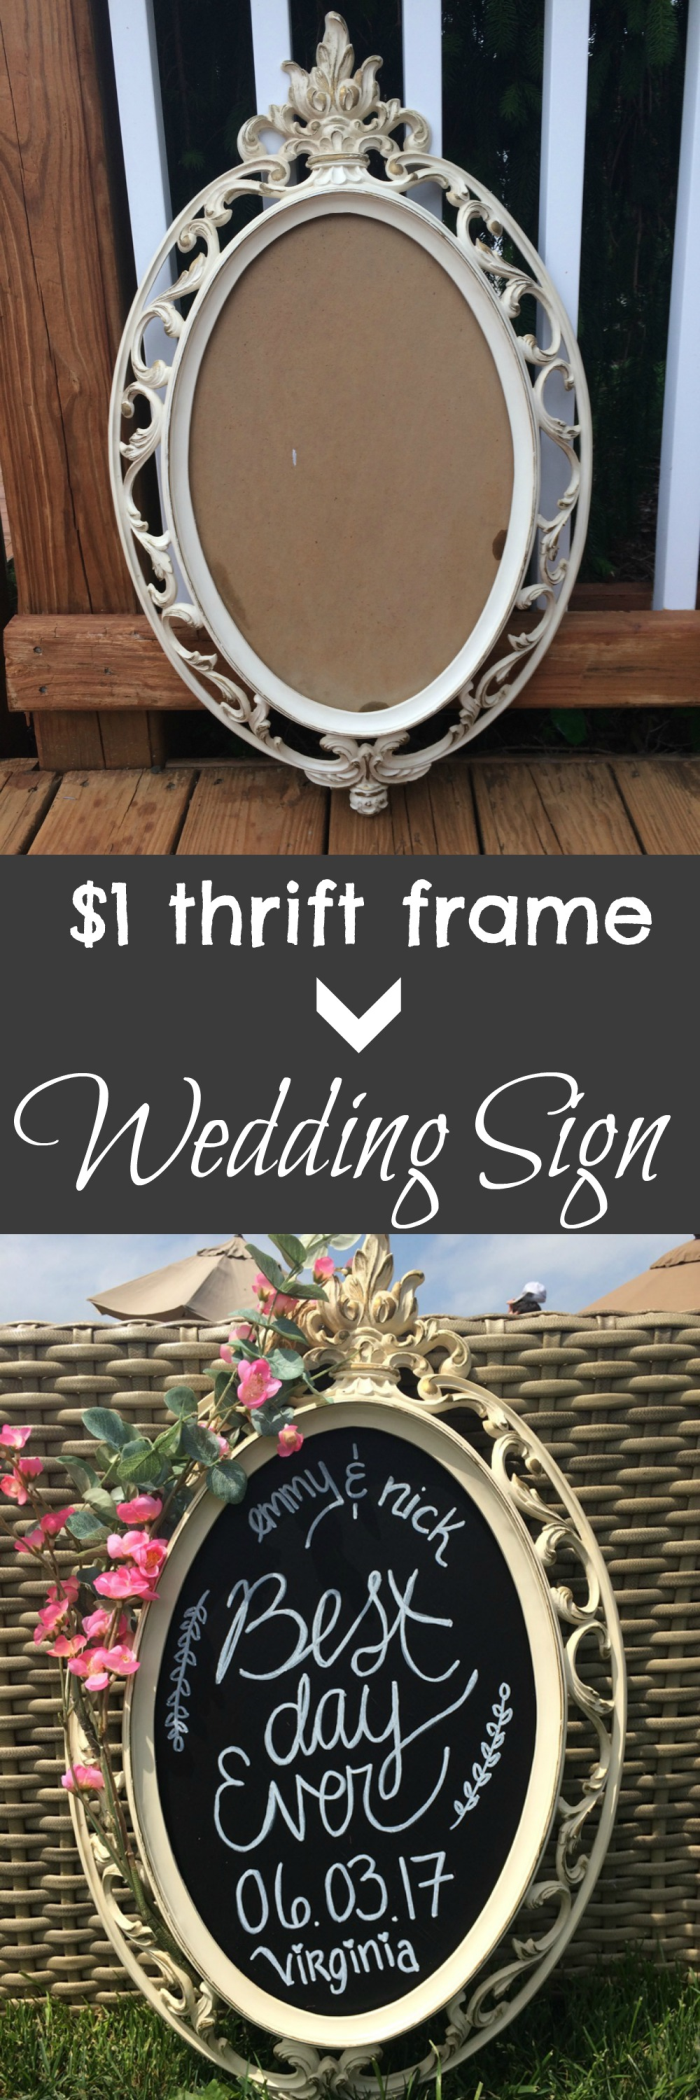
When I found this antique frame at the Habitat for Humanity for $1…yes $1…I couldn’t resist. I debated awhile on whether to use in Hartley’s room, but when I heard of the bridal shower I immediately thought, she would love this at the wedding. I’ve only heard a few details but it sounds like the perfect blend of pastel palettes, farm scenery and shabby chic touches that this frame would fit perfectly in. After a good cleaning, all I did remove the backing (it was a thick cardboard material) and did one coat of leftover primer and two coats of chalkboard paint, which really ended up being about 6 coats of chalkboard paint because I have the worst handwriting and had to redo it three times to even be presentable. Oh and tip, I tried outlining with a pen…you can see the pen. Then I did it upside down. Practice makes perfect I guess! When it was all done, I just added a few flowers and greenery on the side for some extra drama that would go along with her flowers colors (optional step and cost around $10).

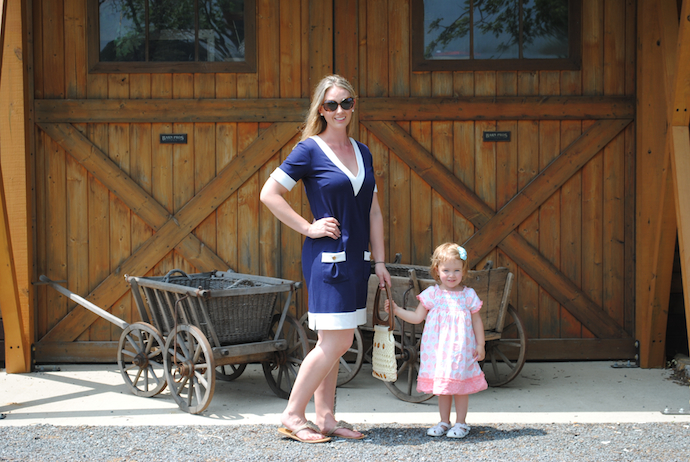
Ohhh and of course, it’s THRIFT THURSDAY, so my bridal shower attire was a brand new (with tags) Lilly Pulitzer nautical dress I found for $9.50 and a craftwork/bold handle purse that is in trend right now for $4. Both found at my local thrift store. #notmodels (excuse our sweaty hair)


Monday, May 1, 2017

Tips for Spring Cleaning

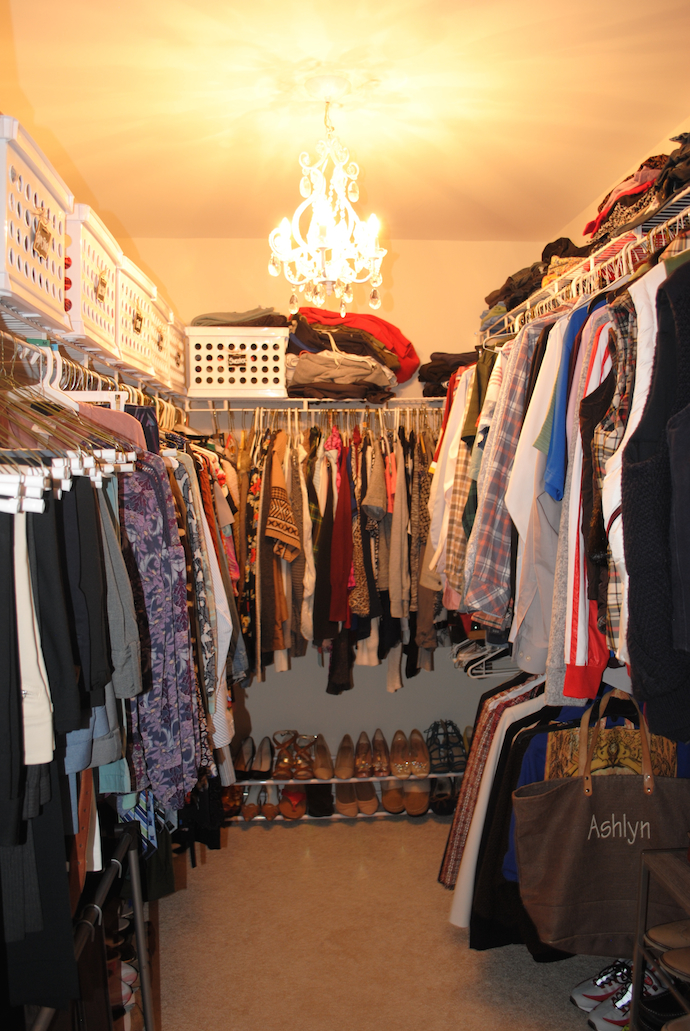
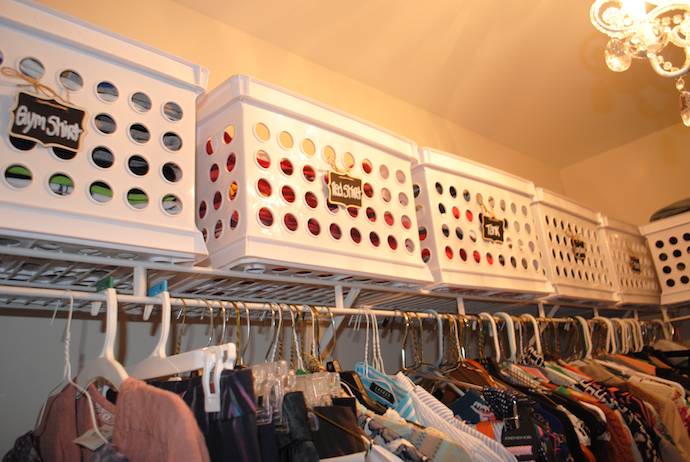
With the nasty rain last weekend I took the opportunity to completely overhaul of our master bedroom closet. This was one part of our new house we definitely compromised on, because for a single family home it’s on the smaller side. And for people that love clothes, we have had to be practical and inventive on space options. I was so embarrassed with the dysfunction and overflowing of clothes, a spring cleaning was definitely needed! So with Willie away at a bachelor party and the rainy weather keeping us in, Hartley watched me take almost every SINGLE piece of or clothing out of the closet in order to orangize into piles and re-order the hanging items for more practicality.

In some ways this was a present for Willie and selfishly for my sanity because almost all the loose items were his. The pants I neatly folded and put into stacks of jeans, “specialty pants”, and shorts. All the hanging stuff was easy to shift around and getting rid of all the extra hangers and plastic dry cleaning wrap helped significantly. I put the long dresses in the far back which opened room for the laundry basket and better shoe grabbing. For scarfs and belts I just looped over a hanger and made them easily accessible towards the front of the closet.

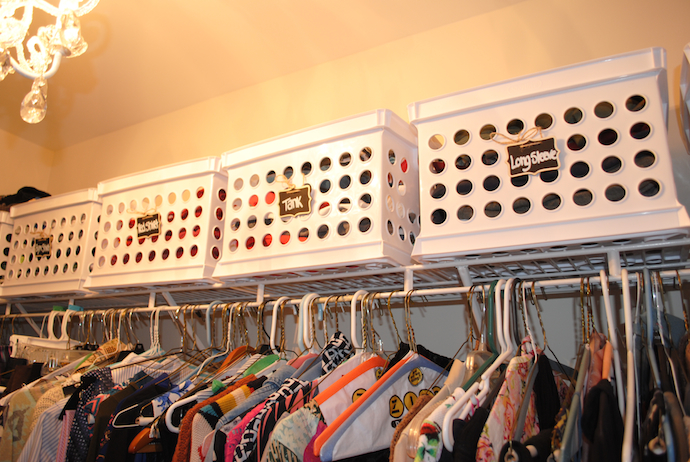
Then for the monumental task of Willie’s shirts…I made a thrift pile, questionable pile (those clothes that I hated, but for some reason thought Willie would kill me if I threw them out), and then a t-shirt pile, gym shirt pile, tank top pile, long sleeve pile, sweater pile, and a red shirt pile. Yes…a red shirt pile?!? This reference guide for spring cleaning from Tommy John was SUPER helpful when deciding on both mine and his items. I know as a frugal person it can be especially hard to throw away clothes and shoes because all your thinking of is the money it cost you and if you had to replace it, more money comes out of your pocket. So setting an intention and using the flowchart was my lifesaver. Sometimes quality over quantity is the answer, and something like a well-made pair of underwear can go a long way to help declutter.

I also knew if I put his shirts back up in neat stacks, he would destroy them in…oh about 1 day. So I went on the hunt for some cute storage options, but why are bins/crates/baskets so darn expensive?!? I settled on these white Target crates that were only $3.49 each, but they were a good size and cohesive, and honestly as long as it does its job, who is going to really judge I didn’t by the adorable $12 wire baskets I really wanted. I made them more fancy by using these adorable chalkboards signs I found and just used a chalk marker pen to write labels for each crate.

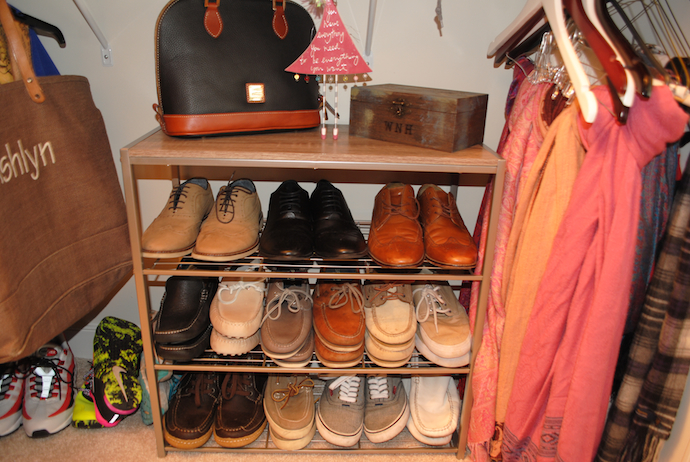
I also found a great Target shoe rack for Willie’s shoes. Which I proudly put together all by myself on Saturday night when the baby fell asleep. It’s been a LONG time since I’ve had to read directions! Ohhhh and just one little last piece…this stunning chandelier for a little closet bling.

Good luck with your spring cleaning! I’m happy that we get to take 3 full bags of clothes to the donation center. Always a nice feeling to de-clutter and give back to the community.

Thursday, April 20, 2017

Dream Living Room Inspiration

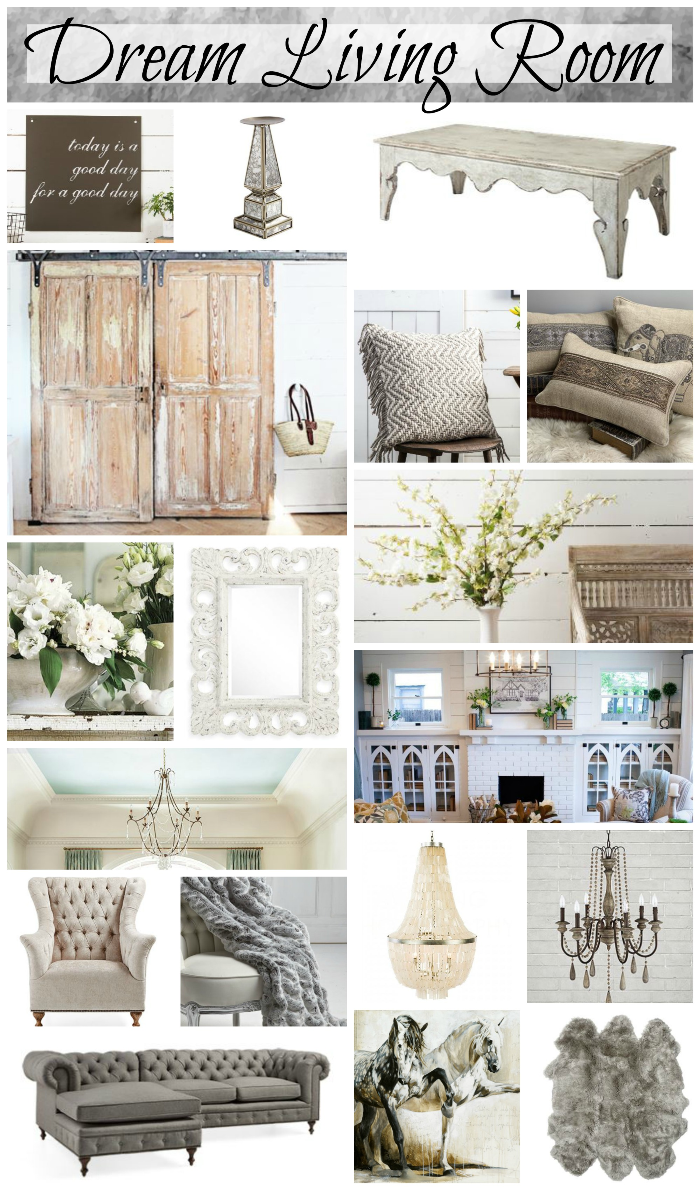
Ok guys, this is my first design inspiration mood board post! I was so excited when Arhaus reached out to me for a their Dream Living Room project. Creating a beautiful room with ANY pieces I want…ummmm heck yes!

So what inspired me?

First off, tufted furniture…vintage glam at it’s finest. I would include a beautiful tufted sectional sofa complimented with gorgeous accent chairs. If you are looking for more accent chair tips and tricks this post from Joss and Main is great! A faux fur throw, rug, and stunning pillows would finish off seating to welcome family and friends with comfort and style.

I would love to have antique sliding barn doors or custom built-ins (my favorite Joanna Gaines moment were these chapel-isc built-ins) and have a rustic antique coffee table with adorable scalloped details.

For the walls I would do white shiplap or a light grey paint. Then for a pop of color and unexpectedness amongst the neutral palette, I would paint the ceiling a light blue with thick beautiful white crown molding around the room. The contrast would be stunning!

For some drama I would either pick an extravagant chandelier or a more modest farmhouse style chandelier to center the room. Can I just drool over both these options for a second…deep sigh…ok wiped my mouth.

For wall art, I would include this metal sign and a horse painting canvas. If you know me at all, horses are EVERYWHERE in my home. It’s a part of me and what makes my home mine. I am also a sucker for hand-carved mirrors like the one above. It’s the perfect statement piece for a shabby chic living room.

Finishing off my room would be metallic candle sticks and white vases filled with tons of white flowers.

What do you think? What would you include in your dream living room? For more design inspiration, check out Arhaus Instagram!

Photo credits: Arhaus, Magnolia Market, HGTV, Aidan Grey, Google Images